background image

English

   - 26 -

any files in your media server program on your PC. If 

the domain is invalid, this might cause problems while 

browsing files in Audio Video Sharing mode. 

Using Audio Video Sharing Network Service

Audio Video Sharing feature uses a standard that eases 

the viewing process of digital electronics and makes 

them more convenient to use on a home network. 
This standard allows you to view and play photos, music 

and videos stored in the media server connected to your 

home network.

1. Nero Media Home Installation

The Audio Video Sharing feature cannot be used 

if the server programme is not installed onto your 

PC. Please prepare your PC with the Nero Media 

Home programme. For more information about the 

installation, please refer to the “

Nero Media Home 

Installation

” section.

2. Connect to a Wired or Wireless Network

See the 

Wired/Wireless Connectivity 

chapters for 

detailed configuration information. 

3. Play Shared Files via Media Browser

Select 

Media Browser

 by using the 

directional

 buttons 

from the main menu and press 

OK

. The media browser 

will then be displayed. 

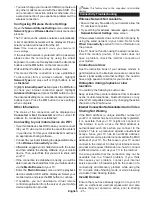
Audio Video Sharing

Audio Video Sharing support is only available in the 

Media Browser


Folder

 mode. To enable folder mode, 

go to the 

Settings

 tab in the main media browser screen 

and press 

OK

. Highlight 

View


Style

 and set to 

Folder


using the 

Left

 or 

Right

 buttons. Select the desired media 

type and press 

OK.

If  sharing  configurations  are  set  properly, 

Device 

Selection

 screen will be displayed after selecting the 

desired media type. If available networks are found, 

they will be listed on this screen. Select media server 

or network that you want to connect to using the Up 

or Down buttons and press 

OK

. If you want to refresh 

the device list, press the 

Green

 button. You can press 

Menu

 to exit. 

If you select the media type as 

Videos

 and choose 

a device from the selection menu. Then select the 

folder with video files in it on the next screen and all 

the available video files will be listed.

To play other media types from this screen, you must 

go back to main 

Media Browser

 screen and select the 

media type as desired and then perform the network 

selection again. Refer to the 

Media Browser

 menu 

section for further information on file playback.
Subtitle files do not work if you watch videos from 

your network through Audio Video Sharing feature.
You can connect only one television to the same 

network. If a problem occurs with the network, please 

switch your television off at the wall socket and back 

on again. Trick mode and jump are not supported with 

the Audio Video Sharing feature.

Note:

 There may be some PC’s which may not be able to 

utilize the Audio Video Sharing feature due to administrator 

and security settings (such as business PC’s).

For  best  home  network  streaming  with  this  TV,  the  Nero 

software should be installed.

Nero MediaHome Installation

To install Nero MediaHome, please proceed as 

follows:

Note:

 To use Audio Video Sharing feature, this software 

should be installed to your PC.

1. 

Enter the link below completely in the adress-

bar of your web browser.

http://www.nero.com/mediahome-tv

2. 

Click the 

Download

 button on the opening 

page. The installation file will be downloaded 

onto your PC. 

3. 

After the download is completed, double click 

on the installation file to start the installation. 

The installation wizard will guide you through 

the installation process.

4. 

The prerequisites screen will be displayed first. 

The installation wizard checks the availability 

of required third-party software on your PC. 

If applications are missing they are listed and 

must be installed before continuing installation.

5. 

Click the 

Install

 button. The integrated serial 

will be displayed. Please do not change the 
displayed serial. 

6. 

Click the 

Next

 button. The License Conditions 

(EULA) screen will be displayed.


Please read 

the license agreement carefully and select the 

appropriate check box if you agree to the terms 

of the agreement. Installation is not possible 

without this agreement.

7. 

Click the 

Next

 button. On the next screen you 

can set your installation preferences.

8. 

Click the 

Install 

button. The installation begins 

and finishes automatically. A progress bar will 

indicate the state of the installation process.

9. 

Click the 

Finish

 button. The installation is 

completed. You will be directed to the web site 

of the nero software.

10. 

A shortcut is now placed on your desktop.

Congratulations!

 You successfully installed Nero 

MediaHome on your PC.
Run Nero MediaHome by double clicking on the shortcut 

icon.

Содержание 48U7653DB

Страница 1: ...OPERATING INSTRUCTIONS 48U7653DB COLOUR TELEVISION WITH REMOTE CONTROL ...

Страница 2: ...al TV Operation 15 Using the Channel List 15 Configuring Parental Settings 15 Electronic Programme Guide EPG 15 Teletext Services 16 Software Upgrade 16 Troubleshooting Tips 16 PC Input Typical Display Modes 17 AV and HDMI Signal Compatibility 17 Supported Video File Formats for USB Mode 18 Supported Picture File Formats for USB Mode 18 Supported Audio File Formats for USB Mode 19 Supported DVI Re...

Страница 3: ...by qualified personnel before operating it any further Do not expose the TV to direct sunlight open flames or place it near intense heat sources such as electric heaters Listening in excessive volumes from earphones and headphones may cause hearing loss Ensure that no open flame sources such as lit candles are placed on top of the TV To prevent injuries this TV must be securely attached to a wall ...

Страница 4: ... to a fixed value set as Custom and adjust the Backlight located under the Energy Saving setting manually using Left or Right buttons on the remote Set as Off to turn this setting off Note Available Energy Saving options may differ depending on the selected Mode in the System Picture menu The Energy Saving settings can be found in the System Picture menu Note that some picture settings will be una...

Страница 5: ...ade for a long time Press OK to continue TV Control Buttons Operation P CH TV AV 1 Standby On button 2 Source button 3 Programme buttons 4 Volume buttons Press the Volume buttons simultaneously to view main menu and use Programme buttons to navigate and Volume buttons to change value Note The position of the control buttons may differ depending on the model Operation with the Remote Control Press ...

Страница 6: ...tion for Users on Disposal of Old Equipment and Batteries European Union only Equipment bearing these symbols should not be disposed as general household waste You should look for appropriate recycling facilities and systems for the disposal of these products Notice The sign Pb below the symbol for batteries indicates that this battery contains lead Products Battery Specification TV Broadcasting P...

Страница 7: ...and off where available 20 Stop Stops the media being played 21 Rapid advance Moves frames forward in media such as movies 22 Screen Changes the aspect ratio of the screen 23 My button 2 24 Text Displays teletext where available press again to superimpose the teletext over a normal broadcast picture mix 25 Media browser Opens the media browsing screen 26 Exit Closes and exits from displayed menus ...

Страница 8: ...hannels Mpeg4 H 264 or while in Media Browser mode output will not be available via the scart socket When using the wall mounting kit available from third party in the market if not supplied we recommend that you plug all your cables into the back of the TV before mounting on the wall Insert or remove the CI module only when the TV is SWITCHED OFF You should refer to the module instruction manual ...

Страница 9: ...continue You can activate Store Mode option at this point This option will configure your TV s settings for store environment and depending on the TV model being used the supported features of it may be displayed on the top of the screen as an info banner This option is intended only for store use It is recommended to select Home Mode for home use This option will be available in System Options Mo...

Страница 10: ... the CEC enabled devices that are connected through HDMI ports by using the remote control of the TV The CEC option in the System Options More menu should be set as Enabled at first Press the Source button and select the HDMI input of the connected CEC device from the Sources List menu When new CEC source device is connected it will be listed in source menu with its own name instead of the connect...

Страница 11: ...warmth or coolness of the picture by pressing Left or Right buttons Picture Zoom Sets the desired image size format Film Mode Films are recorded at a different number of frames per second to normal television programmes Turn this feature on when you are watching films to see the fast motion scenes clearly Skin Tone Skin tone can be changed between 5 and 5 Colour Shift Adjust the desired colour ton...

Страница 12: ...orts AVL Automatic Volume Limiting Sets the sound to obtain fixed output level between programmes Headphone Lineout When you connect an external amplifier to your TV using the headphone jack you can select this option as Lineout If you have connected headphones to the TV set this option as Headphone Please ensure before using headphones that this menu item is set to Headphone If it is set to Lineo...

Страница 13: ...TV Hard of Hearing Enables any special feature sent from the broadcaster Audio Description A narration track will be played for the blind or visually impaired audience Press OK to see all available Audio Description menu options This feature is available only if the broadcaster supports it Netflix If this feature is supported by your TV you can view your ESN number and deactivate Netflix ESN numbe...

Страница 14: ...stations Analogue Searches and stores analogue stations Manual channel scan This feature can be used for direct broadcast entry Network channel scan Searches for the linked channels in the broadcast system Digital Aerial Searches for aerial network channels Digital Cable Searches for cable network channels Analogue fine tune You can use this setting for fine tuning analogue channels This feature i...

Страница 15: ...sed by entering the right PIN Set PIN Defines a new PIN number Default CICAM PIN This option will appear as greyed out if no CI module is inserted into the CI slot of the TV You can change the default PIN of the CI CAM using this option Note Default PIN can be set to 0000 or 1234 If you have defined the PIN is requested depending on the country selection during the First Time Installation use the ...

Страница 16: ...dating the firmware automatically via the broadcast signal or via Internet Software upgrade search via user interface On the main menu select System Options and then More Navigate to Software upgrade and press the OK button In Upgrade options menu select Scan for upgrade and press OK button to check for a new software upgrade If a new upgrade is found it starts to download the upgrade After the do...

Страница 17: ...900 75Hz 27 1600x1200 60Hz 28 1680x1050 59Hz 29 1680x1050 60Hz 30 1920x1080 60Hz AV and HDMI Signal Compatibility Source Supported Signals Available EXT SCART PAL O SECAM O NTSC4 43 O NTSC3 58 RGB 50 60 O Side AV PAL O SECAM O NTSC4 43 O NTSC3 58 O YPbPr 480i 480p 60Hz O 576i 576p 50Hz O 720p 50Hz 60Hz O 1080i 50Hz 60Hz O HDMI 480i 60Hz O 480p 60Hz O 576i 576p 50Hz O 720p 50Hz 60Hz O 1080i 50Hz 60...

Страница 18: ...P 3gpp 3gp AVI avi MKV mkv H 264 3840x2160 30fps 1080P 60fps 135Mbps FLV flv MP4 mp4 mov 3GPP 3gpp 3gp MPEG transport stream ts trp tp ASF asf AVI avi MKV mkv Motion JPEG 720P 30fps 10Mbps AVI avi 3GPP 3gpp 3gp MP4 mp4 mov MKV mkv ASF asf VP8 1080P 30fps 20Mbps MKV mkv WebM webm HEVC 4K2K 60fps 160Mbps MP4 mp4 mov MKV mkv MPEG transport stream ts trp tp VP9 4K2K 30fps 100Mbps MKV mkv WebM webm Sup...

Страница 19: ...KHz 44 1KHz 48KHz 32Kbps 640Kbps AC3 ac3 AVI avi Matroska mkv mka 3GPP 3gpp 3gp MP4 mp4 mov m4a MPEG transport stream ts trp tp MPEG program stream DAT VOB MPG MPEG EAC3 32KHz 44 1KHz 48KHz 32Kbps 6 Mbps EAC3 ec3 3GPP 3gpp 3gp MP4 mp4 mov m4a MPEG transport stream ts trp tp MPEG program stream DAT VOB MPG MPEG AAC HEAAC 8KHz 48KHz AAC aac AVI avi Matroska mkv mka 3GPP 3gpp 3gp MP4 mp4 mov m4a MPEG...

Страница 20: ...nnectors by using DVI converter cable DVI to HDMI cable not supplied you can refer to the following resolution information 56Hz 60Hz 66Hz 70Hz 72Hz 75Hz 640x480 þ þ 800x600 þ þ þ 1024x768 þ þ þ 1280x768 þ þ 1280x960 þ 1360x768 þ 1366x768 þ 1280x1024 þ þ þ 1400x1050 þ 1600x900 þ ...

Страница 21: ...with your doctor before watching 3D TV It is possible that some viewers may experience a seizure or epilepsy when exposed to certain conditions including flashing lights or images in TV or video games Sometimes certain symptoms can occur in unspecified conditions even if you do not have any previous history In such a case if you experience any of the following symptoms immediately stop watching th...

Страница 22: ... TV should be in 3D mode Press the 3D button on the remote if available to open 3D Settings menu quickly Select 2D Only option in the 3D Settings menu using the Up or Down buttons Press Left or Right buttons to set 2D mode as Left Right or Off Watching 2D images in 3D format Press the 3D button on the remote if available to open 3D Settings menu quickly Select Virtual 3D option in the 3D Settings ...

Страница 23: ...R Not Supported SBS TB SBS TB Not Supported C1 If the image height exactly divisible by 2 and the image width exactly divisible by 16 and image width is wider or equal than panel width C1 is supported SBS Side By Side TB Top Bottom MBP Media Browser Picture MBV Media Browser Video DTV Digital TV Source ATV Analog TV Source FC Frame Compatible FP Frame Packed Connectivity Wired Connectivity To Conn...

Страница 24: ...ID visible you should change your SSID settings via the modem s software To Connect to a wireless LAN you should perform the following steps 1 Ensure that Nero Media Home software is installed to your PC for Audio Video Sharing function 2 To configure your wireless settings please refer to the Network Internet Settings section in the System Options Menu Broadband ISP connection A Wireless N router...

Страница 25: ... continue If available you can download a virtual remote controller application from the server of your mobile device application provider Note This feature may not be supported on all mobile devices Connectivity Troubleshooting Wireless Network Not Available Ensure that any firewalls of your network allow the TV wireless connection Try searching for wireless networks again using the Network Inter...

Страница 26: ... to the Media Browser menu section for further information on file playback Subtitle files do not work if you watch videos from your network through Audio Video Sharing feature You can connect only one television to the same network If a problem occurs with the network please switch your television off at the wall socket and back on again Trick mode and jump are not supported with the Audio Video ...

Страница 27: ...tton to exit iPlayer Press the Return Back button for going back to the previous screen Note Episode is unavailable message may be displayed on the screen if a problem occurs during the playback Searching a Programme Highlight the Search tab using the navigation buttons and press the OK button Use the virtual keyboard to type the letters Select letters and press the OK button When finished highlig...

Страница 28: ...on It should be noted that the red button switching capability is provided by the application and some application may behave differently If you switch to another channel while an HbbTV application is active either in red button icon mode or full UI mode the following scenarios can occur The application can continue running The application can be terminated The application can be terminated and an...

Страница 29: ...delete icon found on each row EPG You can view the broadcast schedules of selected channel lists through this tab You can also navigate through channels by pressing on the selected channel on the EPG grid Please note that updating refreshing the EPG information may take a while depending on your network and web service quality Note Internet connection is required for WEB based EPG informations POR...

Страница 30: ...vailable Keyboard Page The keyboard page can be opened in two ways by pressing the Keyboard widget on the application screen or automatically by receiving a command from the TV Requirements 1 Smart TV 2 Network connection 3 Mobile Device based on Android or iOS platform Android OS 4 0 or higher IOS 6 or higher version 4 Smart Center app to be found on online application stores based on Android and...

Страница 31: ...al which is marked with the letter E or by the earth symbol or coloured green or green and yellow The wire which is coloured blue or black must be connected to the terminal which is marked with the letter N or coloured Black The wire which is coloured brown or red must be connected to the terminal which is marked with the letter L or coloured Red For continued protection against risk of fire repla...

Страница 32: ...jon Kommersiell merkevare Produkt nr Modell nr Energieffektivitet klasse Synlig skjermstørrelse diagonal ca tommer cm Português Ficha do produto Marca Comercial Produto Nº Modelo Nº Classificação eficiência energética Tamanho ecrã visível diagonal aprox polegadas cm Român Fi produs Marc comercial Nr Produs Nr Model Clasa de eficien energetic Dimensiunea ecranului vizibil diagonal aprox inch cm cm ...

Страница 33: ...obrazu pikseli Magyar Energiafogyasztás bekapcsolva hagyott üzemmódban Watt Éves energiafogyasztás kWh Éves Energiafogyasztás standby üzemmódban Watt Energiafogyasztás kikapcsolt üzemmódban Watt Képerny felbontás px Norsk Påmodus gjennomsnittlig strømforbruk Watt Årlig strømforbruk kWh Årlig Hvilemodus strømforbruk Watt Av modus strømforbruk Watt Skjermoppløsning piksel Português Consumo energia e...

Страница 34: ......
Отзывы: