background image

84

32" 720p / 55" 1080p 60Hz LED Google Cast™ TV

www.tv.toshiba.com

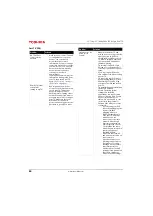
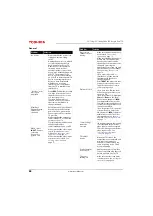
Cast TV FAQ

Problem

Solution

My TV will not 
connect to the 
network.

• Make sure your router’s firewall 

is configured to accept new 
devices. See your router's 
documentation for more 
information. If you are renting a 
router, you may need to contact 
your ISP. If you are on a private 
network, such as a University 
network, you may need to 
contact your network 
administrator.

• You may have entered incorrect 

information during setup. Reset 
your TV, then set up your TV 
again. See 

Restoring settings to 

the defaults

 on page

82

.

How do I prevent 
others from 
casting to my TV?

• By design, anyone who has 

access to your Wifi network can 
cast to your TV. This makes 
devices with Google Cast 
built-in great for sharing videos 
between friends! If you want to 
prevent people from casting to 
your TV, make sure that your 
Wifi network is password 
protected and only give out the 
password to people you trust.

I see the error “No 
Cast Devices 
Found.”

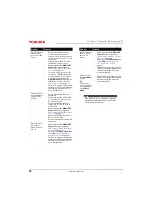
• Make sure that your TV and 

mobile device is set up correctly 
and connected to Wifi. You 
should see Google Cast on your 
TV, with its assigned name and 
the current time, and a photo 
slideshow playing.

• Try casting from the Google 

Cast app to see if the device is 
correctly connected or requires 
setup.

• If you're using an iOS device, 

turn on Bluetooth when setting 
up your TV.

• Try rebooting your Wifi router 

by unplugging the power cord 
and turning off your TV. Plug 
your router back in and turn on 
your TV.

• Try uninstalling and reinstalling 

the Google Cast app.

• Certain operating system 

settings and installed 
applications can conflict with 
the use of Google Cast. If other 
devices (such as phones or 
tablets) are also unable to cast 
successfully, the problem is 
likely an issue with your router 
or network.

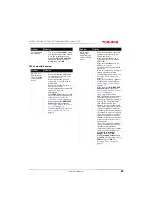
• Try rebooting your Wifi 

router by unplugging the 
power cord, then 
plugging it back in.

• Make sure that Google 

Cast, your TV, and your 
mobile device are 
connected to the same 
network. After Google 
Cast starts, the network 
name displayed on your 
TV should be the same 
network name selected in 
your mobile device’s 
available Wifi list.

• Make sure that firewall 

and antivirus software on 
your router are 
up-to-date and are not 
blocking connections to 
Google Cast. If you are 
renting a router, contact 
your Internet service 
provider about firewall 
settings. If you purchased 
the router, check your 
network firewall settings.

Problem

Solution

Содержание 32L221U

Страница 1: ...Before using your new product please read these instructions to prevent any damage 32 720p 60Hz LED Google Cast TV 55 1080p 60Hz LED Google Cast TV 32L221U 55L421U ...

Страница 2: ...ount bracket 8 TV components 11 Package contents 11 Front 11 Power INPUT button 11 Side jacks 12 Back jacks 13 Remote control 14 Virtual Remote control 15 What connection should I use 17 Connecting a cable or satellite box 18 HDMI best 18 DVI same as HDMI but requires an audio connection 19 AV good 20 Coaxial good 21 Connecting an antenna or cable TV no box 22 Connecting a DVD or Blu ray player 23...

Страница 3: ...bile device 45 Casting a video movie or TV show 52 Setting up the ANT CABLE IN jack 53 Understanding the basics 53 Turning your TV on or off 53 Selecting the video input source 54 On screen menu overview 55 Navigating the menus 56 Adjusting the volume 56 Selecting a channel 56 Viewing channel information 57 Controlling CEC compatible devices 57 Turning HDMI CEC Control on or off 58 Turning TV Auto...

Страница 4: ...for USA region 74 Temporarily unlocking programs 75 Locking video inputs 75 Locking channels 76 Setting the GameTimer 76 Using closed captioning 77 Turning closed captioning on or off 77 Selecting the analog closed captioning mode 78 Selecting the closed captioning mode with the CCD button 78 Customizing digital closed captioning settings 78 Adjusting time settings 79 Setting the time zone and Day...

Страница 5: ...v Contents www tv toshiba com Video and audio 85 Remote control 87 General 88 CEC compatible devices 89 Specifications 91 Legal notices 92 One year limited warranty Toshiba Televisions 93 ...

Страница 6: ...d over pulled or grabbed WALL OR CEILING MOUNT YOUR TELEVISION ALWAYS contact your retailer about professional installation if you have any doubts about your ability to safely mount your television ALWAYS use a mount that has been recommended by the television manufacturer and has a safety certification by an independent laboratory such as UL CSA ETL ALWAYS follow all instructions supplied by the ...

Страница 7: ...paratus should not be exposed to dripping or splashing and no objects filled with liquids such as vases should be placed on the apparatus 18 Your TV has four VESA mounting holes on the back If you attach a wall mount bracket or TV stand to the back of your TV the bracket or stand must be securely attached using all four holes If you do not use all four mounting holes your TV may fall and cause pro...

Страница 8: ...ting instructions Adjust only those controls covered by the operating instructions because incorrect adjustment of other controls may result in damage and will often require extensive work by a qualified technician to restore your TV to its normal operation If your TV has been dropped or damaged in any way When your TV exhibits a distinct change in performance Outdoor antenna grounding If an outsi...

Страница 9: ... for information about disposal or recycling and about finding a recycler in your area before you dispose of your TV Non active pixels The LCD panel contains almost 3 million thin film transistors which provide exceptionally sharp video quality Occasionally a few non active pixels may appear on the screen as a fixed blue green or red point These non active pixels do not adversely affect the perfor...

Страница 10: ...re s nothing new to learn cast your apps your playlists your TV shows without new log ins or downloads It s simple to search browse queue and control from anywhere in the home MULTI TASK WITHOUT INTERRUPTING WHAT S PLAYING While you are casting you can keep using your phone for other things without disrupting what is playing on the TV HDMI CEC Control Enjoy the benefit of having HDMI CEC compatibl...

Страница 11: ...r TV on a wall go to Installing a wall mount bracket Installing the stands 32 model 1 Carefully place your TV face down on a cushioned clean surface to protect the screen from damages and scratches 2 Secure each TV stand to the bottom of your TV with two of the provided screws Notes If you plan to wall mount your TV do not install the stands Store the stands and stand screws in case you decide to ...

Страница 12: ... com Installing the stands 55 model 1 Carefully place your TV face down on a cushioned clean surface to protect the screen from damages and scratches 2 Secure each TV stand to the bottom of your TV with two of the provided screws Screw type Screw length of screws M5 10 mm 4 ...

Страница 13: ...he back If you attach a wall mount bracket to the back of your TV the bracket must be securely attached using all four holes If you do not use all four mounting holes your TV may fall and cause property damage or personal injury See the documentation that came with your wall mount for complete mounting instructions This TV is intended to be supported by a UL Listed wall mount bracket with suitable...

Страница 14: ... 32L221U 55L421U 32 720p 55 1080p 60Hz LED Google Cast TV www tv toshiba com 2 If the stands are installed remove the two screws that secure each stand to your TV then remove the stand 32 model 55 model ...

Страница 15: ...your TV Notes The length of the wall mount screws vary depending on the wall mount bracket you purchased See the instructions that came with the wall mount bracket for screw lengths The mounting holes on the back of the 32 model take type M4 screws The mounting holes on the back of the 55 model take type M6 screws 3 94 in 100 mm 3 94 in 100 mm 32 model 7 87 in 200 mm 11 81 in 300 mm 55 model ...

Страница 16: ...he remote control Do not block 2 Power indicator Turns off when your TV is on Lights red when your TV is off standby mode Item Description INPUT Press to turn on your TV when your TV is off in standby mode Press and hold to turn off your TV when TV is on Warning When your TV is off power still flows through it To completely disconnect power unplug the power cord INPUT When your TV is on quickly pr...

Страница 17: ... DVI same as HDMI but requires an audio connection on page 19 or 29 HDMI IN 1 ARC Connect an ARC enabled home theater receiver to this jack 3 DIGITAL OUTPUT Optical Connect a soundbar digital speaker system or home theater system to this jack to listen to TV audio through external speakers For more information see Connecting external speakers or a soundbar on page 32 4 Connect headphones to this j...

Страница 18: ...ss your Google Cast account For more information see Connecting a network router on page 27 2 VIDEO and AUDIO L and R Connect the video and audio for an AV device to these jacks For more information see AV good on page 20 24 or 26 3 ANT CABLE IN Connect an antenna or cable TV to this jack For more information see Coaxial good on page 21 or Connecting an antenna or cable TV no box on page 22 ...

Страница 19: ...ge tothe next higherchannel in the channel list TVmenu Navigate up USB Rotate a photocounter clockwise in a slideshow 8 VOL W TV Decrease thevolume TVmenu Navigate left USB Gotothe previous photo in a slideshow 9 OK Confirm selections or changes in TV menus 10 Switch toGoogle Cast 11 CCD Turn closed captioning on or off Select the language like English to turn on closedcaptioning or Off to turn of...

Страница 20: ... and hold to continuously decrease the volume 4 Play Pause Tap topause castingvideo Tap again toresume playback 5 Mute Tap tomute the soundor un mute the sound 6 Number Tap togotothe number page and enter channel numbers Toshiba TV Cast Remote icon on Android device Toshiba TV Cast Remote icon on iOS device 7 Settings Taptogotothe Settings page 8 Input source Taptoswitch tothevideo inputsource tot...

Страница 21: ...ut source then press OK 2 Arrows Use these buttons to browse through on screen menus 3 OK Taptoconfirm selections orchangesin TV menus 4 Back Taptogotothe previous channel or go back to the previous step 5 Menu Taptoopen on screen menus Which on screen menus 6 Game Taptoturn Game mode on or off 7 Closed captioning Taptoturn closed captioningon or off 8 Sound mode Taptoselect thesound mode You can ...

Страница 22: ...uality Connection type and jack Cable connector Best use this ifyourdevices have HDMI HDMI video audio Good AV requires an audio connection Good Coaxial video audio Connection type and jack Cable connectors Optical digital audio output Analog audio input 3 5mm analog audio output Cautions Check the jacks for position and type before making any connections Loose connections can cause poor audio or ...

Страница 23: ...d all connected equipment is turned off 2 Connect the incoming cable from the cable wall jack to the cable in jack on the cable or satellite box 3 Connect an HDMI cable not provided to one of the HDMI IN jacks on the side of your TV and to the HDMI OUT jack on the cable or satellite box 4 Plug your TV s power cord into a power outlet turn on your TV then turn on the cable or satellite box 5 Press ...

Страница 24: ...dapter to the DVI OUT jack on the cable or satellite box 4 Connect the other end of the cable to one of the HDMI IN jacks on the side of your TV 5 Plug your TV s power cord into a power outlet turn on your TV then turn on the cable or satellite box 6 Press INPUT to open the Input Selection list 7 Press S or T to highlight HDMI 1 HDMI 2 or HDMI 3 then press OK Note Your TV supports DVI video only T...

Страница 25: ...your TV and to the AV and audio out jacks on the cable or satellite box 4 Plug your TV s power cord into a power outlet turn on your TV then turn on the cable or satellite box 5 Press INPUT to open the Input Selection list 6 Press S or T to highlight AV then press OK Notes Cables are often color coded to match color coded jacks Important When you connect the audio using the AUDIO L and R jacks the...

Страница 26: ...the cable or satellite box 4 Plug your TV s power cord into a power outlet turn on your TV then turn on the cable or satellite box 5 Press INPUT to open the Input Selection list 6 Press S or T to highlight ANT CABLE then press OK 7 If you cannot tune to channels you know exist scan for channels See Automatically scanning for channels on page 69 Notes Use a coaxial cable to eliminate interference a...

Страница 27: ...o waves Do not bundle the coaxial cable with the power cord or other cables If the antenna is not installed correctly contact qualified service personnel to correct the problem If the signal level for a channel is weak the picture may be distorted Adjust the antenna or use a highly directional outdoor or set top antenna with a built in amplifier If the picture quality is good on some channels and ...

Страница 28: ... your TV s power cord is unplugged and the DVD or Blu ray player is turned off 2 Connect an HDMI cable not provided to one of the HDMI IN jacks on the side of your TV and to the HDMI OUT jack on the DVD or Blu ray player 3 Plug your TV s power cord into a power outlet then turn on your TV and DVD or Blu ray player 4 Press INPUT to open the Input Selection list 5 Press S or T to highlight HDMI 1 HD...

Страница 29: ...on the DVD or Blu ray player 3 Plug your TV s power cord into a power outlet then turn on your TV and DVD or Blu ray player 4 Press INPUT to open the Input Selection list 5 Press S or T to highlight AV then press OK Note Cables are often color coded to match color coded jacks Important When you connect the audio using the AUDIO L and R jacks the audio output is analog AV cable Back of TV AV cable ...

Страница 30: ...your TV and to the HDMI OUT jack on the game console 3 Plug your TV s power cord into a power outlet then turn on your TV 4 Turn on the game console then set it to the correct output mode For more information see the documentation that came with the console 5 Press INPUT to open the Input Selection list 6 Press S or T to highlight HDMI 1 HDMI 2 or HDMI 3 then press OK Note An HDMI cable carries bo...

Страница 31: ...e console then set it to the correct output mode For more information see the documentation that came with the console 5 Press INPUT to open the Input Selection list 6 Press S or T to highlight AV then press OK Notes Cables are often color coded to match color coded jacks Important Some older game consoles come with a special AV cable See the documentation that came with your game console or check...

Страница 32: ...k on the back of your TV 1 Make sure that your TV s power cord is unplugged and the router is turned off 2 Connect an Ethernet cable not provided to the LAN jack on the back of your TV and to an Ethernet jack on the router 3 Plug your TV s power cord into a power outlet then turn on your TV and the router Ethernet cable Network router Back of TV Ethernet cable connector LAN jack On your TV ...

Страница 33: ...off 2 Connect an HDMI cable not provided to one of the HDMI IN jacks on the side of your TV and to the HDMI OUT jack on the computer 3 Plug your TV s power cord into a power outlet then turn on your TV and the computer 4 Press INPUT to open the Input Selection list 5 Press S or T to highlight HDMI 1 HDMI 2 or HDMI 3 then press OK 6 Adjust the display properties on the computer if necessary HDMI ca...

Страница 34: ...t the other end of the cable to one of the HDMI IN jacks on the side of your TV 4 Plug your TV s power cord into a power outlet then turn on your TV and the computer 5 Press INPUT to open the Input Selection list 6 Press S or T to highlight HDMI 1 HDMI 2 or HDMI 3 then press OK 7 Adjust the display properties on the computer if necessary Notes Your TV supports DVI video only To add sound for a DVI...

Страница 35: ...our TV 2 Press INPUT press S or T to highlight USB then press OK The Media Player menu opens Caution Do not remove the USB flash drive or turn off the TV while using the USB flash drive You may lose data or damage the USB flash drive Note For information about supported file types see Supported photo file formats on page 61 USB flash drive Side of TV ...

Страница 36: ...eadphones to the jack on the side of your TV 2 In the Headphones Audio Output screen that opens press W or X to highlight Headphones Audio Output then press OK Warning Loud noise can damage your hearing When using headphones use the lowest volume setting on your headphones that still lets you hear the sound Note The Headphones Audio Output screen closes after 30 seconds without any action To open ...

Страница 37: ...ital speaker system or soundbar 3 Plug your TV s power cord into a power outlet then turn on your TV 4 Turn on the digital speaker system or soundbar then set it to the correct source For more information see the documentation that came with the digital speaker system or soundbar 5 On your TV s Sound menu highlight Digital Audio Output then press OK Highlight Audio Format then press OK Press S or ...

Страница 38: ... to highlight Audio Output Fixed then press OK 4 Turn on the analog speaker system or soundbar then set it to the correct source For more information see the documentation that came with the analog speaker system or soundbar Note If the TV Speakers option on the Sound menu is set to Auto or Off the TV speakers are muted when you connect an analog sound system or soundbar Note If you want to mute t...

Страница 39: ...able on your devices Refer to the documentation that came with your devices for connection information Just remember to use the best connection types available for the best picture and sound For information about connection types see What connection should I use on page 17 DVD or Blu ray player Cable or satellite box Antenna or cable TV connected directly to the wall jack AV receiver ...

Страница 40: ... the power cord to the power connector on the back of your TV 2 Connect the other end of the cord to a power outlet Cautions Your TV should only be operated from the power source indicated on the label Always unplug the power cord from the power outlet when you will not be using your TV for an extended period of time ...

Страница 41: ...emote control maker OR Contact the cable or satellite company that provided the remote control you are trying to program 2 Follow your universal remote control s instructions to enter the TV code you found in Step 1 Cautions Batteries should not be exposed to excessive heat such as sunshine heat registers or fire Battery chemicals can cause a rash If the batteries leak clean the battery compartmen...

Страница 42: ... 10154 10765 10178 10700 10702 Dish Network 617 631 590 618 635 680 688 750 847 800 526 851 852 595 908 757 850 802 785 743 849 622 789 771 744 243 117 RCA 11524 11656 10156 11156 11256 12006 11265 11704 11945 10845 1356 12724 Rogers 1524 Time Warner 0156 0060 0154 1042 1060 1061 1062 1087 1091 1097 1098 1130 1131 1172 1173 1183 1286 1317 1325 1327 1334 1345 1346 1355 1364 1365 0016 0017 0090 0096...

Страница 43: ...1 Make sure that you Install the remote control batteries See page 36 If you plan to watch standard broadcast TV channels using a cable box satellite box or external antenna connect an antenna cable TV or satellite TV See page 18 through 22 Connect the power cord See page 35 Know the Wifi network name and password if you are using a wireless network to set up your TV 2 Turn on Wifi on your mobile ...

Страница 44: ...the search bar of your device s browser 5 Tap Get it on Google Play 6 Tap Install The app installs 7 Tap Open Google cast opens 8 Tap ACCEPT to agree to the Terms of Service and Privacy Policy 9 Optional Sign in to your Google account to personalize your casting experience OR Tap SKIP to start casting right away ...

Страница 45: ...TV www tv toshiba com 10 Tap Devices 11 Tap Chromecast Note If you have not turned on Wifi on your mobile device a message tells you to turn on Wifi After you turn on Wifi the following screen may appear If you device is detected go to Step 12 ...

Страница 46: ...41 32L221U 55L421U 32 720p 55 1080p 60Hz LED Google Cast TV www tv toshiba com 12 Tap SET UP for the Cast TV number you want to set up ...

Страница 47: ...42 32 720p 55 1080p 60Hz LED Google Cast TV www tv toshiba com 13 Tap SET ME UP ...

Страница 48: ...w tv toshiba com 14 Make sure the code on your device matches the code on your TV then on your mobile device tap I See the Code 15 Optional To change the name of your Google Cast app to something distinct delete the current name type in a new one then tap SET NAME ...

Страница 49: ...twork you want to connect to your TV enter the Wifi password if necessary then tap SET NETWORK Your TV connects to the network and is ready to cast 17 Tap BROWSE YOUR CAST APPS Note When your TV connects to Wifi it may receive an automatic software update Wait for the update to finish ...

Страница 50: ... Automatically scanning for channels on page 69 Using an iOS Apple mobile device 1 Make sure that you Install the remote control batteries See page 36 If you plan to watch standard broadcast TV channels using a cable box satellite box or external antenna connect an antenna cable TV or satellite TV See page 18 through 22 Connect the power cord See page 35 Know the Wifi network name and password if ...

Страница 51: ...of your device s browser 6 Tap Download on the App Store 7 Tap Get then Install The app installs 8 Tap Open Google cast opens 9 Tap ACCEPT to agree to the Terms of Service and Privacy Policy 10 Optional Sign in to your Google account to personalize your casting experience OR Tap SKIP to start casting right away ...

Страница 52: ...turned on Wifi on your mobile device a message tells you to turn on Wifi After you turn on Wifi the following screen may appear If you device is detected go to Step 12 Note If you have not turned on Bluetooth on your mobile device you will not see this screen Turn on Bluetooth After you turn on Bluetooth the following screen appears ...

Страница 53: ...48 32 720p 55 1080p 60Hz LED Google Cast TV www tv toshiba com 13 Tap SET UP for the Cast TV number you want to set up ...

Страница 54: ...49 32L221U 55L421U 32 720p 55 1080p 60Hz LED Google Cast TV www tv toshiba com 14 Tap NEXT ...

Страница 55: ...oshiba com 15 Make sure the code on your device matches the code on your TV then on your mobile device tap I See the Code 16 Optional To change the name of your Google Cast app to something distinct delete the current name type in a new one then tap NEXT ...

Страница 56: ...the Wifi network you want to connect to your TV enter the Wifi password if necessary then tap SETUP Your TV connects to the network and is ready to cast 18 Tap BROWSE YOUR CAST APPS Note When your TV connects to Wifi it may receive an automatic software update Wait for the update to finish ...

Страница 57: ...0 If you connected cable TV without a box or an external antenna to the ANT CABLE IN jack set up the ANT CABLE IN jack and scan for channels See Setting up the ANT CABLE IN jack on page 53 Automatically scanning for channels on page 69 Casting a video movie or TV show After you set up Google Cast on your TV and mobile device you are ready to cast videos movies and TV shows 1 On your mobile device ...

Страница 58: ... Selecting the video input source On screen menu overview Navigating the menus Adjusting the volume Selecting a channel Viewing channel information Turning your TV on or off 1 Make sure that the power cord is connected securely and correctly For more information see Connecting power on page 35 2 Press power to turn on your TV The power indicator blinks while you TV is starting up then turns off wh...

Страница 59: ...have not scanned for channels Google Cast appears at the top of the Input Selection list Notes If a CEC compatible device is connected to an HDMI jack the HDMI CEC icon appears in the list If a connected CEC compatible device has CEC compatible devices connected to it a separate device selection pop up window appears For example the pop up window for a CEC compatible DVD player with a CEC compatib...

Страница 60: ...st TV www tv toshiba com On screen menu overview Picture menu Sound menu Options menu Installation menu Timers menu Notes Depending on the signal source selected you may see different options on your screen Menu items that are not selectable are grayed out ...

Страница 61: ... select the sub channel from the channel list On the virtual remote control on your mobile device press the number buttons to enter the channel number you want then press OK to immediately change the channel To change the channel to a sub channel enter the main channel number press enter the sub channel button then press OK See Virtual Remote control on page 15 Press back to go to the last viewed ...

Страница 62: ...mpatible devices Using the TV menu to control CEC compatible devices HDMI CEC Control lets you control HDMI CEC compatible devices connected to the HDMI jacks on your TV using the remote control that came with your TV To use HDMI CEC Control you must set the Enable HDMI CEC Control setting on the HDMI CEC Control Setup menu to On Note If you pressed INFO press INFO again to close the banner Notes ...

Страница 63: ...nu Turning TV Auto Power on or off TV Auto Power automatically turns on your TV when an HDMI CEC device is turned on if the device has this feature 1 Press MENU press S or T to highlight Options then press OK 2 Highlight HDMI CEC Control Setup then press OK 3 Make sure that Enable HDMI CEC Control is set to On 4 Highlight TV Auto Power then press OK 5 Highlight On or Off then press OK 6 Press EXIT...

Страница 64: ... set to On 4 Highlight Auto Standby then press OK 5 Highlight On or Off then press OK 6 Press EXIT to close the menu Turning Amplifier Control on or off Amplifier Control lets you use your TV s remote control to control the volume and mute the sound on an audio receiver 1 Press MENU press S or T to highlight Options then press OK 2 Highlight HDMI CEC Control Setup then press OK 3 Make sure that En...

Страница 65: ...then press OK 5 Highlight TV or Receiver then press OK 6 Press EXIT to close the menu Using the TV remote to control CEC compatible devices When Enable HDMI CEC Control on the HDMI CEC Control Setup menu is set to On you can use the remote control that came with your TV to control a CEC compatible device such as a DVD or Blu ray player Button Press to play pause Start or pause playback S T W X Pla...

Страница 66: ... close the menu Using the Media Player You can connect a USB flash drive to your TV to view photos stored on the flash drive This section includes topics about Supported photo file formats Viewing photos Viewing photos in a slideshow Supported photo file formats Your TV supports the following photo file formats Data type JPEG EXIF ver 2 1 File format JPEG Maximum photo size 6 MB Maximum number of ...

Страница 67: ...tom right thumbnail then press X to move to the next screen To navigate on a full screen photo Press W or X to view the previous or next photo Press S to rotate the photo 90 counter clockwise or press T to rotate the photo 90 clockwise Press EXIT to close the Media Player In the message that appears use W or X to select Yes then press OK Viewing photos in a slideshow When viewing photos in a slide...

Страница 68: ...ancement Movie Lowers the contrast for a darkened room Game Reduces controller delay for faster video gaming action PC Optimizes the image of a connected computer Store The Store picture mode is only available if you selected Store Mode during initial setup This option is hidden in the Home mode Reset Resets all picture settings to the factory default Backlight Sets the overall brilliance of the s...

Страница 69: ...and mosquito noise by MPEG encoding You can select On or Off Dynamic Noise Reduction Reduces picture noise snow You can select High Low or Off Edge Enhancer Adjusts the picture to achieve a sharper image You can select On or Off Reset Resets all advanced picture settings to factory defaults Display Settings Opens the Display Settings menu where you can adjust how the picture is displayed on the sc...

Страница 70: ...ially useful for viewing external HD sources such as DVD movies video games or computer graphics Normal Displays the image inthe original aspect ratio You may see black bars if the original content is not widescreen This setting is for viewing VGA SVGA XGA WXGA and SXGA sources Note This option adjusts the timing when a computer is connected to an HDMIIN jack using an HDMI DVI adapter Dot by Dot D...

Страница 71: ...en press OK 5 Press EXIT to close the menu Automatically adjusting the aspect ratio When the Auto Aspect option is set to On your TV automatically selects the picture size when one of the following input sources is received 480i 480p 720p 1080i digital signal from the ANT CABLE IN jack 480i 480p 720p 1080i 1080p or VGA 60Hz signal from an HDMI jack 1 Press MENU press S or T to highlight Picture th...

Страница 72: ...und over front facing speaker configurations complete with rich bass high frequency detail and clear dialog You can select On or Off Dialog Clarity Adjusts the volume of dialog when watching movies or TV programs You can select Off Low or High TV Speakers Turns your TV s speakers on or off You can select Auto Turns off the TV speakers when you connect a device to the jack On Keeps the TV speakers ...

Страница 73: ... the amount of delay to manually sync the audio with the video To use this option Audio Delay must be set to Manual 3 Press W X S or T to adjust the option or select a setting then press OK 4 Press EXIT to close the menu Playing TV audio only You can turn off the picture on your TV and listen to the program audio only 1 Press MENU press S or T to highlight Options then press OK 2 Highlight Power M...

Страница 74: ...ss MENU press S or T to highlight Installation then press OK 3 Highlight Channel Tuning then press OK 4 Highlight Auto Tuning then press OK Press OK again to start the scan Your TV scans for available channels The scan may take several minutes 5 When the scan is complete press EXIT to close the menu Your TV tunes to the first scanned channel Note When you scan for channels your TV erases any chann...

Страница 75: ... OK 4 Use the number buttons on the virtual remote control to enter the channel number then press OK See Virtual Remote control on page 15 OR Press W or X to select previous or next channel then press OK 5 Press OK to start manual tuning 6 Press EXIT to close the menu Hiding channels You can hide channels in the channel list When you press CH or CH your TV skips the hidden channels You can still t...

Страница 76: ... necessary for some menus The Parental Control and Locks menu is grayed out if no PIN has been set 1 Press MENU press S or T to highlight Options then press OK 2 Highlight Parental PIN Setup then press OK 3 Press W or X on the number bar at the bottom of the screen to select a number then press OK Repeat this step to enter the other three numbers in your PIN After you enter the fourth number a con...

Страница 77: ...ects the ratings and blocks the programs and movies according to the ratings you select TV rating levels Notes You must create a PIN before you can block TV programs and movies See Setting a new PIN on page 71 To view a program or movie rating tune to the program or movie then press INFO U S TV ratings TV MA Mature audiences only May contain L Crude or indecent language S Explicit sexual activity ...

Страница 78: ...en press OK 7 Press S T W or X to highlight a rating then press OK 8 When you have finished highlight Done then press OK to save your changes 9 Press EXIT to close the menu U S movie MPAA ratings X Adults only NC 17 Not suitable for children under 17 R Restricted Under 17 requires accompanying parent or adult PG 13 Parents Strongly Cautioned Some material may be inappropriate for children under 13...

Страница 79: ...additional rating system can be downloaded 1 Tune to the channel you want to download ratings for 2 Press MENU press S or T to highlight Options then press OK 3 Highlight Parental Control and Locks then press OK 4 Press W or X on the number bar at the bottom of the screen to select a number then press OK Repeat this step to enter the other three numbers in your PIN 5 Highlight Enable Rating Blocki...

Страница 80: ...en press OK 3 Press W or X on the number bar at the bottom of the screen to select a number then press OK Repeat this step to enter the other three numbers in your PIN 4 Press T to highlight Input Lock then press OK 5 Highlight a video input locking level then press OK You can select Video Locks AV HDMI 1 HDMI 2 and HDMI 3 Off Unlocks all video inputs 6 Press EXIT to close the menu Notes The ALT R...

Страница 81: ...You can use the GameTimer to set a time limit for playing a video game 30 120 minutes When the GameTimer expires your TV locks out the input source for the video game device 1 Press MENU press S or T to highlight Timers then press OK 2 Highlight Game Timer then press OK 3 Press W or X on the number bar at the bottom of the screen to select a number then press OK Repeat this step to enter the other...

Страница 82: ...osed captioning on or off 1 Press MENU press S or T to highlight Options then press OK 2 Highlight Closed Captions then press OK 3 Highlight Closed Captions Display then press OK 4 Highlight On turns on closed captioning or Off turns off closed captioning then press OK 5 Press EXIT to close the menu Note To turn off the game timer select Off Notes A message appears when 10 minutes 3 minutes and 1 ...

Страница 83: ... CC1 is usually the printed version of the audio CC2 through CC4 display content provided by the broadcaster T1 through T4 Closed captioning covers half or all of the screen T1 through T4 display content provided by the broadcaster 5 Press EXIT to close the menu Selecting the closed captioning mode with the CCD button Press CCD The CC bar appears If you are tuned to an analog channel or a video de...

Страница 84: ...the letter edge 5 To adjust another option press S or T to highlight the option then press W or X to adjust the setting 6 Press EXIT to close the menu Adjusting time settings This section includes Setting the time zone and Daylight Saving Time status Setting the sleep timer Setting the time zone and Daylight Saving Time status Your TV uses the Time Zone and Daylight Saving Time settings to correct...

Страница 85: ...us look by Selecting the menu language Labeling a video input source Selecting the menu language You can choose from three different menu language settings English Français and Español for the on screen display of menus and messages 1 Press MENU press S or T to highlight Installation then press OK 2 Highlight Menu Language then press OK 3 Press S or T to select a language then press OK 4 Press EXI...

Страница 86: ...e too hot or too cold because the cabinet may warp or the screen may malfunction Your TV works best in temperatures that are comfortable to you Storage temperatures are 32 to 122 F 0 to 50 C Working temperatures are 41 to 104 F 5 to 40 C Do not place your TV in direct sunlight or near a heat source This sections includes topics about Cleaning the TV cabinet Cleaning the TV screen Cleaning the TV c...

Страница 87: ...t regions 3 To close the screen and return to the Get Help menu press OK OR To close the menu press EXIT Restoring settings to the defaults When you restore default settings all the settings you have customized are reset 1 Press MENU press S or T to highlight Installation then press OK I 2 Press S or T to highlight Reset TV then press OK A confirmation screen opens 3 Highlight Yes to reset or No t...

Страница 88: ...ess OK 2 Highlight Power Management then press OK 3 Highlight No Signal Power Down then press OK 4 Highlight Off or On then press OK 5 Press EXIT to close the menu Making your TV turn on faster When you turn off your TV it normally goes into a power savings mode to conserve energy When you turn your TV back on it takes several seconds to exit the power saving mode and display a picture You can tur...

Страница 89: ...TV with its assigned name and the current time and a photo slideshow playing Try casting from the Google Cast app to see if the device is correctly connected or requires setup If you re using an iOS device turn on Bluetooth when setting up your TV Try rebooting your Wifi router by unplugging the power cord and turning off your TV Plug your router back in and turn on your TV Try uninstalling and re...

Страница 90: ...our TV is connected to your Wifi network and make sure that you set up Google Cast on your mobile device and connected the device to the same network Disconnect what you re currently casting from Netflix Try casting again Disconnect from a Virtual Private Network VPN or proxy server if applicable over these networks If you are seeing an error such as Error 16003 or16001 try setting up and casting ...

Страница 91: ...e 18 or Connecting an antenna or cable TV no box on page 22 If you are using an antenna and the signal strength is low adjust the antenna or use a highly directional outdoor antenna or set top antenna with a built in amplifier Problem Solution Picture quality is good on some channelsandpoor on others Sound is good The problem may be caused by a poor or weak signal from the broadcaster or cable TV ...

Страница 92: ...e contrast color and brightness settings See Adjusting the TV picture on page 63 Problem Solution Audio noise Other devices for example a surround sound receiver external speakers fans or hair dryers may be interfering with your TV Try turning off one device at a time to determine which device is causing interference After you have determined which device is causing interference move it further fr...
Страница 93: ... donot display Make sure that the channels are not blocked See Locking channels on page 76 Make sure that the channels are not hidden The channel may have been deleted from the channel list You can tune to the channel by pressing the number buttons or you can add the channel back to the channel list See Hiding channels on page 70 If you are using a cable or satellite box use the remote that came w...

Страница 94: ... the device Make sure that the device is connected to your TV with an HDMI cable Make sure that the device is a CEC device See the documentation that came with the device Make sure that the TV volume is turned up and not muted Try adjusting the TV sound See Adjusting sound settings on page 67 Make sure that the TV speakers are turned on and not muted See Adjusting sound settings on page 67 Make su...

Страница 95: ...on See Turning HDMI CEC Control on or off on page 58 Make sure that the device is a CEC device See the documentation that came with the device My device does not turn off when I turn off my TV Make sure that the HDMI CEC Control feature is turned on See Turning HDMI CEC Control on or off on page 58 Make sure that Auto Standby is set to On See Turning Auto Standby on or off on page 59 The device ma...

Страница 96: ...io 16 9 16 9 Contrast ratio typical panel 3 000 1 4 000 1 TV Brightness minimum cd m2 180 nits 240nits Comb filter 3d y c digital 3d y cdigital Response time 6 5ms typical 8 ms typical Horizontal viewing angle 178 178 Vertical viewing angle 178 178 32L221U 55L421U HDMI suggested resolutions 720p 480p 480i 1080p 1080i 720p 480p 480i Analog NTSC Digital ATSC 8 VSB Clear QAM HDMI 3 side EDID complian...

Страница 97: ...o the following two conditions 1 this device may not cause interference and 2 this device must accept any interference including interference that may cause undesired operation of the device This equipment complies with IC radiation exposure limits set forth for an uncontrolled environment Dolby License Notice and Trademark Acknowledgement Manufactured under license from Dolby Laboratories Dolby D...

Страница 98: ...er This warranty does not cover Customer instruction education Installation Set up adjustments Cosmetic damage Damage due to acts of God such as power surges Accident s Misuse unintentional or intentional Abuse unintentional or intentional Negligence Commercial purposes use including but not limited to use in a place of business or in communal areas of a multiple dwelling condominium or apartment ...

Страница 99: ...r product information and support go to www tv toshiba com Product support 855 527 2411 Distributed and warranted by Best Buy Purchasing LLC 2016 Best Buy China LTD All rights reserved V2 ENGLISH 16 0700 ...

Отзывы: