3
F
L
2
2
2
3
1
1
G014532
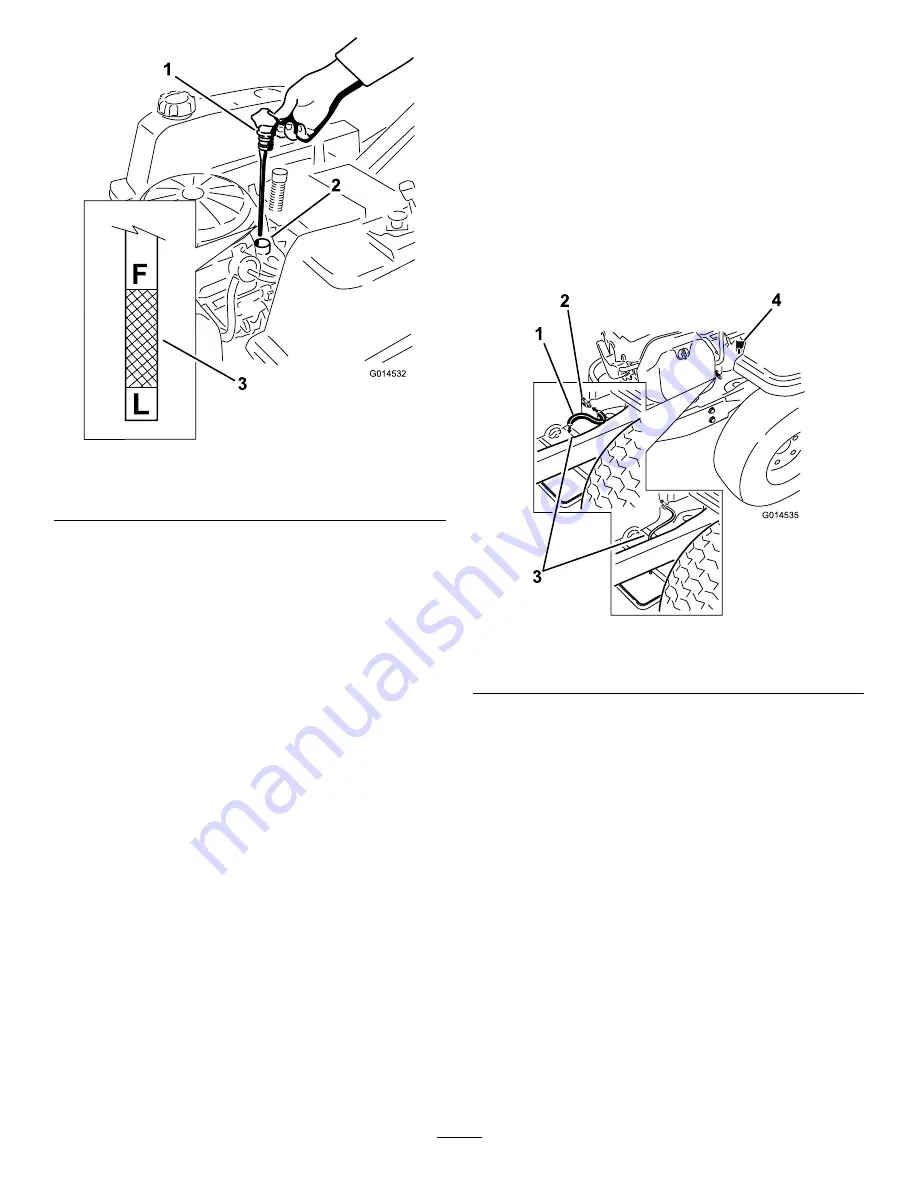
Figure 29
1.
Oil dipstick
3.
Oil level
2.
Filler tube
5. Remove the dipstick and check the oil level.
(Figure 29).
The oil level should be up to, but not over, the
F
mark on the dipstick.
6. If the level is low, add oil of the proper type, up to
the
F
mark on the dipstick. Always check the level
with the dipstick before adding more oil.
Note:
To prevent extensive engine wear or damage,
always maintain the proper oil level in the crankcase.
Never operate the engine with the oil level below the
“L” mark or over the “F” mark on the dipstick.
Changing the Oil and the Filter
Service Interval:
Every 100 hours—Change the engine
oil and filter.
Refill with service class SG, SH, SJ or higher oil as
specified in the “Viscosity Grades” table.
Change the oil and filter while the engine is still warm.
The oil will flow more freely and carry away more
impurities. Make sure the engine is level when filling,
checking, or changing the oil.
Change the oil and oil filter as follows:
1. Start the engine and let it run until warm. This
warms the oil so it drains better.
2. Park the machine so that the drain side is slightly
lower than the opposite side to assure the oil drains
completely.
3. Disengage the blade control switch and move the
motion controls outward to the park position.
4. Stop the engine, remove the key, and wait for all
moving parts to stop before leaving the operating
position.
5. Clean the area around the drain valve and on the
machine frame. Locate the oil drain hose and slide
it over the drain valve (Figure 30).
G014535
1
2
3
4
Figure 30
1.
Oil drain hose
3.
End of frame
2.
Drain valve
4.
Oil filter
6. Place the opposite end of the oil drain hose over the
end of the frame (Figure 30).
7. Place a pan underneath machine directly below the
drain hose as shown in Figure 31.
27
Содержание SS 3200
Страница 46: ...Schematics G014644 Electrical Diagram Rev A 46 ...
Страница 47: ...Notes 47 ...


