


8.
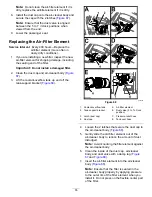
Install the cover onto the air-cleaner body and
secure the cover with the 2 latches (
).
Note:
Ensure that the dust valve is aligned
between the 5 and 7 o’clock positions when
viewed from the end (
9.
Align the coolant-overflow tank to the
tank-support bracket and seat the tank firmly
(
).
Important:
Ensure that the pressure-relief
hose is routed rearward, and the tank-vent
hose is round forward and down.
10.
Lower the passenger seat.
Servicing the Engine Oil
Service Interval:
After the first 50 hours—Change
the engine oil and oil filter.
Every 200 hours—Change the engine oil
(including synthetic oil) and oil filter (more often
when operating under heavy load or in high
temperatures).
Every 400 hours/Yearly (whichever comes
first)—Complete all yearly maintenance
procedures specified in the engine owner's
manual.
Crankcase oil capacity:
4.6 L (4.9 US qt) with the
filter.
Engine oil specification:
•
Oil type—API service CH-4, CI-4 or higher.
•
Preferred oil viscosity—SAE 15W40 (above 0°F)
•
Alternate oil viscosity—SAE 10W30 or 5W30 (all
temperatures)
Toro Premium Engine Oil is available from your
distributor in either 15W40 or 10W30 viscosity. Refer
to the
Parts Catalog
for part numbers.
Checking the Engine Oil
Service Interval:
Before each use or daily
Note:
The best time to check the engine oil is when
the engine is cool, before it has been started for the
day. If it has already been run, allow the oil to drain
back down to the sump for at least 10 minutes before
checking.
The engine is shipped with oil in the crankcase;
however, the level of oil must be checked before you
first start the engine and after you have run it.
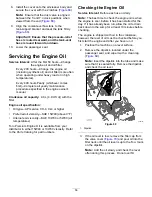
1.
Position the machine on a level surface.
2.
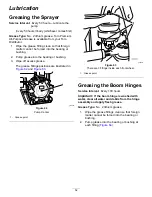
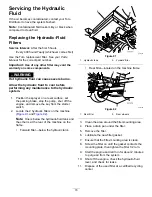
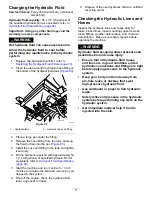
Remove the dipstick, located under the
passenger seat, and wipe it with a clean rag
(
).
Note:
Insert the dipstick into the tube and make
sure that it is seated fully. Remove the dipstick
and check the oil level.
g028154
Figure 69
1.
Dipstick
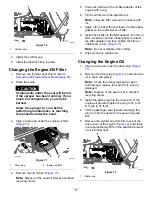
3.
If the oil level is low, remove the filler cap from
the valve cover (
) and pour oil into the
filler neck until the oil level is up to the F
ULL
mark
on the dipstick.
Note:
Add the oil slowly and check the level
often during this process. Do not overfill.
56
Содержание Multi Pro 5800-D
Страница 74: ...Spray System Schematic g034336 Figure 95 74 ...
Страница 89: ...Notes ...
Страница 90: ...Notes ...


