background image

17

The squeegee height has to be adjusted 

depending on how much the rubbers are worn. 

In order to obtain an optimal drying, the lower 

edge of the rear squeegee rubber (1) must be 

slightly bent backward along all its length.

To adjust the rubber bending proceed as 

follows:

Loose the knob (2) for each wheel that 

you want to adjust.  Turn the wheel ferrule 

clockwise in order to decrease the bending or 

counterclockwise to increase the bending of 

the rubber.  Lock the knob keeping the ferrule 

steady.

WEEKLY MAINTENANCE
REAR SQUEEGEE RUBBER CHECK

Check the squeegee rubber wearing and 

eventually turn it or replace it.

For the replacement it is necessary:

1. Take off the squeegee (see chapter 

“CLEANING THE SQUEEGEE”).

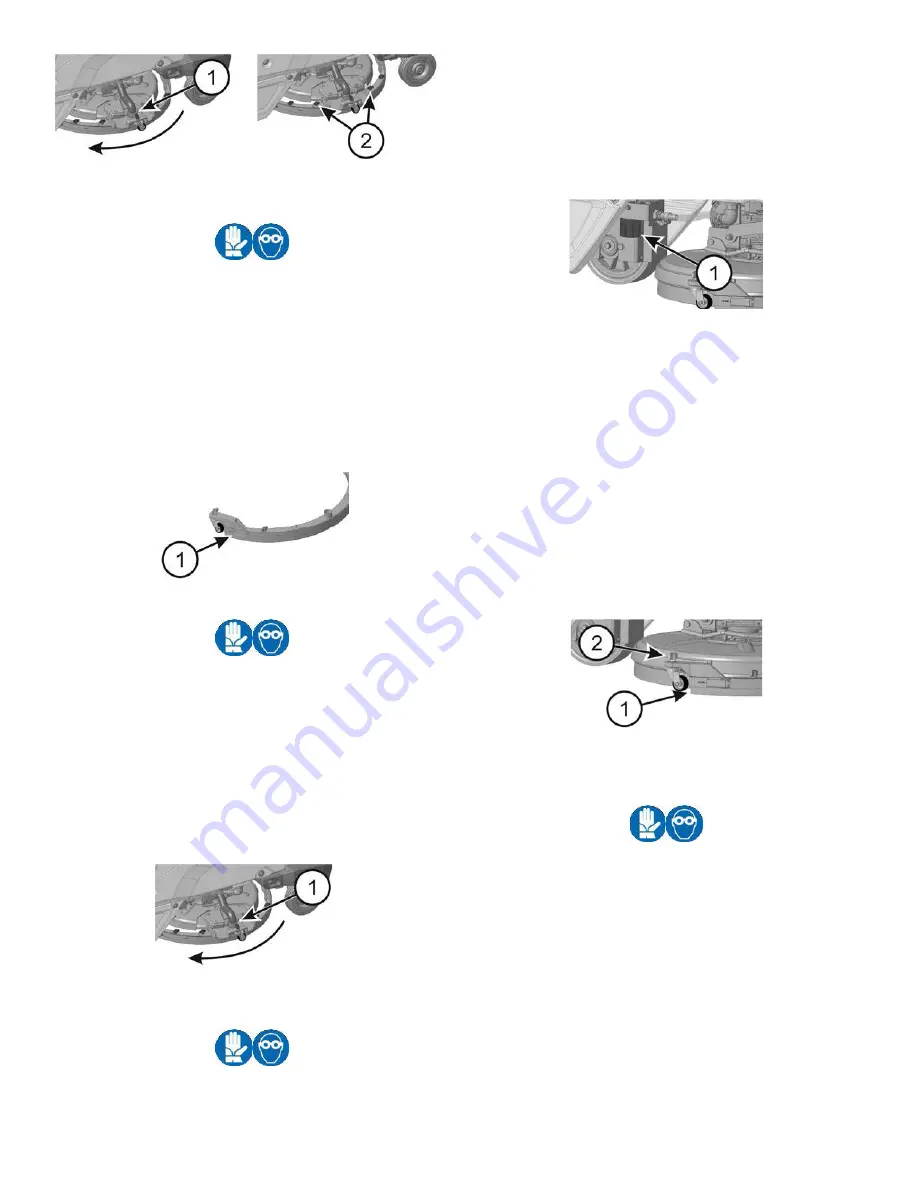
2. Unlock the squeegee blade lock (1).

3. Take off the rubber to turn it around or 

replace it.

To put back the squeegee just repeat these 

operations backwards.

CLEANING THE SQUEEGEE HOSE

Weekly or in case of insufficient suction, it is 

necessary to check that the squeegee hose is 

not obstructed. Eventually, to clean it, proceed 

as follows:

1. With the brush base lifted, rotate the 

squeegee on one side.

2. With the squeegee in such position, take off 

the squeegee hose coupling (1).

Do not wash the hose that goes from the 

suction motor to the recovery tank.

CLEANING THE OUTER FILTER AND THE 

SOLUTION TANK

Take the machine to the place assigned for the 

detergent solution draining. 

1. Unscrew the filter cap (1) and take the filter 

out.

2. Wash the filter components with a water jet.

Once finished, close the valve, reassemble the 

filter and replace the tank cap.

SQUEEGEE HEIGHT ADJUSTMENT

TWO-MONTHLY MAINTENANCE

FRONT SQUEEGEE RUBBER CHECK

Check the wear of the squeegee rubber and 

eventually replace it.

For the replacement it is necessary to:

1. Take off the squeegee (see under paragraph 

“SQUEEGEE CLEANING”).

2. Disassemble the rear part of the squeegee 

(see under paragraph “REAR SQUEEGEE 

RUBBER CHECK”).

3. Unscrew the wing nuts (1) and take off the 

front rubber holder blade (2).

4. Replace the front rubber (3).

To reassemble the squeegee repeat backwards 

the operations above mentioned.

Содержание BDSO 20/21

Страница 1: ...PHONE 800 VACUUMS FAX 817 551 0719 WWW TORNADOVAC COM Operations Maintenance Manual For Commercial Use Only Form No T OM BDSO20 05 2021 Tornado Industries LLC All rights reserved BDSO 20 21 STAND ON A...

Страница 2: ...2 NOTES For warranty information go to www tornadovac com Within 30 days to activate the warranty go to https tornadovac com services warranty registration form aspx...

Страница 3: ...attery charging 11 Battery charging using the on board charger 11 Assembling the brush 12 Assemby and disassembly the splash guards 12 FLOOR CLEANING 12 Connecting the battery connector and switching...

Страница 4: ...case of fire use a powder based fire extinguisher Do not use water Do not use the machine in explosive atmosphere The machine has to carry out simultaneously the operations of washing and drying Diff...

Страница 5: ...imum gradient 10 Suction motor W A 490 20 Suction vacuum mbar in water lift 120 48 Solution tank l gal 58 15 Recovery tank l gal 80 21 Machine length mm in 1220 48 Machine height mm in 649 26 Machine...

Страница 6: ...N KEY SWITCH 12 FORWARD BACKWARD SPEED LEVER 13 HORN MACHINE LEGEND 1 RECOVERY TANK 2 SQUEEGEE HOSE 3 STEERING WHEEL 4 DASHBOARD AND CONTROLS 5 SQUEEGEE LEVER 6 WATER LEVEL HOSE 7 DRIVE PEDAL 8 SIDE B...

Страница 7: ...rge level Suction motor off Suction motor on Brush base up Brush base down Brush base on Squeegee up Squeegee down Maximum speed Solenoid valve on Solenoid valve off The next screen shows HOURMETER SO...

Страница 8: ...gs it is possible to set the machine depending on the batteries installed AGM GEL LEAD ACID XFC To select the setting scroll using buttons 1 and 3 until is shown Battery Press buttons 4 and 5 to selec...

Страница 9: ...l for the safety of both the operator and the machine Warning symbol Risk of acid leaking from the batteries This symbol points that it is imperative to disconnect the wiring from the batteries using...

Страница 10: ...g back the lever on the red position as showed in paragraph 3 Keep the platform and the brackets for an eventual transport The portable slope is not included in the packaging INSTALLING THE BATTERIES...

Страница 11: ...disabled When even the last segment of charge turns off the battery is discharged completely and the machine stops LIFTING THE RECOVERY TANK For some ordinary maintenance operations like battery charg...

Страница 12: ...mble the brush it is necessary to have the brush base lifted from the floor If it is not in such position proceed as follows Without having an operator aboard turn the key to switch on the display the...

Страница 13: ...solution in the recovery tank Never use pure acids A safety device prevents the machine s movement if the operator is not properly placed on the footboard To turn on the machine 1 Step on the footboa...

Страница 14: ...isible on the display In standard mode the detergent solution flow adjustment is made through the lever 1 both in MAN and AUTO mode DETERGENT SOLUTION FLOW ADJUSTMENT AUTOMATIC MODE WORK 1 Automatic m...

Страница 15: ...the key switch is positioned on 1 on the display for the brake signal comes on BRUSHES MOTOR OVERLOAD PROTECTION SYSTEM When this happens try to reduce the brushes pressure see under ADJUSTMENT OF TH...

Страница 16: ...E SUCTION FILTER 1 Open the cover 1 and unscrew the knob 2 to release the filter protection 3 2 Rotate the filter protection clockwise to release it 3 Take off the filter and its protection 4 Clean wi...

Страница 17: ...is necessary to check that the squeegee hose is not obstructed Eventually to clean it proceed as follows 1 With the brush base lifted rotate the squeegee on one side 2 With the squeegee in such posit...

Страница 18: ...vated it is necessary to check the batteries connection to the machine see under paragraph CONNECTION BATTERIES CONNECTION AND SWITCHING ON OF THE MACHINE If the problem persists please contact the au...

Страница 19: ...e inclination of the squeegee see section ADJUSTMENT OF THE SQUEEGEE in BEFORE USE 3 Check that the suction hose is correctly inserted in the proper location on the recovery tank or that it is not clo...

Страница 20: ...l Use with caution in order not to mark the floor or ruin the polishing BRISTLES THICKNESS Thicker bristles are more rigid and must be used on smooth floor or floor with small joints On irregular floo...

Страница 21: ...21 TS120 S59 U...

Отзывы: