background image

122

Flatten and Hone the Back of the Tools

To achieve a really sharp and durable edge, both of the two converging surfaces must be 
smooth. If we sharpen and hone the bevel to perfection but the back is not equally flat and 
smooth, you will never achieve a satisfactory result. On most new tools, the back has vis-
ible grooves from the manufacturing process. These should be removed and the surface 
honed and polished.

Working free-hand, remove the grooves on the side of the grindstone and then hone and 
polish the surface on the leather honing wheel. This work only needs to be done once, when 
you start using the tool. It is a good investment in your quality tool and will last its lifetime.

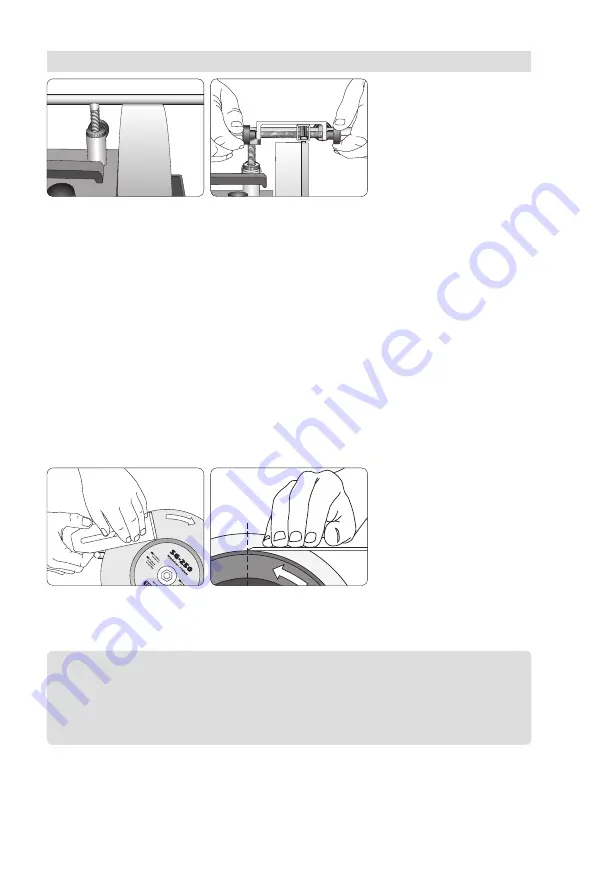
Flatten the back of the tool by 
holding it flat to the grindstone 
while moving it slightly.

Note

  Keep the tool absolutely flat against the grindstone. Otherwise the tip 

can cut into the wheel and be rounded off. Let the side of the tool rest on the  
Universal Support which should be placed close to the stone as shown. You 
do not need to smooth the tool more than 25–30 mm (1–1¼") from the edge.

Before you start grinding, 
check that the stone is true 
by letting the Universal 
Support touch the stone.

If necessary, true it with 
the Truing Tool TT-50 so 
the surface is flat and parallel 
to the Universal Support.

Preparations

Hone the back free-hand. 
Hold the tool so it is a tangent 
to the wheel.

Содержание SE-76

Страница 1: ...the width of the tool and one outer stop 3 mounted on the end of the Universal Support The jig lines up the chisel to its upper flat side making it easier to mount it correctly not twisted Conventiona...

Страница 2: ...ese prevent the tool from slipping off the edges of the stone which can hurt your fingers The inner stop 2 is removed when sharpening blades wider than 60 mm 2 Note The safety stops should be used whe...

Страница 3: ...en you start using the tool It is a good investment in your quality tool and will last its lifetime Flatten the back of the tool by holding it flat to the grindstone while moving it slightly Note Keep...

Страница 4: ...or you set to a new angle according to your choice using the Tormek AngleMaster WM 200 Open the clamp to the thickness of the tool and approximately parallel to the base Mount the tool protruding P a...

Страница 5: ...ter some sharpenings you might need to flatten the back so the hollow does not reach the edge Then use the side of the stone Draw a pencil line on the stone using the Universal Support as guide Align...

Страница 6: ...shavings The camber c varies from 0 8 mm 1 32 for a jack plane down to 0 05 mm 0 002 for a smooth plane A scrub plane should have a much larger camber which cannot be achieved in the SE 76 jig Use th...

Страница 7: ...otates away from you Move the Universal Support to the honing wheel side and mount horizontally The jig gives you full control of the honing angle on the T 7 model Set to the same honing angle as the...

Страница 8: ...sy and fast operation there is no need for a secondary bevel With a single bevel you can set exactly the angle that you want and easily maintain it at every grinding and honing Reduced support length...

Отзывы: