


5
PLUG AND PLAY
PLUG & PLAY DDC2B FEATURE
This monitor is equipped with VESA DDC2B capabilities according to the VESA DDC STANDARD. It allows the monitor to inform the host system of
its identity and, depending on the level of DDC used, communicate additional information about its display capabilities.
The DDC2B is a bi-directional data channel based on the I2C protocol. The host can request EDID information over the DDC2B channel.
THIS MONITOR WILL APPEAR TO BE NON-FUNCTIONAL
THIS MONITOR TO OPERATE PROPERLY, THERE MUST BE A VIDEO INPUT SIGNAL.
This monitor meets the Green monitor standards as set by the Video Electronics Standards Association (VESA) and The Swedish Confederation
Employees (NUTEK). This feature is designed to conserve electrical energy by reducing power consumption when there is no video-input signal
present. When there is no video input signal this monitor, following a time-out period, will automatically switch to an OFF mode. This reduces
the monitor's internal power supply consumption. After the video input signal is restored, full power is restored and the display is automatically
redrawn. The appearance is similar to a "Screen Saver" feature except the display is completely off. The display is restored by pressing a key on the
keyboard, or clicking the mouse.
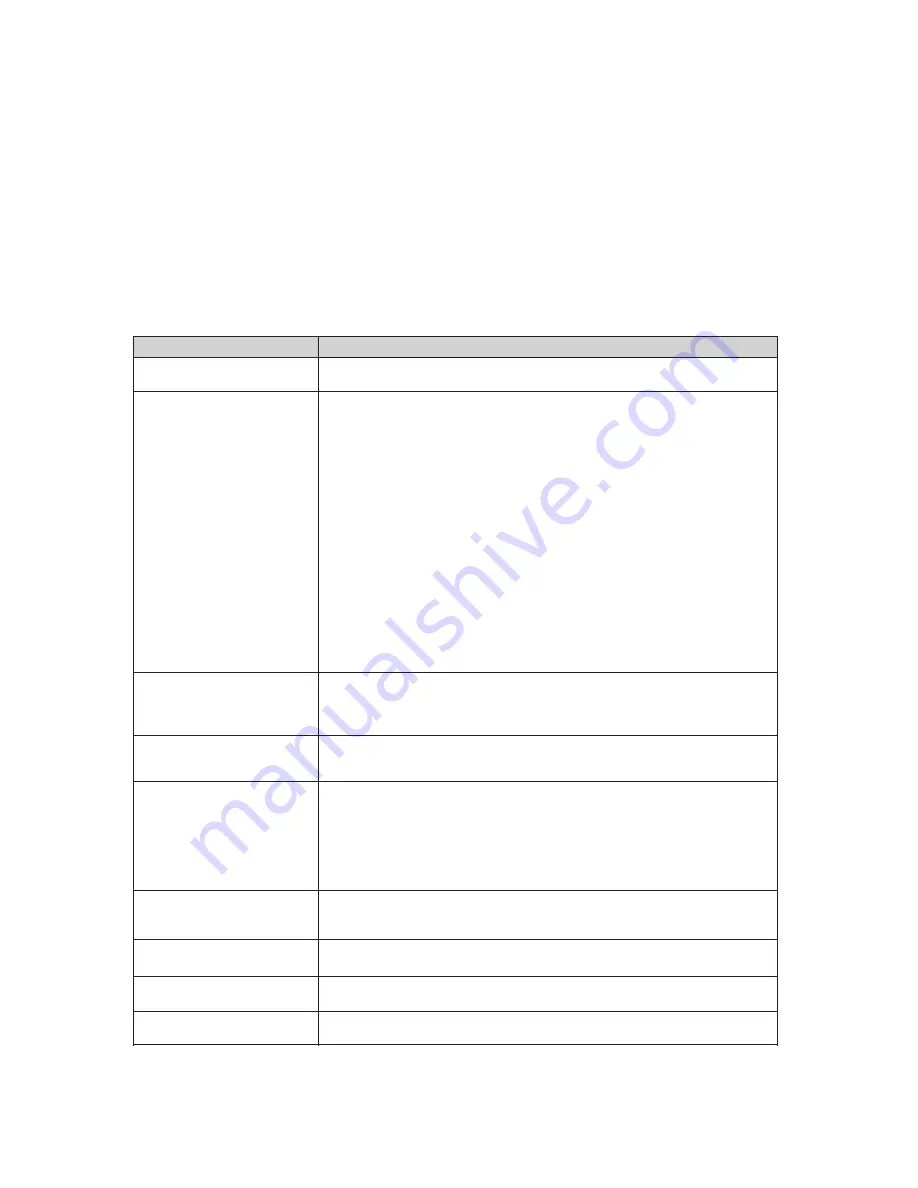
TECHNICAL SUPPORT (FAQ)
Problem & Question
Possible Solution
Power LED is Not ON
Make sure the power button is ON and the Power Cord is properly connected to a
grounded power outlet and to the monitor.
No images on the screen
Is the power cord connected properly?
Check the power cord connection and power supply.
Is the cable connected correctly?
(Connected using the D-sub cable)
Check the DB-15 cable connection.
(Connected using the DVI cable)
Check the DVI cable connection.
* DVI input is not available on every model.
(Connected using the HDMI cable)
Check the HDMI cable connection.
* HDMI input is not available on every model.
If the power is on, reboot the computer to see the initial screen (the login screen), which can be seen.
If the initial screen (the login screen) appears, boot the computer in the applicable mode
(the safe mode for Windows ME/XP/2000) and then change the frequency of the video card.
If the initial screen (the login screen) does not appear, contact the Service Center or your dealer.
Can you see "Input Not Supported" on the screen?
You can see this message when the signal from the video card exceeds the maximum resolution and
frequency that the monitor can handle properly.
Adjust the maximum resolution and frequency that the monitor can handle properly.
Picture Is Fuzzy & Has
Ghosting Shadowing Problem
Adjust the Contrast and Brightness Controls.
Press to auto adjust.
Make sure you are not using an extension cable or switch box. We recommend plugging the monitor
directly to the video card output connector on the back .
Picture Bounces, Flickers Or
Wave Pattern Appears In The
Picture
Move electrical devices that may cause electrical interference as far away from the monitor as possible.
Use the maximum refresh rate your monitor is capable of at the resolution your are using.
Monitor Is Stuck In Active
Off-Mode"
The Computer Power Switch should be in the ON position.
The Computer Video Card should be snugly fitted in its slot.
Make sure the monitor's video cable is properly connected to the computer.
Inspect the monitor's video cable and make sure no pin is bent.
Make sure your computer is operational by hitting the CAPS LOCK key on the keyboard while
observing the CAPS LOCK LED. The LED should either turn ON or OFF after hitting the CAPS
LOCK key.
Missing one of the primary
colors (RED, GREEN, or
BLUE)
Inspect the monitor's video cable and make sure that no pin is damaged.
Make sure the monitor's video cable is properly connected to the computer.
Screen image is not centered
or sized properly
Adjust H-Position and V-Position or press hot-key (AUTO).
Picture has color defects
(white does not look white)
Adjust RGB color or select desired color temperature.
Horizontal or vertical
disturbances on the screen
Use Windows 95/98/2000/ME/XP shut-down mode Adjust CLOCK and PHASE.
Press to auto-adjust.
Содержание EB1927WSL
Страница 1: ...EB1927WSL LCD MONITOR USER S MANUAL...


