background image

EX-91171 User Manual   

10

1.5 Display Mode


Display Mode 

Hori. Sync (KHz) 

Vert. Sync. (Hz) 

 31 60 

VGA 640 x 480 

38 

72 

 38 75 

 35 

56 

SVGA 800 x 600 

38 

60 

 48 72 
 47 75 
 48 60 

XGA 1024 x 768 

56 

70 

 60 75 

1152 x 864 

68 

75 

64 60 


SXGA 


1280 x 1024 

80 75 


Содержание EX-91171

Страница 1: ...EX 91171 User Manual 1 EX 91171 Display Monitor User Manual Release Date Revision Dec 2005 V0 1 May 2007 V0 2 2005 All Rights Reserved Published in Taiwan ...

Страница 2: ...rsuant to FCC Rules which are designed to provide reasonable protection against such interference when operated in a commercial environment Operation of this equipment in a residential area is likely to cause interference in which case the user at his own expense will be required to take whatever measures may be required to correct the interference Disclaimer This information in this document is s...

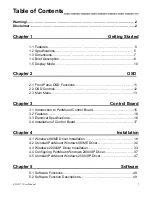
Страница 3: ... Chapter 3 Control Board 3 1 Introduction to PenMount Control Board 15 3 2 Features 16 3 3 Electrical Specifications 16 3 4 Installation of Control Board 17 Chapter 4 Installation 4 1 Windows 98 ME Driver Installation 18 4 2 Uninstall PenMount Windows 98 ME Driver 32 4 3 Windows 2000 XP Driver Installation 33 4 4 Configuring PenMount Windows 2000 XP Driver 37 4 5 Uninstall PenMount Windows 2000 XP...

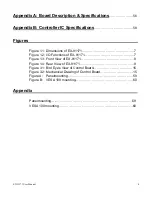
Страница 4: ...Dimensions of EX 91171 7 Figure 1 2 I O Functions of EX 91171 7 Figure 1 3 Front View of EX 91171 8 Figure 1 4 Rear View of EX 91171 9 Figure 3 1 Bird Eye s View of Control Board 15 Figure 3 2 Mechanical Drawing of Control Board 15 Figure A Panelmounting 59 Figure B VESA 100 mounting 60 Appendix Panelmounting 59 VESA 100 mounting 60 ...

Страница 5: ...cifications Display Display 17 SXGA color TFT LCD monitor Maximum resolution 1600 x 1200 with auto phase and auto position Maximum colors 256K Dot size mm 0 264 x 0 264 Luminance 250 cd m Viewing angle 150 degrees H 140 degrees V Backlight life 50 000 hours Control OSD on the front panel Touch screen resistive optional Power Supply Internal Universal AC DC adapter Mechanical Construction heavy dut...

Страница 6: ...nmental Operating temperature 0 to 45 32 to 113 Storage temperature 20 to 60 4 to 140 Relative humidity 10 to 95 40 non condensing Vibration 1G peak 10 150Hz Shock 10G peak acceleration 11 msec duration Certification CE FCC Class A ...

Страница 7: ...EX 91171 User Manual 7 1 3 Dimensions Figure 1 1 Dimensions of the EX 91171 Figure 1 2 I O Functions of the EX 91171 ...

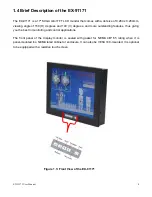
Страница 8: ...and 140 V degrees and more outstanding features thus giving you the best in monitoring and control applications The front panel of the display monitor is sealed with gasket for NEMA 4 IP 65 rating when it is panel mounted in a NEMA rated cabinet or enclosure It can also be VESA 100 mounted It is optional to be equipped with a resistive touch screen Figure 1 3 Front View of the EX 91171 ...

Страница 9: ...EX 91171 User Manual 9 Figure 1 4 Rear View of EX 91171 ...

Страница 10: ...Manual 10 1 5 Display Mode Display Mode Hori Sync KHz Vert Sync Hz 31 60 VGA 640 x 480 38 72 38 75 35 56 SVGA 800 x 600 38 60 48 72 47 75 48 60 XGA 1024 x 768 56 70 60 75 1152 x 864 68 75 64 60 SXGA 1280 x 1024 80 75 ...

Страница 11: ...n press don t let them go the buttons until the AC power cord is connected and the RGB appears on the top left corner of your screen Now it can be put into the burn in mode for changing colors 2 Getting Out of Burn in Mode Before getting out of the burn in mode please first disconnect the AC power cord Then press the button If not workable press the button and don t let them go until the AC power ...

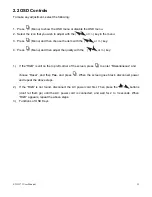
Страница 12: ...enu and then adjust the quality with the or key 1 If the RGB is still on the top left corner of the screen press to enter Miscellaneous and choose Reset and then Yes and press When the screen goes black disconnect power and repeat the above steps 2 If the RGB is not found disconnect the AC power cord first Then press the buttons don t let them go until the AC power cord is connected and wait for 2...

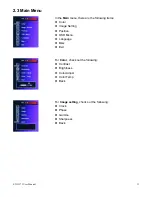
Страница 13: ...he following items z Color z Image Setting z Position z OSD Menu z Language z Misc z Exit For Color check out the following z Contrast z Brightness z Color Adjust z Color Temp z Back For Image setting check out the following z Clock z Phase z Gamma z Sharpness z Back ...

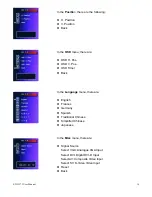
Страница 14: ...z OSD V Pos z OSD Timer z Back In the Language menu there are z English z Frances z Germany z Spanish z Traditional Chinese z Simplified Chinese z Japanese In the Misc menu there are z Signal Source Select VGA Analogue VGA Input Select DVI Digital DVI D Input Select AV Composite Video Input Select SV S Video Video Input z Reset z Back ...

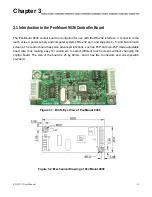
Страница 15: ... computer system s RS 232 port and supports 4 5 and 8 wire touch screens The control board has some advanced functions such as PnP and non PnP mode adjustable baud rate thus making easy for customers to select different touch screens without changing the control board The size of the board is 25 by 60mm and it has two connectors and one dipswitch on board Figure 3 1 Bird s Eye View of PenMount 903...

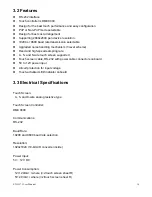
Страница 16: ...h speed sampling rate z 4 5 and 8 wire touch screen supported z Touch screen cable RS 232 with power cable connectors onboard z 5V to 12V power input z Circuit protection for input voltage z Touch activated LED indicator onboard 3 3 Electrical Specifications Touch Screen 4 5 and 8 wire analog resistive type Touch Screen Controller DMC9000 Communications RS 232 Baud Rate 19200 and 9600 baud rate se...

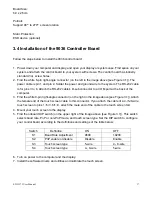
Страница 17: ... back of the computer 3 Find the white 9 pin right angle connector on the right in the image above see Figure 3 1 Attach the female end of the touch screen cable to this connector If you attach the cable of a 4 5 8 wire touch screen to pins 1 5 1 6 1 9 attach the male end of the cable to the touch screen tail 4 Mount your touch screen to the display 5 Find the onboard DIP switch on the upper right...

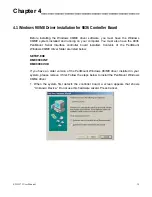
Страница 18: ...036 PenMount Serial Interface controller board installed Contents of the PenMount Windows 98 ME driver folder are listed below SETUP EXE DMC9000 INF DMC9000 VXD If you have an older version of the PenMount Windows 98 ME driver installed in your system please remove it first Follow the steps below to install the PenMount Windows 98 Me driver 1 When the system first detects the controller board a sc...

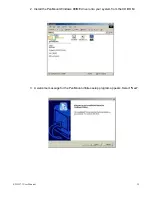
Страница 19: ...EX 91171 User Manual 19 2 Install the PenMount Windows 98 ME driver onto your system from the CD ROM 3 A welcome message for the PenMount utilities setup program appears Select Next ...

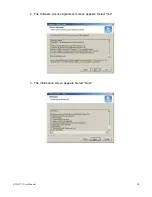
Страница 20: ...EX 91171 User Manual 20 4 The Software License Agreement screen appears Select Yes 5 The Information screen appears Select Next ...

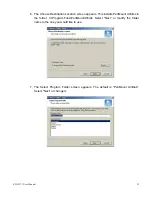
Страница 21: ...een appears This installs PenMount Utilities in the folder C Program Files PenMount Win9x Select Next or modify the folder name to the one you would like to use 7 The Select Program Folder screen appears The default is PenMount Utilities Select Next or change it ...

Страница 22: ...EX 91171 User Manual 22 8 The Start Copying Files screen appears Select Next to copy files to the system 9 The Setup Complete screen appears Select Finish ...

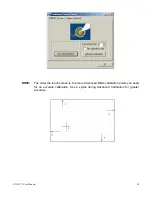
Страница 23: ...Panel The functions of the PenMount Control Panel are explained in the following sections Calibrate This function offers two ways to calibrate your touch screen Standard Calibration adjusts most touch screens Advanced Calibration adjusts aging touch screens Standard Calibration Click this button and arrows appear pointing to red squares Use your finger or stylus to touch the red squares in sequenc...

Страница 24: ...EX 91171 User Manual 24 NOTE The older the touch screen is the more Advanced Mode calibration points you need for an accurate calibration Use a stylus during Advanced Calibration for greater accuracy ...

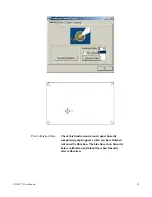
Страница 25: ...Calibration Data Check this function and a touch panel linearity comparison graph appears when you have finished Advanced Calibration The blue lines show linearity before calibration and black lines show linearity after calibration ...

Страница 26: ...EX 91171 User Manual 26 Draw Tests or demonstrates the PenMount touch screen operation The display shows touch location Click Draw to start ...

Страница 27: ...91171 User Manual 27 Touch the screen with your finger or a stylus and the drawing screen will register touch activity such as left right up down pen up and pen down Click Clear Screen to clear the drawing ...

Страница 28: ...or configuring POS terminals Stream Mode Select this mode and the mouse functions as normal and allows dragging of icons Point Mode Select this mode and the mouse only provides a click function and dragging is disabled Beep Sound Mode Enable Beep Sound turns beep function on and off Beep on Pen Down beep occurs when pen comes down Beep on Pen Up beep occurs when pen is lifted up Beep on both of Pe...

Страница 29: ...ut the PenMount controller and this driver version PenMount Monitor Menu Icon The PenMount monitor icon PM appears in the menu bar of Windows 98 ME system when you turn on the PenMount Monitor in the PenMount Utilities The PenMount Monitor has the following functions ...

Страница 30: ...gged and plugged into the serial port Exit Exits the PenMount Monitor function PenMount Rotating Functions The PenMount driver for Windows 98 ME supports several display rotating software packages The PenMount drivers for Windows 95 Windows 98 ME Windows 2000 XP as well as Windows 98 USB and Windows ME 2000 XP support display rotating software packages such as Portrait s Pivot Screen Rotation Soft...

Страница 31: ...1 Install the rotation software package 2 Choose the rotating function 0 90 180 270 in the 3rd party software The calibration screen appears automatically Touch this point and rotation is mapped NOTE The Rotating function is disabled if you use Monitor Mapping ...

Страница 32: ...u bar 2 From PenMount Utilities in Programs select the Uninstall utility 3 This message appears Are you sure you want to completely remove PenMount Utilities and all its components 4 Select Yes to remove the PenMount Windows 98 ME driver 5 Reboot system and the PenMount Windows 98 ME driver is removed from system ...

Страница 33: ...ce controller board installed Contents of the PenMount Windows 2000 XP driver folder are listed below DMC9000 inf DMC9000 sys DMC9000 cat SETUP EXE If you have an older version of the PenMount Windows 2000 XP driver installed in your system please remove it first Follow the steps below to install the PenMount Windows 2000 XP driver 1 When the system first detects the controller board a screen appe...

Страница 34: ...EX 91171 User Manual 34 2 Insert the PenMount Driver CD ROM Go to the Windows 2000 XP Driver folder Click setup exe 3 The screen displays the installation wizard for the PenMount software Click Next ...

Страница 35: ...EX 91171 User Manual 35 3 A License Agreement appears Click I accept and Next 4 The Ready to Install the Program screen appears Select Install ...

Страница 36: ...EX 91171 User Manual 36 5 The next screen is Hardware Installation Select Continue Anyway 6 The InstallShield Wizard Completed appears Click Finish ...

Страница 37: ...ple Monitors Option and About which are explained in the following sections Calibrate This function offers two ways to calibrate your touch screen Standard Calibration adjusts most touch screens Advanced Calibration adjusts aging touch screens Standard Calibration Click this button and arrows appear pointing to red squares Use your finger or stylus to touch the red squares in sequence After the fi...

Страница 38: ...EX 91171 User Manual 38 NOTE The older the touch screen is the more Advanced Mode calibration points you need for an accurate calibration Use a stylus during Advanced Calibration for greater accuracy ...

Страница 39: ...Calibration Data Check this function and a touch panel linearity comparison graph appears when you have finished Advanced Calibration The blue lines show linearity before calibration and black lines show linearity after calibration ...

Страница 40: ...ation Click Draw to start Touch the screen with your finger or a stylus and the drawing screen will register touch activity such as left right up down pen up and pen down Touch the screen with your finger or a stylus and the drawing screen will register touch activity such as left right up down pen up and pen down ...

Страница 41: ...her installed inside the display or in a central unit The PenMount control boards must be connected to the computer COM ports via the RS 232 interface Driver installation procedures are the same as for a single monitor Multiple Monitors support the following modes Windows Extends Monitor Function Matrox DualHead Multi Screen Function nVidia nView Function NOTE The Multiple Monitor function is for ...

Страница 42: ...l 42 Enable the multiple display function as follows 1 Check the Enable Multiple Monitor Support box then click Map Touch Screens to assign touch controllers to displays 2 When the mapping screen message appears click OK ...

Страница 43: ...e of the screens Touch the screen 7 Touch the red square messages appear Touch the red squares in sequence 8 Continue calibration for each monitor by clicking Standard Calibration and touching the red squares NOTES 1 If you use a single VGA output for multiple monitors please do not use the Multiple Monitor function Just follow the regular procedure for calibration on each of your desktop monitors...

Страница 44: ...t the PenMount controller and this driver version PenMount Monitor Menu Icon The PenMount monitor icon PM appears in the menu bar of Windows 2000 XP system when you turn on the PenMount Monitor in the PenMount Utilities The PenMount Monitor has the following functions ...

Страница 45: ...n the right bottom of the screen Click this icon to switch between Right and Left Button functions Pen Stabilizer Check this function to reduce cursor vibration for relatively unstable touch screens or where there may be excess vibration Normally this function is not checked Exit Exits the PenMount Monitor function ...

Страница 46: ...uch as Portrait s Pivot Screen Rotation Software ATI Display Driver Rotating Function nVidia Display Driver Rotating Function SMI Display Driver Rotating Function Intel 845G GE Display Driver Rotating Function Configuring the Rotation Function 1 Install the rotation software package 2 Choose the rotating function 0 90 180 270 in the 3rd party software The calibration screen appears automatically T...

Страница 47: ...or PM in the menu bar 2 Go to Settings then Control Panel and then click Add Remove program Select PenMount DMC9000 and click the Add Remove button 3 Select PenMount DMC9000 and DMC9100 Click the Remove button 4 Select Yes and Close to remove the PenMount Windows 2000 XP driver and reboot the system ...

Страница 48: ...functions and their availability for specific interface and systems are shown in the table below a description for each function follows Software Function DOS Win 3 1 95 98 Me NT 2000 XP CE Linux QNX Standard Calibration Advanced Calibration Multiple Monitors Multi Device Rotation Stream Point mode Drawing mode Beep Sound Beep sound adjustable Wake up function Showing linearity Right button Hide c...

Страница 49: ...cy Errors in calibration may occur due to viewing angle or individual skill and there may be little difference in using 16 or 25 points Note that a stylus is recommended for the most accurate results Multiple Monitors Until now most touch screen systems only support one monitor and users of multiple monitors have not been able to use touch screen systems This situation has inspired PenMount to des...

Страница 50: ... same image Software that supports this function includes the PenMount 9000 2000 XP drivers and the PenMount 5000 98 Me 2000 XP CE drivers The drivers for PenMount 9000 can support up to six control boards and the drivers for PenMount 5000 support up to 16 Comparing Functions The difference between the Multiple Monitors function and the Multiple Devices function are illustrated below or The Multip...

Страница 51: ...ith 9000 Control Boards 1 Configure your computer hardware 2 Attach each 9000 Control Board to a different computer s serial port 3 Install the appropriate PenMount software driver in each computer 4 Use each driver s Calibration function to calibrate each computer s touch screen You must calibrate each touch screen before configuration is complete Rotation There are currently a number of software...

Страница 52: ...91171 User Manual 52 to touch Once the point is touched the software driver understands which degree you plan to rotate your display The rotation function supports 90 180 and 270 degrees rotation 0 degrees ...

Страница 53: ...EX 91171 User Manual 53 90 degrees 180 degrees 270 degrees ...

Страница 54: ...rence of noise and smooths the drawing of lines Beep Sound All of PenMount s drivers support the beep sound function however some PC systems may only offer a fixed buzzer sound Beep Sound Adjustable Software drivers for Windows systems let the user adjust the frequency and length of the beep sound The drivers let the user adjust the desired touch screen sound as well as turn the sound off Wake Up ...

Страница 55: ...aring when using the touch screen The cursor appears when the user turns this function off Cursor Offset The Cursor Offset function lets the user adjust the position of the touch point to a desired location away from the real touch point Double Click Area and Speed The Double Click Area and Speed function lets the user adjust the double click area and speed to their personal preference About This ...

Страница 56: ... touch screen Baud rate 19200 or 9600 bps selectable Automatic pin assignment adjustment Input voltage is 5V to 12V Bundled with PenMount drivers which are also available for download from our website Connector Pin Definitions Pin definitions for the two connectors on the PenMount 9036 control board follow Connector Pin Definitions for Touch Screen Pin definition wires 4 wire touch screen 5 wire t...

Страница 57: ...EX 91171 User Manual 57 Connector Pin Definitions for Power and RS 232 Power Lines RS 232 Interface Pin PIN 1 PIN 2 PIN 3 PIN 4 PIN 5 PIN 6 Definition Ground 5V 12V power RTS TXD RXD Ground ...

Страница 58: ...circuit board Electrical Specifications Touch Screen 4 5 8 wire Package 28 pin PDIP or 32 pin TQFP Communications RS 232 Characteristics 8 bit RISC microprocessor with built in functions including 10 bit ADC UART Timer Counter Comparator Watchdog Memory etc Voltage Range 4 0V to 6 0V Power Consumption at 4 MHz 3V Active 3 4 mA Idle Mode 1 4mA Power Down Mode 1 µA Operating Temperature 40o C to 85o...

Страница 59: ...l or VESA 100 mounted as shown in Figure A and Figure B Just carefully place the unit through the hole and tighten the given 8 screws from the rear to secure the mounting Figure A Panelmounting of the EX 91171 How to Mount 1 Just insert the bracket into the hole 2 Slightly push the bracket back 3 And screw it tight as the arrow shows ...

Страница 60: ...Mounting optional The EX 91171 display monitor can be VESA mounted as an option Just carefully mount the arm onto the rear of the unit by fastening the given four screws as shown in Figure B Figure B VESA 100 mounting of the EX 91171 ...

Отзывы: