


EX-93211/93511/93711/93911User Manual
61
Chapter 5 Touch Screen Installation
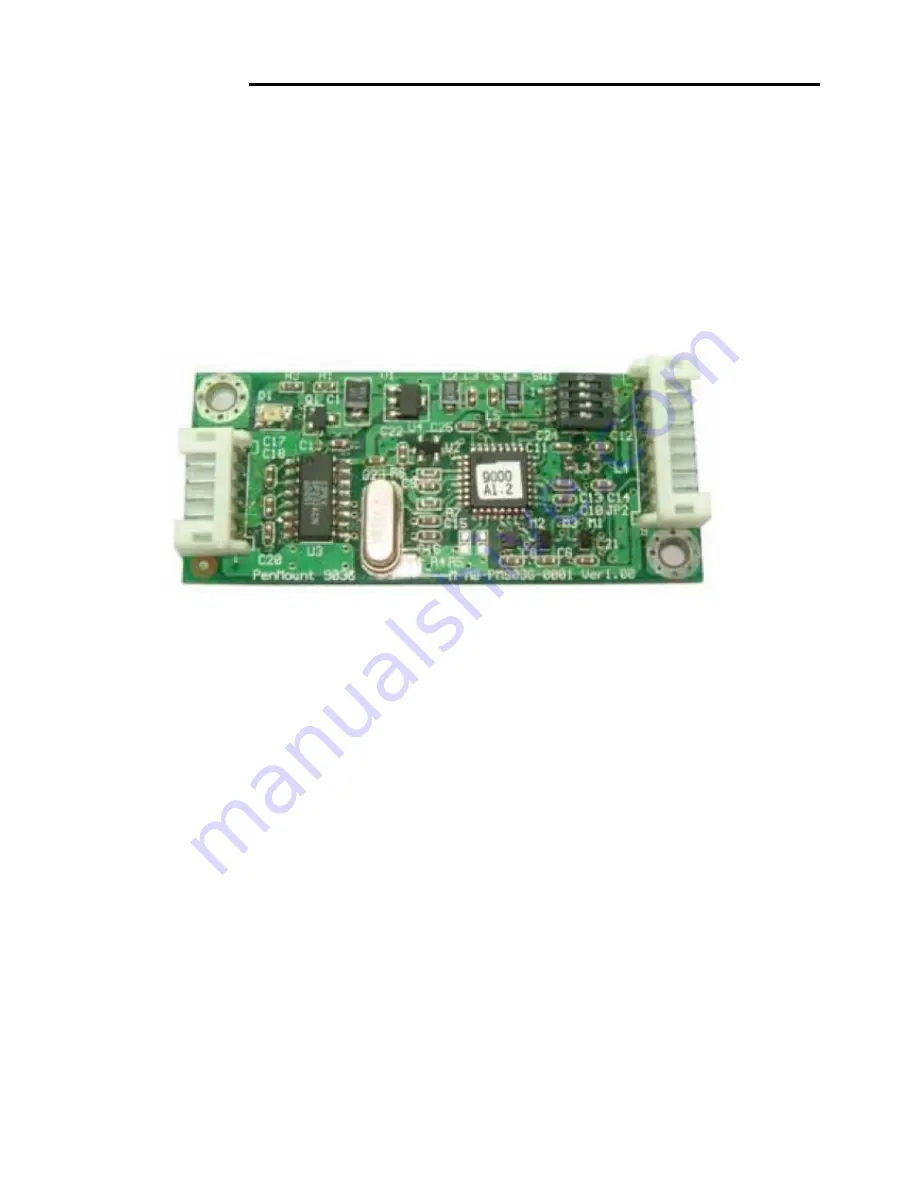
5.1 Introduction to Touch Screen Controller Board
The control board is configured for use with the RS-232 interface. It connects to the touch screen,
power supply and computer system’s RS-232 port, and supports 4-, 5- and 8-wire touch screens. The
control board has some advanced functions, such as PnP and non-PnP mode adjustable baud rate,
thus making easy for customers to select different touch screens without changing the control board.
The size of the board is 25 by 60mm, and it has two connectors and one dipswitch on-board.
Figure 5.1: Bird’s Eye View of Control Board
5.2 Windows 2000/XP Driver Installation for Control Board
Before installing the Windows 2000/XP driver software, you must have the Windows
2000/XP system installed and running on your computer. You must also have the 9036
PenMount Serial Interface controller board installed. Contents of the PenMount
Windows 2000/XP driver folder are listed below:
DMC9000.inf
DMC9000.sys
DMC9000.cat
SETUP.EXE
If you have an older version of the PenMount Windows 2000/XP driver installed in your
system, please remove it first. Follow the steps below to install the PenMount Windows
2000/XP driver.
Содержание EX-93211
Страница 7: ...EX 93211 93511 93711 93911User Manual 7 1 2 Dimensions Figure 1 1 Dimensions of the EX 93211...
Страница 8: ...EX 93211 93511 93711 93911User Manual 8 Figure 1 2 Dimensions of the EX 93511...
Страница 9: ...EX 93211 93511 93711 93911User Manual 9 Figure 1 3 Dimensions of the EX 93711...
Страница 10: ...EX 93211 93511 93711 93911User Manual 10 Figure 1 3 Dimensions of the EX 93911...
Страница 15: ...EX 93211 93511 93711 93911User Manual 15 Figure 1 6 Rear View of EX 93211 93511 93711 93911...
Страница 16: ...EX 93211 93511 93711 93911User Manual 16 Chapter 2 Hardware 2 1 Mainboard Figure 2 1 Mainboard Overview...
Страница 20: ...EX 93211 93511 93711 93911User Manual 20...
Страница 21: ...EX 93211 93511 93711 93911User Manual 21...
Страница 22: ...EX 93211 93511 93711 93911User Manual 22...
Страница 24: ...EX 93211 93511 93711 93911User Manual 24...
Страница 25: ...EX 93211 93511 93711 93911User Manual 25...
Страница 26: ...EX 93211 93511 93711 93911User Manual 26...
Страница 27: ...EX 93211 93511 93711 93911User Manual 27...
Страница 28: ...EX 93211 93511 93711 93911User Manual 28...
Страница 29: ...EX 93211 93511 93711 93911User Manual 29...
Страница 30: ...EX 93211 93511 93711 93911User Manual 30...
Страница 51: ...EX 93211 93511 93711 93911User Manual 51...
Страница 52: ...EX 93211 93511 93711 93911User Manual 52...
Страница 53: ...EX 93211 93511 93711 93911User Manual 53...
Страница 54: ...EX 93211 93511 93711 93911User Manual 54...
Страница 55: ...EX 93211 93511 93711 93911User Manual 55...
Страница 56: ...EX 93211 93511 93711 93911User Manual 56...
Страница 57: ...EX 93211 93511 93711 93911User Manual 57...
Страница 58: ...EX 93211 93511 93711 93911User Manual 58...
Страница 59: ...EX 93211 93511 93711 93911User Manual 59...
Страница 60: ...EX 93211 93511 93711 93911User Manual 60...
Страница 70: ...EX 93211 93511 93711 93911User Manual 70 The PenMount Monitor has the following functions...


