background image

www.topromobility.com

11

PEGASUS

EN

EN

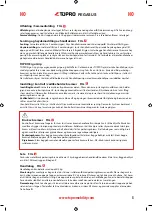
Seat FIG.

6

The parking brakes must be on before using the seat A. Push both brake handles B downwards until they lock. Both 

rear wheels are now locked. Sit with your back towards the shopping bag C.

Shopping Bag  FIG.

8

The shopping bag can carry goods up to 10 kg.

Attach: To mount the shopping bag, stand behind the rollator (driving position) B and apply the parking brakes A

Place the hooks in the hole positions on top on each side of the frame C. Slightly turn the hooks outwards and push 

them gently down. You will hear a “click” sound when the hooks are positioned correctly. Please note that on the back 

side of the shopping bag, there are two Velcro straps. For a better weight distribution, we advise to use the Velcro 

straps by attaching them around the lower part of the cross bar.

Remove: To remove the shopping bag, stand behind the rollator (driving position) B and apply the parking brakes A

Start with loosening the Velcro straps at the lower part of the cross bar. Next grip the lower part of the hooks, turn 

them slightly outwards and push them upwards to detach them from the holes D.

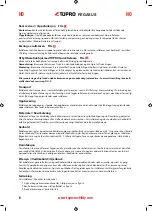
Edge guard // Tilt function  FIG.

7

Edge guard: The edge guard A, which is in front of the rear wheels, prevents the rear wheels from catching on cor-

ners, door frames etc.

Tilt function: To use the tilt function use the front of the foot and press down on the tilt pedal B located beside the 

rear wheel. This helps to tilt the rollator over thresholds, edges etc. Please note: Take care when descending kerbs. Do 

not use the rollator on stairs.

Carrying the rollator  FIG.

9

The rollator must not be carried by the seat strap or the brake wires. Fold the rollator together according to section 

Unfolding / folding

. Carry the rollator by the folded seat bars A.

Disconnect/connect the rear wheels with TORPO Quick Release  FIG.

10

If you want to remove the rear wheels for transportation or replacement, follow these instructions: 

Removal: Loosen the brake lever. Push down the red button on the hub A and slide the wheel off the axle while still 

pushing the button down. 

Attachment: Loosen the brake lever. Slide the wheel unto the axle B. Push the wheel as far as possible inwards on the 

axle to make the wheel snap onto the axle. You will hear a “click” when the wheel is in place. The wheel is securely fas-

tened when the axle is completely visible in the middle of the hub C. Gently pull the wheel to check that it is securely 

fastened to the axle. 

After the new wheel has been applied to the rollator, make sure that the brake lever is reattached, and the brakes 

are functioning properly. Readjust them if necessary (see section Adjusting / checking / maintaining the brakes).

Transport

The rollator should be transported in the folded and locked position (see paragraph 

Unfolding / Folding

). Ensure that 

the rollator cannot unfold unintentionally. Be careful when loading the rollator into a vehicle, giving attention to se-

curing of the item thus avoiding damage to the rollator frame and other parts of the rollator. Do not put heavy items 

on top of the rollator.

Storage

The rollator should be stored in an upright position. It can be stored in- and outdoors, if stored outdoors then it should 

be under cover. Do not put heavy items on top of the rollator during storage. Do not leave your device unattended.

Material // Recycling

The rollator consists of an acrylic-coated carbon frame, aluminium pipes, plastic couplings and a material made of 

plastic and polyester. All outer parts are corrosion protected. Most parts can be recycled. Disposal of the rollator and 

its packaging should be in accordance with the applicable regulations in your country. For information, please con-

tact your public authorities.

Cleaning

The rollator can be hosed and washed with mild household detergents. Please use warm water (not exceeding 45 °C) 

and a clean, nonabrasive cloth. Do not use scrub detergents, steam- or high-pressure cleaners. The bag must be de-

tached before cleaning of the rollator. The bag can be removed and washed gently at max. 40 °C. Do not spin-dry, to 

avoid damage to the side panels. Remember to close the bag before laundering.

Содержание 815020-125000

Страница 1: ...way NO Bruksanvisning 3 7 EN User manual 8 12 DE Bedienungsanleitung 13 17 FR Manuel d instructions 18 22 NL Gebruiksaanwijzing 23 27 TOPRO PEGASUS CARBON FOR LIGHTWEIGHT TOPRO FOR QUALITY www topromo...

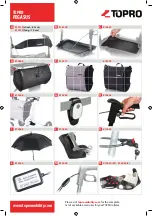
Страница 2: ...available accessories for yourTOPRO rollator 815270 short 67 cm 815272 long 75 cm A 814728 B 814059 C 814046 D 815277 815278 E 814026 M 814029 M 814035 L N 815236 F 814024 L 815260 G 814023 K 814626...

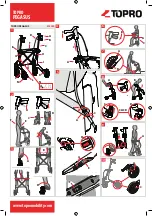
Страница 3: ...2 4 6 B A C 7 A B CLICK D C B A 8 A A 9 10 TOPRO PEGASUS www topromobility com 5 TOPRO PEGASUS 815020 G E 3 C CLICK B A D C A F B A F E C D G B B C A 1 A B C I D E F H G J L K N O D M A B C...

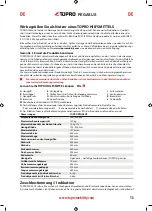
Страница 4: ...nsiden av innbretten Bli kjent med ditt TOPRO HJELPEMIDDEL FIG 1 A Kj reh ndtak E L seb yle I Sideramme B Bremsehendel F Sete med stropp for sammenfolding J Kantavviser C H ndtaksr r G L seratt for h...

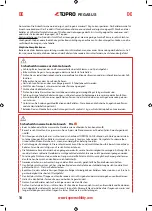
Страница 5: ...sbrems begge sider m v re p B f r bruk av sete C Ikke b y deg bakover eller til sidene n r du sitter p setet D For unng risiko for velt m du heller ikke lene rullatoren for mye til siden maks 5 Av sam...

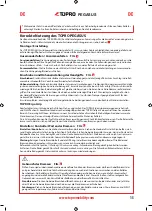
Страница 6: ...Bremsene m ikke v re s stramme at de presses hardt inn i dekkenes gummi n r parkeringsbremsen er p Vedlikehold Hvis n dvendig rengj r bremseklossen F og pningen i bremsedekselet E Hjulene og bremsene...

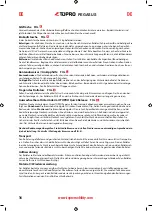
Страница 7: ...latoren b r oppbevares st ende Kan oppbevares utend rs men da helst under tak Ikke legg tunge gjenstander opp rullatoren Ikke forlat rullatoren uten tilsyn Materiale Resirkulering Rullatoren er laget...

Страница 8: ...glidel s E Handlebag lysegr Handlebag m rkegr F Krykkeholder G LED lykt med klips og USB kontakt H Ringeklokke I Paraply med feste svart J Transportbag K L s L Navneskilt M Enh ndsbrems N Isbrodder f...

Страница 9: ...used on the product The expected life span of the product is estimated to be 10 years provided that it is used in the correct manner ac cording to this user manual and its safety and maintenance instr...

Страница 10: ...w to use it correctly Do not alter the product as this might put your safety at risk and the guarantee will be void When using the crutch holder accessory do not load it with more than 1 kg to avoid d...

Страница 11: ...nd grip at the front of the handle This gives you a better gripping position when getting up from a chair or couch Always make sure that the parking brake is locked in when you do this The new hand gr...

Страница 12: ...brake lever Push down the red button on the hub A and slide the wheel off the axle while still pushing the button down Attachment Loosen the brake lever Slide the wheel unto the axle B Push the wheel...

Страница 13: ...lator Troubleshooting guide If the rollator does not work as expected Check that both brake handles are in the correct position see figure 2 Check that the rollator is unfolded correctly see figure 3...

Страница 14: ...er Bedienungsanleitung und der darin beschriebenen Sicherheits undWartungsanweisungen Die roten nummerierten K stchen unten beziehen sich auf die Nummern in den Illustrationen auf der Innenseite der B...

Страница 15: ...scht Beladen Sie den Stockhalter bei der Nutzung mit nicht mehr als 1 kg um Stabilit tseinbu en zu vermeiden Sicherheitshinweise beim Gebrauch FIG 2 Beim Anhalten oder Parken immer die Standbremsen au...

Страница 16: ...Grip bietet ergonomische Greif und St tzfl chen Er kombiniert die klassische Handgriffposition desTOPROTroja mit einem Greifknauf im vorderen Bereich Das erm glicht Ihnen leichter aus einem Sessel ode...

Страница 17: ...den Auswechselbare Hinterr der mit TOPRO Quick Release FIG 10 M chten Sie die Hinterr der an IhremTOPRO Pegasus f r denTransport abnehmen oder auswechseln gehen Sie wie folgt vor Abnehmen Die Bremsheb...

Страница 18: ...reinsatz sind die hier genanntenTeile am Rollator ebenfalls zu kontrollieren und gegebenenfalls auszutauschen bzw einzustellen Beachten Sie hierzu bitte auch die Anweisungen in dieser Bedienungsanleit...

Страница 19: ...rieur du manuel d instructions Apprenez conna tre votre TOPRO AUXILIAIRE FIG 1 A Poign e E Dispositif de verrouillage I Cadre lat ral B Levier de frein F Si ge avec ruban pour m canisme de pliage J D...

Страница 20: ...ion FIG 2 Toujours utiliser les freins de stationnement gauche et droit lors de l arr t ou du stationnement B Avant de vous asseoir C assurez vous que les freins de stationnement gauche et droit sont...

Страница 21: ...auteuil ou d un canap Veillez toujours serrer les freins de stationnement gauche et droit La poign e permet galement de se tenir debout avec le d ambulateur En changeant votre prise vous pouvez ajuste...

Страница 22: ...frein Pliez le d am bulateur comme indiqu dans le chapitre D plier plier et portez le par les deux barres lat rales A Roues interchangeables avec TOPRO Quick Release FIG 10 Si vous souhaitez retirer l...

Страница 23: ...isation Veuillez galement respecter les instructions de ce manuel sur les th mes de l entretien des freins du nettoyage et de la d sinfection du d ambulateur Guide de d pannage Si le d ambulateur ne f...

Страница 24: ...ebruikt en de gebruikershandleiding de veiligheids en onderhoudsinstructies worden gehanteerd De rode genummerde vierkanten hieronder verwijzen naar de genummerde afbeeldingen Leer uw TOPRO ROLLATOR k...

Страница 25: ...u de rollator niet gebruikt B Zorg ervoor dat beide parkeerremmen geblokkeerd staan B bij het gaan zitten of weer opstaan C Om veiligheidsredenen niet achteroverleunen of buigen over de achterzijde v...

Страница 26: ...ijdens het staan en zo uw comfort te verhogen Bij het duwen van de rollator moeten uw handen altijd in de originele grippositie worden gehouden om de remmen te gebruiken Aanpassen controleren van de r...

Страница 27: ...sport of vervanging Verwijderen Maak de remhendel los Druk op de rode knop bij de naaf A de kant gemarkeerd met TOPRO Schuif het wiel van de as B terwijl u de knop ingedrukt houdt Bevestigen Maak de r...

Страница 28: ...rollator niet werkt zoals verwacht Controleer of beide remhendels in de juiste positie staan zie figuur 2 Controleer of de rollator correct is uitgeklapt zie figuur 3 Controleer of de remmen correct z...

Страница 29: ...22 cs topro de www topromobility com TOPRO GmbH Zweigniederlassung Stetten Im Stetterfeld 2 5608 Stetten SWITZERLAND Tel 41 0 44 940 36 50 Fax 41 0 44 940 36 51 mail topro ch www topromobility com TO...

Отзывы: