background image


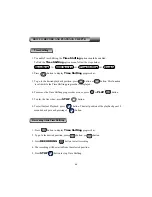
1.    Start playback a recorded service.

2.    Press            button to display 


Playback progress


bar.

3.    To specify one end of region, press the            button with the progress bar.

4.    Move the cursor by pressing            (or       ) or             (or       ) button.

5.    To cut out selected region, press the            button once more.


57


4.   Start playback the recorded video you want to copy.

The fast/slow motion copying is possible by fast/slow motion playback.

5.   Start copying by  


RECORDING 


Button.

6.   The video displayed on TV will be copied.

7.   Press 


STOP 


button to stop copying.

8.   Press 


STOP 


button again to stop playback


Caution


: If the copying time is less than about 1 minute, copying will not be done 

successfully.

During recording, Time Shifting is possible only in the recorded channel.


Time Shifting while Recording

Cut Out Selected Region

Содержание TF4000PVR CoCI

Страница 1: ...rsonal Video Recorder Please read this User s Manual carefully The menu structure and specification can be changed without notice Personal Video Recorder Embedded Conax TF4000PVR Personal Video Record...

Страница 2: ...ITES 29 4 RECORDING 30 5 HDD SERVICE 33 6 INSTALLATION 34 7 INFORMATION 45 8 COMMON INTERFACE 46 9 GAME 47 HOW TO RECORD AND PLAYBACK THE PVR 1 TIME SHIFTING 49 2 RECORDING WHILE TIME SHIFTING 49 3 RE...

Страница 3: ...t use or store the PVR where it is exposed to direct sunlight or near a heater Never stack other electronic equipment on top of the PVR ATTACHMENTS Do not use any attachments that are not recommended...

Страница 4: ...an save up to 3500 TV and 1500 Radio channels and work around with the Favorite Lock Delete Move and Sort functions The Menu is very modern and supports different languages All functions can be carrie...

Страница 5: ...roups support Page Up Page Down available on your channel list PIG Picture In Graphic support Recording and playback Time shifting playback Recording by EPG Delayed Recording Fast and Slow Playback Bo...

Страница 6: ...LOW LNB 1 OUT Use it to connect to another PVR or LNB 2 IN LNB 2 OUT Use it to connect to another STB RF IN Connects the TV RF OUT Connects the TV RF IN ANT IN VCR SCART Connects the VCR SCART AUDIO L...

Страница 7: ...e OFF mode and the PVR to the STANDBY mode Numeric Buttons 0 9 Selects the TV or Radio service channels and individual menu options RECALL Button Selects the previously viewed channel INFO Button Disp...

Страница 8: ...volume Increase Decrease P P Buttons Tunes to the next or previous service Services up or down through the available services OK Button Displays Channel List on screen Selects an item in the menu FAV...

Страница 9: ...lowing setups If you have problems with your connections and need help contact your dealer or service provider 1 Connection to TV VCR and Hi Fi 1 2 Connection to the VCR with the SCART Cable Connect o...

Страница 10: ...i Fi 1 4 Connection to the TV using the RF cable Connect a terrestrial antenna to RF IN socket on the PVR Connect one end of the RF cable to the RF OUT socket on the PVR Connect the other end to the A...

Страница 11: ...menu should be set to Separated 2 2 Installing the PVR with one Antenna The Connection Type in LNB setting menu should be set to Loop Through Tuner 1 and 2 can receive the RF signal of the same polari...

Страница 12: ...he LNB IN socket on the PVR With other connector connect the LNB OUT socket on the PVR and the LNB IN socket of the other PVR or STB 2 4 Installing the PVR with two separated dual LNB Antennas and DiS...

Страница 13: ...ess the MENU button on the RCU to make the Main Menu appear Go to the LNB Setting menu under the Channel Search item of the Installation menu and press button The default PIN CODE is 0000 Choose the r...

Страница 14: ...f EPG is available on programs you will see the detailed description of the programs start end time and programs schedules etc and buttons will be used to move program and to see next program schedule...

Страница 15: ...ee symbol in the Information Box There are VBI insertion mode and software emulation mode in teletext In the VBI insertion mode which is always on you can watch the teletext with your TV using the RCU...

Страница 16: ...nd correctly adjusted to the proper satellite The PVR is connected to the TV The RCU has batteries and ready to control the PVR If the PVR has not been installed or connected properly please refer to...

Страница 17: ...ocal time the Power On Off time and the Sleep Time The exact local present time can be adjusted by using the GMT the Time Offset and the Mode sub menus PLEASE NOTE Configure the Local Time before adju...

Страница 18: ...of the local area can be inserted In another words insert the time difference of the local time zone from the GMT For example if the local area is Seoul the time difference from the GMT being 9 insert...

Страница 19: ...keup Time item sets up the time the PVR automatically turns on Insert the preferable Wakeup Time by using the numeric buttons and the buttons on the RCU To disable the wakeup funtion make the Timer it...

Страница 20: ...the Power Off menu The Sleep Time function turns off after the adjusted sleep time The Wakeup time for EPG menu automatically turns the PVR on if this menu is enabled The PVR will record EPG data to...

Страница 21: ...to each specific setting Use the buttons to select the items below No Block Access to everyone 4 18 age Inaccessible for viewers within each minimum age limit Total Block Access to no one If the chan...

Страница 22: ...guage Setting A V Output Setting Organizing Channels Organizing Favorites Installation and IRD Lock Press the buttons to Lock Unlock the access Locking means controlling the access to specific menus w...

Страница 23: ...shown in English French German Italian Spanish Arabic Greek Turkish Danish Swedish Norwegian Dutch Russian B Subtitle Language It is an item for changing the language of the subtitle As long as the se...

Страница 24: ...A V Outputs Control this menu properly according to external components connected to the PVR Configurations concerning Audio and Video can be made here A TV Type Enables the setting of the TV standard...

Страница 25: ...Sound Mode Allows you to configure the sound mode Select the Stereo Mono Left and Right modes by using the buttons The Sound mode is configurable later on by using the button on your RCU G UHF Type A...

Страница 26: ...ime out of the Info Box Sets the period of time the Info Box is displayed on screen The adjustable time is from 0 to 30 seconds I 7 Info Box Position Adjusts the position of the Info Box Allows you to...

Страница 27: ...rename the channel After renaming it be sure to save it by pressing the button at Save item C Move You can reorder and move the service to the preferred position Mark the desired channel to move and p...

Страница 28: ...nel list F Delete Press button to delete channels The delete function differs from the skip function as it deletes the channel completely Whereas the skip function just makes the channel invisible NOT...

Страница 29: ...are selected as the default menus News Sports Movie and Music Up to 10 lists including these lists can be added and renamed When deleting a service select a service in the Fav CHs section and press th...

Страница 30: ...recording time press or button IV 4 Duration Edit Reservation TV List Channel Date Mode Start Time Duration Save Cancel Recording Select the reserved name in the delayed recording List Moves Item Sel...

Страница 31: ...to Saturday or Sunday Select Every Weekday to record the same channel at the same time on every weekday This menu is enabled when the Date menu is set from Monday to Friday Edit Reservation TV List C...

Страница 32: ...the HDD Edit Reservation TV List Channel Date Mode Start Time Duration Save Cancel Recording Select the reserved name in the delayed recording List Moves Item Selects Item Exit OK MENU 1 DWtv 73 DWtv...

Страница 33: ...t of PC You cannot use the Time shifting Recording and Playback functions with an unformatted HDD V 2 Format Hard Disk V 3 Time Shifting To enable time shifting function select Enable If the Time Shif...

Страница 34: ...o the value of the antenna If the desired satellite name is not in the list then select Others B Tuner Select Select a tuner for channel searching from the selected satellite C Connection Type If two...

Страница 35: ...witch box is controlled by 12V DC H DiSEqC 1 0 The PVR is designed to be DiSEqC 1 0 compatible This allows multiple antennas to be connected to the PVR at the same time If you are using two or more fi...

Страница 36: ...MATV mode is used to special purposes on satellite master antenna TV system Enter the Transponder s Frequency by using the numeric buttons on your RCU Enter the Transponder s Symbol Rate by using the...

Страница 37: ...the LNB is over To stop the searching process on the way press either the button or the button This menu will be shown as long as the PVR is searching for channels All channels found will be listed in...

Страница 38: ...etween Tuner 1 and Tuner 2 A Tuner 1 to Tuner 2 Copy the service list of Tuner 1 to that of Tuner 2 B Tuner 2 to Tuner 1 Copy the service list of Tuner 2 to that of Tuner 1 C All Add the service list...

Страница 39: ...te manually Movement In case of User mode the movement is adjustable by fine tuning In case of Installer mode the movement is adjustable by East West going command 00 Level 00 Quality Motor Control Go...

Страница 40: ...ted satellite and it can be set automatically in case of selecting a satellite name My Longitude It means the angle of Longitude and you can select the direction of EAST and WEST by Numeric or button...

Страница 41: ...of a satellite and also you can select a frequency Or by pressing or buttons you can select and view a frequency one by one You can see the symbol rate of the specified satellite on the right side of...

Страница 42: ...formation is added by broadcaster you can add new TP transponder information and enjoy new services Before adding new TP information you should know the frequency symbol rate and polarization types Af...

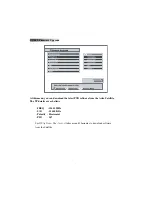
Страница 43: ...with connecting the PVR of same model and same specification VI 9 Transfer Data to Other PVR It is used to transfer PVR Data such as satellite TP information to other PVR for upgrading the PVR Notes P...

Страница 44: ...PVR software from the Astra Satellite The TP details are as bellows FREQ 12603 MHz S R 22000 KS s Polarity Horizontal PID 347 For OTA Over The Air it takes around 10minutes to download software from...

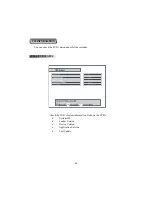
Страница 45: ...hows the PVR s v System ID v Loader Version v Device Version v Application Version v Last Update VII 1 PVR STATUS You can check the PVR version and refer the calendar VII INFORAMTION 00 Level 00 Quali...

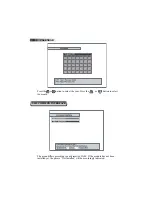
Страница 46: ...t the year Press the or button to select the month VII 2 CALENDAR The menu differs according to each inserted CAM If the module has not been installed yet the phrase Not Installed will be accordingly...

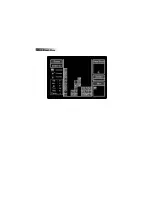
Страница 47: ...47 IX 1 ExBlock IX GAME IX 2 Bricks Lay...

Страница 48: ...48 IX 3 Bomb Hexa...

Страница 49: ...e the Time Shifting progress bar is displayed 4 To remove the Time Shifting progress bar at once press or PLAY button 5 To play the live video press STOP button 6 To start Instant Playback press butto...

Страница 50: ...steps There are four kinds of recording references Caution If the recording time is less than about 1 minute recording will not be done successfully 1 Immediate Recording by RECORDING button a Recordi...

Страница 51: ...Select Start item and press button For detailed information refer to the explanation of Recording menu in Menu operations b Checking and modification A Recording Icon will be displayed on the upper ri...

Страница 52: ...isplayed b Checking Press GUIDE button to display EPG The reserved services for delayed recording will be marked with a Recording mark c Canceling Press GUIDE button to display EPG To cancel a reserva...

Страница 53: ...Motion Playback To pause the picture or playback press PAUSE button Press PAUSE button or PLAY button to quit pausing 1 Pausing from live video If the PAUSING is kept more than 5 seconds with enabled...

Страница 54: ...repeatedly 3 There are 4 steps in fast motion playback 4 Press PLAY button to resume playback with normal speed 5 The slow motion function is available for the playback and the time shifted playback...

Страница 55: ...ARK button 4 30 sencods forward If there is no bookmark the PVR plays every 30 seconds forward by pressing BOOKMARK button 1 Select the live video you want to record Descramble the service with a prop...

Страница 56: ...nd smart card The fast slow motion descrambling is possible by fast slow motion playback 5 Start recording by RECORDING Button 6 The video displayed on TV will be recorded 7 Press STOP button to stop...

Страница 57: ...recorded video you want to copy The fast slow motion copying is possible by fast slow motion playback 5 Start copying by RECORDING Button 6 The video displayed on TV will be copied 7 Press STOP button...

Страница 58: ...of region press the button with the progress bar d Move the cursor by pressing or or or button e To specify the other end of region press the button once more f Press button once more to cancel the r...

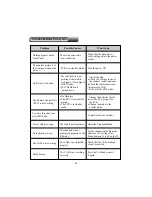
Страница 59: ...mode The Time is not set properly The channels are not configured properly on the RF mode The CAM is not installed properly Check that the main power cable is plugged into the power socket Turn the po...

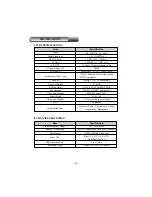
Страница 60: ...ible 22 KHz RF Modulator UHF Ch 21 69 with PAL I G K Specification MPEG 2 DVB Compliant SI Video Compression MP ML in MPEG 2 Aspect Ratio On Screen Display EPG Common Interface 4 3 or 16 9 256 colors...

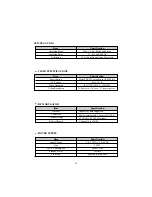
Страница 61: ...I G K ISO IEC 13818 2 MP ML TV System Video Decoding Video Resolution 720 pixels 576 lines 25 frames per sec RF MODULATOR Item Specification Features Input RF bypass Supported IEC Coaxial female 9 5 m...

Отзывы: