5.2 LED light
Attention, LED light:
– Do not look directly into the LED light!
– Do not look into the beam directly or with optical instruments!
6 Overview of product
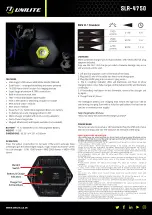
1 Wide-angle LED
2 Spot LED
3 Housing
4 Battery status indicator
5 Power button
6 USB-C
TM
charging socket
7 Magnetic base (180° rotatable)
7 Operation and use
Looking into an LED light in darkness can cause temporarily blindness. This can be
dangerous in high risk environments.
Press the power button (5) repeatedly to cycle between the following light modes:
Spot -> Wide Angle Level 1 (low) -> Wide Angle Level 2 (medium) -> Wide Angle Level 3
(maximum) -> Lamp off
The work light will turn off when the battery needs to be recharged.
LED battery indicator
The battery status of the work light is indicated by 3 LEDs (4). The more LEDs that are illumi-
nated, the greater the charging level. If none of the LEDs light up, this means that the rechar-
geable battery is empty and must be recharged immediately.
Charging
Charge the work light for approx. 4-5 hours before first use.
Before connecting, make sure that the USB power source (USB power supply unit) can deliver
sufficient current, otherwise you may damage the source. Do not use a USB port on a com-
puter, keyboard or USB hub without a power adapter, as the current supplied by these ports
may be insufficient.
The USB power supply unit should be able to deliver a permanent current of 5 V/DC
and 1,5 A. Always use the recommended charger to charge the work light. Using a
charger that is NOT recommended can lead to a fire and destroy the light.
Do not turn on the work light during the charging process.
To recharge the battery, connect one end of the supplied charging cable to the USB char-
ging port (6), and the other end to a suitable power supply.
During the charging process, the LEDs (4) light up/flash and indicate the current charging
status based on the number of illuminated LEDs. The more LEDs that are illuminated, the
greater the charging level. When the battery is fully recharged, all LEDs will be constant.
8 Care and cleaning
Before cleaning, turn the work light off, disconnect it from the power supply and allow it to
cool down completely.
Do not use any aggressive cleaning agents, rubbing alcohol or other chemical solutions, as
they can cause damage to the housing or cause the product to malfunction.
Wipe the product with a dry, fibre-free cloth.
9 Storage
Fully charge the work light if you do not plan to use it for an extended period.
During extended storage periods, charge at least 2x a year to prevent deep discharge of
the battery pack.
Store the work light in a cool, dark location away from moisture.
Operating instructions
WL700 LED work light
Item no. 2481635
1 Intended use
The product is a long-life, durable work light with four brightness settings. The work light is
powered via an built-in rechargeable battery and features an adjustable magnetic base.
The work light has the following protection ratings: IP65 (ingress protection), IK07 (impact
protection).
For safety and approval purposes, do not rebuild and/or modify this product. If you use the
product for purposes other than those described above, the product may be damaged. In ad-
dition, improper use can result in other hazards. Read the operating instructions carefully and
store them in a safe place. Make this product available to third parties only together with its
operating instructions.
This product complies with statutory national and European requirements. All company and
product names contained herein are trademarks of their respective owners. All rights reserved.
2 Delivery content
Work light
USB-C
TM
charging cable
Operating instructions
3 Latest product information
Download the latest product information at
www.conrad.com/downloads
or scan the QR code
shown. Follow the instructions on the website.
4 Symbols in this document
A symbol of an exclamation mark in a triangle points to important information in
these operating instructions which must be observed.
The arrow symbol indicates special information and advice on how to use the pro-
duct.
This device was constructed according to protection class III. Protection class III
includes electrical devices with a low voltage power supply (< 50 Volts) using a
safety transformer or batteries/rechargeable batteries/solar energy etc. Devices in
protection class III have no connection for protective insulation - they must not be
connected to the protective earth.
5 Safety information
Read the operating instructions carefully and especially observe the safety
information. If you do not follow the safety instructions and information on
proper handling in this manual, we assume no liability for any resulting per-
sonal injury or damage to property. Such cases will invalidate the warranty/
guarantee.
5.1 General safety information
This product is not a toy. Keep it out of the reach of children and pets.
Do not leave packaging material lying around carelessly. It may become a dangerous
plaything for children.
Protect the appliance from extreme temperatures, direct sunlight, strong jolts, high humidi-
ty, moisture, flammable gases, steam and solvents.
Do not expose the product to any mechanical stress.
If it is no longer possible to operate the product safely, stop using it and prevent unautho-
rised use. Safe operation can no longer be guaranteed if the product:
– is visibly damaged,
– is no longer working properly,
– has been stored for extended periods in poor ambient conditions or has been exposed
to considerable transport-related stress.
Please handle the product carefully. Despite the robust design, impacts, blows or falls can
damage the product.
Consult an expert when in doubt about the operation, safety or connection of the appliance.
Maintenance, modifications and repairs must only be completed by a technician or an au-
thorised repair centre.
If you have questions which remain unanswered by these operating instructions, contact
our technical support service or other technical personnel.
1
2
3
4
5
6
7


