This is a publication by Conrad Electronic SE, Klaus-Conrad-Str. 1, D-92240 Hirschau (www.conrad.com).
All rights including translation reserved. Reproduction by any method, e.g. photocopy, microfilming, or the capture in
electronic data processing systems require the prior written approval by the editor. Reprinting, also in part, is prohibited.
This publication represent the technical status at the time of printing.
Copyright 2016 by Conrad Electronic SE.
*1461733_v2_0816_01_m_(1)_4L
Operation
a) Adjusting the headband
• Press the headband buckle (1) and adjust the length of the headband (2) to fit your head.
• Ensure that the buckle clicks into place in one of the holes on the headband (2). This will
secure the headband to your head.
• Place the headband magnifier around your head.
• Loosen the fastening pin (3) on the side by turning it anticlockwise.
• Move the magnifier housing (5) up or down to bring it to the desired position.
• Turn the fastening pin clockwise to fix it in place.
• When you are not using the headband, tilt the magnifier housing upwards slightly. It must not
point completely downwards.
b) Using the light
• To turn the light (9) on, move the on/off switch (4) on the top of the magnifier housing to the
"ON" position.
• Tilt the light up or down and turn it left or right as desired.
• To turn the light off, move the on/off switch on the top of the magnifier housing to the "OFF"
position.
c)
Configuring the lenses
• The standard lens (6) has a 1.8x magnification.
• To increase the magnification to 2.3x, bring the interior additional lens (7) to the front.
• To increase the magnification to 3.7x, rotate the circular close-up lens (8) so that it covers
the standard lens.
• For the highest magnification (4.8x), use all of the lenses (collapsible additional lens and
rotating close-up lens).
Magnification factor
Focusing range
1.8x
250 - 290 mm
2.3x
130 - 160 mm
3.7x
70 - 90 mm
4.8x
50 - 70 mm
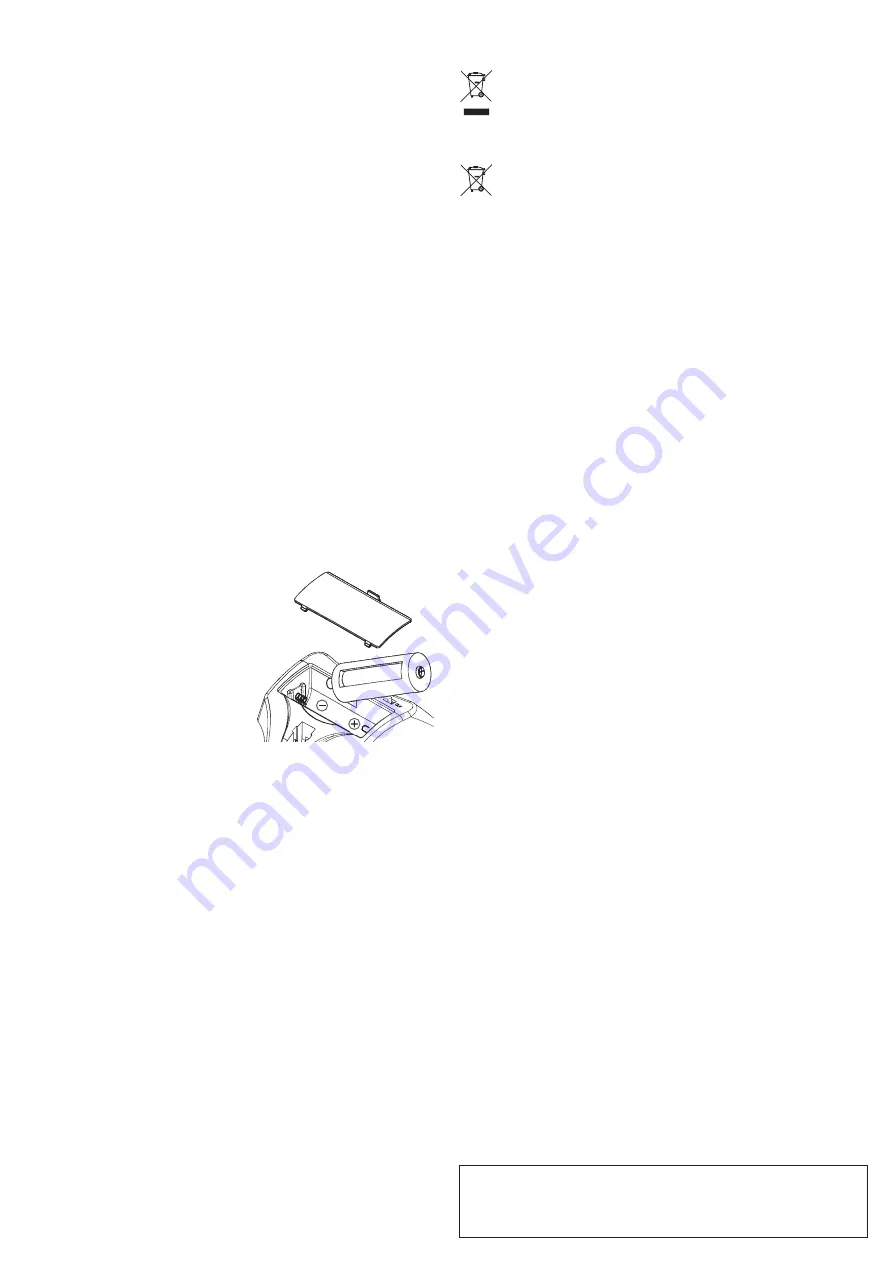
Changing the batteries
• Three AAA batteries are required to power the
built-in light.
• Open the battery compartment cover (10) by
pressing the latch.
• Remove the battery holder.
• Insert three AAA batteries into the battery holder
in the correct polarity. The correct polarity (plus/+
and minus/-) is indicated on the sides of the
battery holder.
• Insert the battery holder into the battery
compartment (observe the plus/+ and minus/-
markings).
• Replace the battery compartment cover and ensure that the latch clicks into place.
Care and cleaning
• Before cleaning the product, remove the batteries to disconnect it from the power supply.
• Never use aggressive detergents, rubbing alcohol or other chemical solutions, as these could
damage the casing or even impair the functioning of the product.
• Clean the lenses with lens cleaning fluid, alcohol or neutral cleaning agents.
• Clean the surface of the lenses using a lens cloth or a clean, soft and lint-free cloth.
• Avoid touching the lenses with your fingernails or other sharp objects.
Disposal
a) Product
Electronic devices are recyclable waste and must not be disposed of in the
household waste. At the end of its service life, dispose of the product according to
the relevant statutory regulations.
Remove any inserted batteries and dispose of them separately from the product.
b) Batteries
You as the end user are required by law (Battery Ordinance) to return all used
batteries. Disposing of them in the household waste is prohibited.
Contaminated batteries are labelled with this symbol to indicate that disposal in the
domestic waste is forbidden. The designations for the heavy metals involved are:
Cd = Cadmium, Hg = Mercury, Pb = Lead (name on (rechargeable) batteries, e.g.
below the trash icon on the left).
Used batteries can be returned to collection points in your municipality, our stores or wherever
batteries are sold.
You thus fulfil your statutory obligations and contribute to the protection of the environment.
Technical data
Operating voltage (light) .............................. 3 x 1.5 V/DC AAA batteries (not included)
Lens material ............................................... PMMA (Polymethyl methacrylate)
Lens magnification factors ........................... 1.8 / 2.3 / 3.7 / 4.8
Luminous intensity ....................................... 12.4 – 17.30 cd
Maximum rotation angle (light) .................... 120º (vertical)/ 90º (horizontal)
Storage conditions ....................................... -5 to +45 °C, 0 - 70 % relative humidity
(non-condensing)
Operating conditions .................................... -5 to +45 °C, 0 - 70 % relative humidity
(non-condensing)
Dimensions (W x H x D) .............................. 200 x 70 x 270 mm
Weight ......................................................... 182 g


