background image


© by WilTec Wildanger Technik GmbH 


Item 63042


Page 6 


http://www.toboli.com


05 2022-1


Operating the joints


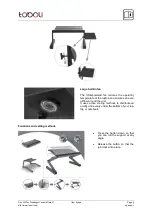
Press and hold the round button in the middle to freely adjust the support angles. With the small triangle 
on the button indicating the desired angle, release the button. The button immediately locks the  joint 
automatically.


Note! 

When releasing the button, you may hear a pop sound. This, being the sound of the joint locking, 

is completely normal.


1.


First hold the button down and then adjust the support angles. If the angles cannot be turned, 
you may not have pressed the button all the way down. Make sure to press the button again.


2.


Adjust one support and then adjust the other. When adjusting two supports at the same time, 
hold the panel with your fingers.


3.


The maximum load is 15


kg. Do not overload the table.


4.


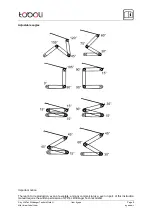
When you unfold the table, the adjustment sequence of the joints should be C → B → A. When 
you fold the table, the adjustment sequence of the joints should be A → B → C.


Use


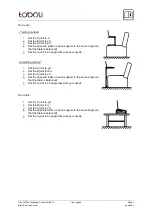
On a bed


1.


Set the C joint to 150°.


2.


Set the B joint to 30°–90°.


3.


Set the A joint to 90°–180°.


4.


Set the opposite joints on each support to the same angle (so that the table is balanced).


5.


Set the B joint to an angle that suits your needs.


On a carpet or outdoors


1.


Set the C joint to 120°.


2.


Set the B joint to 60°.


3.


Set the A joint to 90°.


4.


Set the opposite joints on each support to the same angle (so that the table is balanced).


5.


Set the A joint to an angle that suits your needs.


Содержание 63042

Страница 1: ...ing instructions and safety information before using for the first time Technical changes reserved Due to further developments illustrations functioning steps and technical data can differ insignificantly Updating the documentation If you have suggestions for improvement or have found any irregularities please contact us ...

Страница 2: ... entirely avoided If you should find a mistake or wish to make a suggestion for improvement we look forward to hearing from you Send an e mail to service wiltec info or use our contact form https www wiltec de contacts The most recent version of this manual in various languages can be found in our online shop via https www wiltec de docsearch Our postal address is WilTec Wildanger Technik GmbH Kön...

Страница 3: ...an better absorb and dissipate the heat of the laptop The six 360 degree rotating and automatically locking joints on the legs make the table very flexible and easy to use The angle and height can be freely adjusted by just pressing the button lightly and then releasing it to lock it in place You can easily fold the table when it is not in use making transport and storage much easier The holders o...

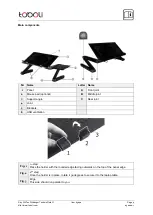
Страница 4: ...ouse pad optional B Middle joint 3 Support angle C Rear joint 4 Joint 5 Brackets 6 USB ventilation Fig 1 1st step Place the holder with the rounded edge facing outwards on the top of the panel edge Fig 2 2nd step Once the holder is in place rotate it 90 degrees to secure it to the laptop table Fig 3 Edge This side should run parallel to you ...

Страница 5: ...ting temperature of the laptop and ensures an even airflow around the unit It uses active cooling methods to distribute air quietly and evenly under the bottom of your lap top or notebook Functions and setting methods Press the button down so that you can roll the support at any angle Release the button so that the joint locks into place ...

Страница 6: ...n again 2 Adjust one support and then adjust the other When adjusting two supports at the same time hold the panel with your fingers 3 The maximum load is 15 kg Do not overload the table 4 When you unfold the table the adjustment sequence of the joints should be C B A When you fold the table the adjustment sequence of the joints should be A B C Use On a bed 1 Set the C joint to 150 2 Set the B joi...

Страница 7: ...to an angle that suits your needs 2nd setting method 1 Set the C joint to 90 2 Set the B joint to 180 3 Set the A joint to 90 4 Set the opposite joints on each support to the same angle so that the table is balanced 5 Set the A joint to an angle that suits your needs On a table 1 Set the C joint to 90 2 Set the B joint to 15 3 Set the A joint to 30 4 Set the opposite joints on each support to the ...

Страница 8: ...2 Page 8 http www toboli com 05 2022 1 Adjustable angles Important notice The reprint or reproduction even of excerpts and any commercial use even in part of this instruction manual require the written permission of WilTec Wildanger Technik GmbH ...

Отзывы: