W W W . T M G I N D U S T R I A L . C O M
P 1 6 / 1 6
T o l l F r e e : 1 - 8 7 7 - 7 6 1 - 2 8 1 9
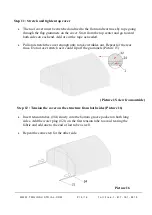
Step 13 : Install ratchet straps (Picture 17)
Stretch and adjust the cover from left and right, back and forth, to make sure it is
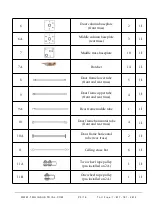
square and centered. Cut the groove pocket where it aligns with ratchet (#7A), and
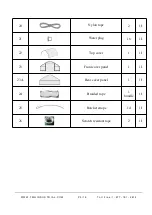
use strap (#25) to pull tension tube (#14) toward the ratchet and tie it firmly there.
Evenly adjust all ratchets on both sides to take wrinkles out and make the cover flat
and smooth.
Picture 17
After the Installation
Walk
around
and
inspect
the
shelter
periodically
to
make
sure
all
components
are
still
firmly
secured
and
the
whole
shelter
is
well
supported.
Check
all
bolts
and
nuts
as
well
as
all
connection
points
to
make
sure
they
are
all
in
good
position.
Check
the
base
plates,
adjust
the
ropes
and
tie
downs
if
required
and
clean
the
cover
regularly.
Snow
accumulating
on
the
fabric
cover
must
be
removed
as
soon
as
possible.
If
snow
becomes
solid
ice
on
the
cover,
it
will
increase
the
weight
on
the
roof
and
may
collapse
the
shelter
or
reduce
the
life
span.
Keep
the
shelter
on
a
dry
ground
most
of
the
time.
Do
not
keep
the
fabric
dirt
skirt
under
water
all
the
time,
otherwise
the
fabric
will
deteriorate.
We
strongly
recommend
you
remove
any
snow
from
the
roof
immediately.
Do
not
leave
any
snow
load
on
the
roof
overnight.
Keep
3
feet
of
clearance
on
all
sides
at
all
times.
Do
not
allow
snow
to
accumulate
and
pile
up
on
the
sides
of
the
building.
Otherwise
the
pressure
from
the
sides
will
push
inwards
and
could
lead
to
a
collapse.

