


0
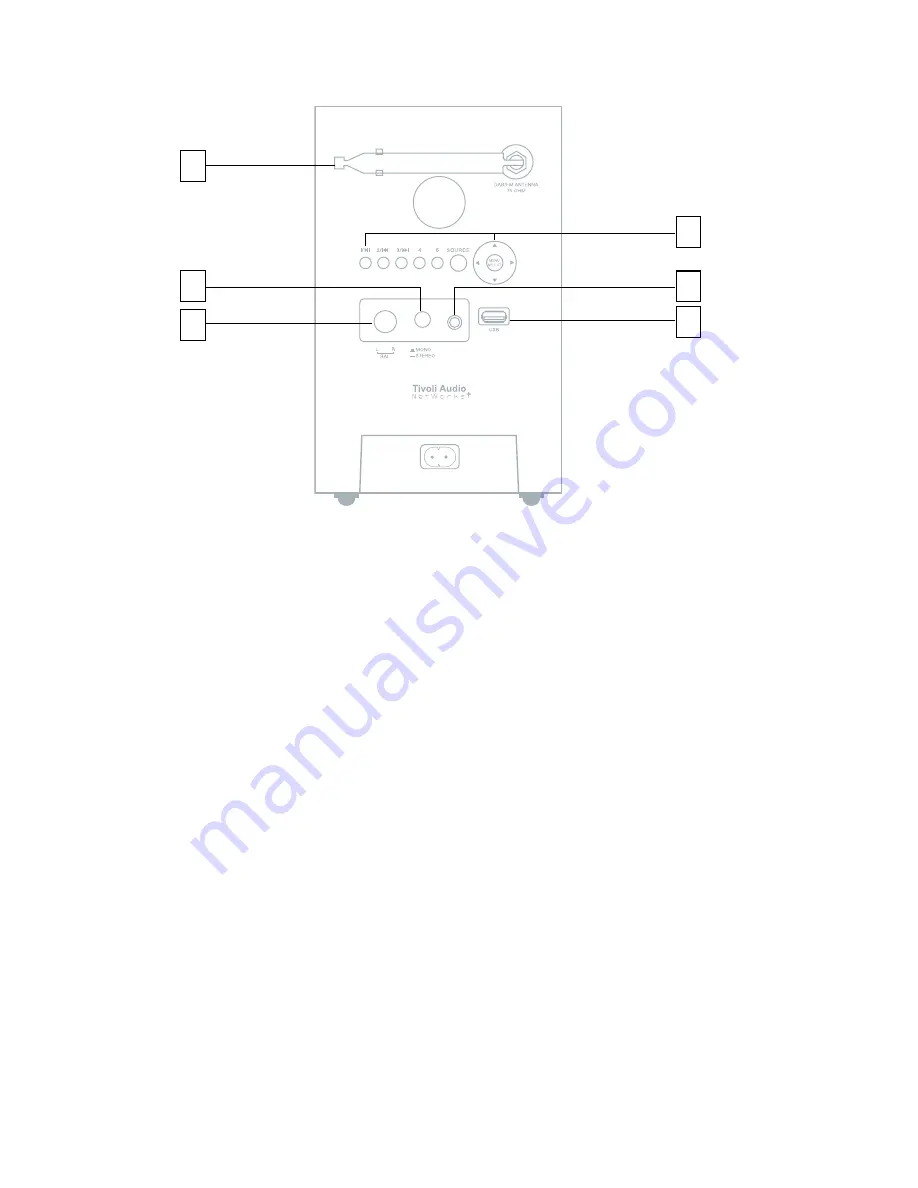
Guide to Features (Rear panel):
DAB/FM ANTENNA: Extend and rotate the telescoping antenna for best reception. In strong
FM signal locations, reducing the antenna’s length usually provides better reception. Keep the
antenna retracted in its locked position when not being used to avoid damage.
WARNING: The DAB/FM antenna is not designed to be removed. Removal of this antenna
will void your warranty.
MONO/STEREO: Press in for Stereo only when the optional N Speaker is connected.
The display will show an “ST” for Stereo. In FM mode, when the optional N Speaker
is connected, placing the button in the Mono position during weak FM reception may help to
reduce noise. The display will show an “M” when the Mono/Stereo button is in the Mono
position. Note: It is possible for the source material (such as an Internet station) to be broadcast
in mono even if the Stereo position is selected.
BALANCE: Leave this control in the “Left” position unless the optional N Speaker
is connected. When the optional N Speaker is connected, rotate the knob to the left
or right to adjust the sound from each speaker, or leave in the center detent position for equal
balance.
HEADPHONE: Connect a set of headphones (not included) to this 3.mm female mini stereo
variable output. The headphone volume is controlled by the wheel on the top of N
and the volume buttons on the remote. Connected headphones will mute the main speaker.
Avoid listening to headphones at high volume levels to prevent hearing damage.
USB: For your convenience you may connect the included USB cable to the USB input and
then connect your USB device to the cable. Or connect your digital storage device (such as a
memory stick) to this USB Type A 2.0 input. The display will briefly show “USB device found”.
Set the source to Music Player mode and select USB. Use the music player controls (Presets
, 2, & 3) to control music playback. All of the tracks for an artist or album will playback until
the end of that folder is reached and then repeat. Note: Some MP3 players use dedicated
software to playback music and therefore won’t be recognized. In such cases the LCD will
briefly show “USB unsupported”. To play these MP3 players, including an iPod, connect the
1.
2.
3.
4.
5.
3
2
4
6
Содержание NetWorks +
Страница 1: ...OWNER S MANUAL...
Страница 2: ......


