7
4.3 ANCHORING TIP SHEET
1.
Use a concrete hammer drill with a carbide tip, solid drill bit the same diameter as the
anchor, 3/4”. (.775 to .787 inches diameter).
Do not use excessively worn bits or bits
which have been incorrectly sharpened.
2.
Keep the drill perpendicular to the concrete while drilling.
3.
Let the drill do the work. Do not apply excessive pressure. Lift the drill up and down
occasionally to remove residue to reduce binding.
4.
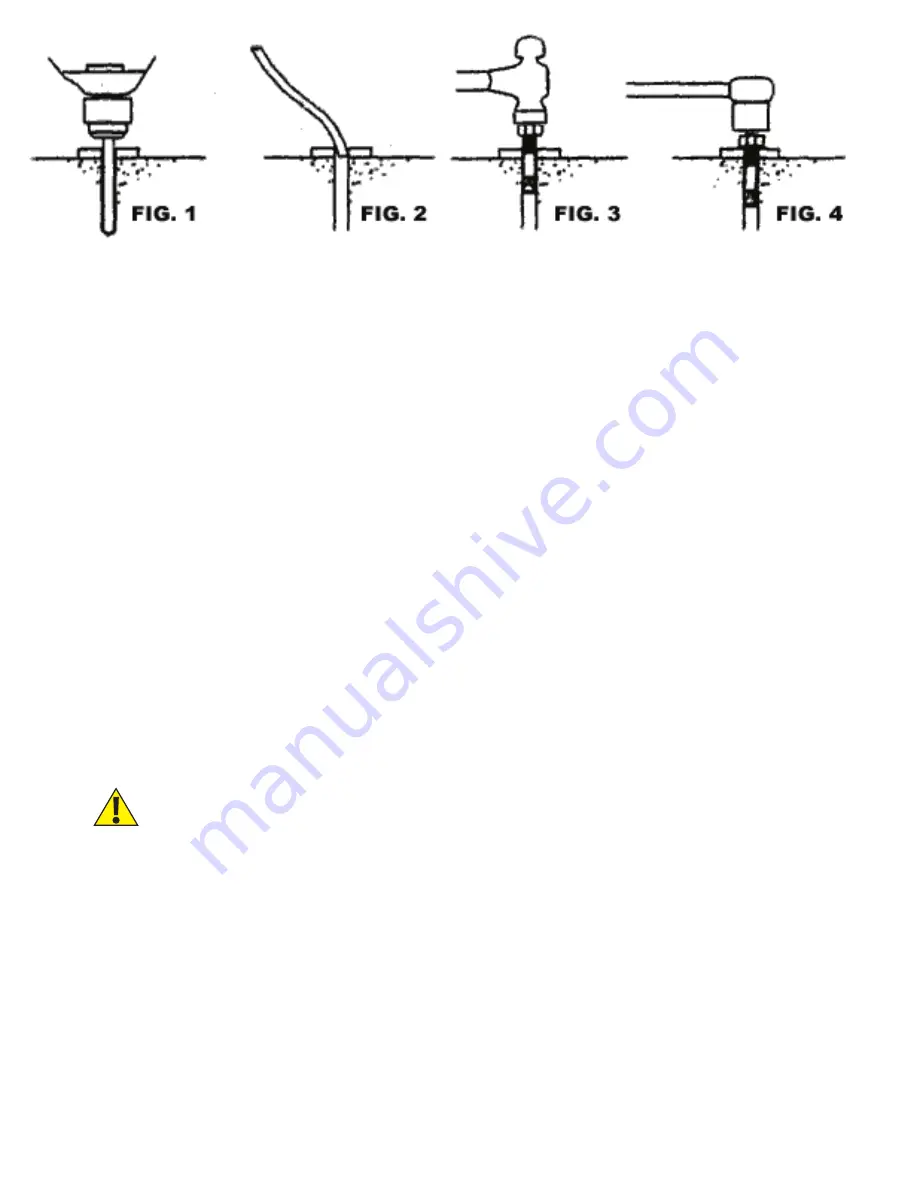
Drill the hole for anchor bolt completely through the concrete. If an error is made during
the installation of these anchors, this will allow for the anchor bolt to be driven down
into the ground, so that a new anchor may be installed in place (fig.1).
5. Be sure to clean all dust from hole.
(fig. 2).
6. Place a flat washer and hex nut over threaded end of anchor, leaving approximately 1/4
inch of thread exposed above the nut (fig.3). Carefully tap anchor into the concrete until
nut and flat washer are against base plate. Be sure to only tap the top of the anchor and
not the nut. This could cause damage to the threads of the anchor.
7. Tighten the nut (fig. 4) to
85 ft-lbs
of torque.
DO NOT USE AN IMPACT WRENCH TO TIGHTEN ANCHORS!
Содержание HD4P-12000
Страница 27: ...23 LIFT WILL NOT RAISE...
Страница 28: ...24 MOTOR WILL NOT RUN...
Страница 29: ...25 LIFT WILL NOT STAY UP...
Страница 30: ...26 WILL NOT RAISE LOADED LIFT...
Страница 31: ...27 LIFT LOWERS SLOWLY OR NOT AT ALL...
Страница 32: ...28 8 DIAGRAMS PARTS LIST FIG 1 85...
Страница 33: ...29 FIG 2 106 105 86 87 86 87 86 87 102 101 85 100 96 95 94 103 104 97 98 99 91 92 93 88 89 86 87 86 87 89 90...
Страница 34: ...30 FIG 3 1 2 3 33 34 26 27 32 32 1 34 4 34 3 34 2 34 1 28 29 30 31 5 2 16 6 7 8 9 10 11 12 13 14 15 4...
Страница 35: ...31 FIG 4...
Страница 36: ...32 FIG 5...
Страница 40: ...36...
Страница 42: ...NOTES...
Страница 43: ...NOTES...


