


Installing Backup Batteries
Note:
After installing the backup batteries and reading the Maintenance
section, plug the AC line cord correctly into a wall outlet.
Battery Backup
If the backup batteries have been installed and a power failure occurs or
the AC cord is accidentally disconnected, the current time and alarm time
settings will be temporarily maintained.
If the backup batteries have not been installed or are dead, when the AC
power resumes the display will show 12:00 and you must reset the time
and alarm settings.
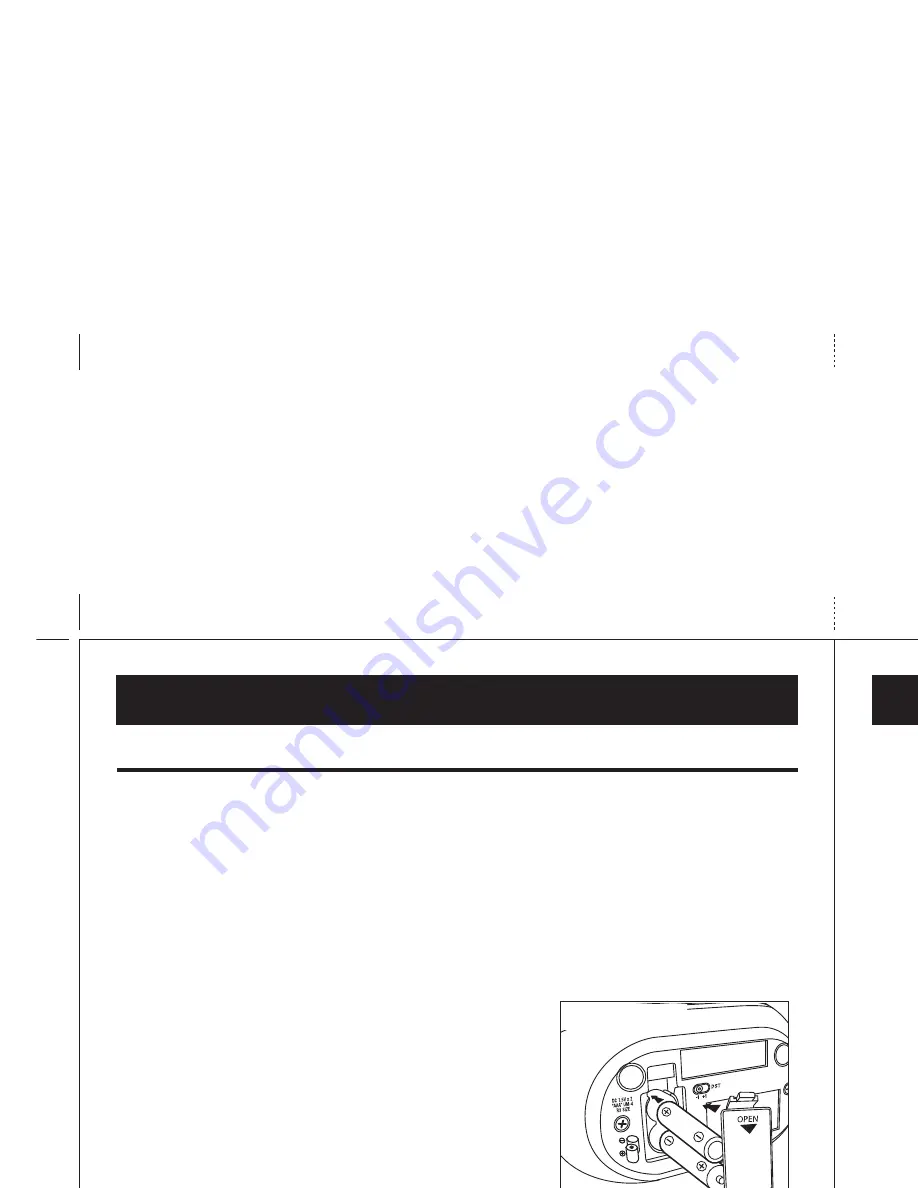
1. Open the battery compartment cover
located on the bottom of the unit.
2. Install 2 “AAA” size batteries into the
compartment, making sure that the + and
– polarities match the diagram next to the
compartment.
3. Close the battery cover.
For the Best Possible Performance
We recommend the use of alkaline batteries for longer life.
• Different types of batteries or new and used batteries are not to be mixed.
• Only batteries of the same or equivalent type as recommended are to be
used.
• Batteries are to be inserted with correct polarity.
• Remove exhausted batteries from the unit.
• Do not attempt to recharge non-rechargeable batteries.
• Remove rechargeable batteries from the unit before charging.
• The supply terminals are not to be short-circuited.
• Batteries should be removed if the item is not going to be needed for an
extended period of time (approximately 30 days or more) to prevent
leakage or damage to the unit.
Maintenance
• Protect your furniture when placing the clock on natural wood or a lacquered
wood finish. A cloth or other protective material should be placed between
the unit and the furniture.
• Clean the casing with a soft cloth moistened only with mild soap and water.
Stronger cleaning agents may damage the surface of the case.
• If the clock is not to be used for a prolonged period, remove the batteries to
prevent possible corrosion. Should the battery compartment become corroded
or dirty, clean it thoroughly and replace the batteries.
Getting Started
Controls and Indicators
Wake to Alarm
After setting the alarm time(s), you can press the
Alarm 1
or
Alarm 2 button
to
arm or disarm the associated alarm. The
Alarm Indicator
Icon(s)
will appear on
the display, showing that the alarm is armed and will sound at the displayed
time.
After the alarm sounds, press the
Alarm Reset Button
to turn it off and automatically
reset it for the same time the following day.
To turn off the alarm without setting it for the following day, just press the armed
alarm button again. The
Alarm Indicator
Icon
will disappear.
NOTE:
The alarm will sound for approximately 1 hour and then turn off
automatically. This cycle will repeat every 24 hours unless the controls are
changed.
Snooze Operation
During normal operation, press the
Snooze button
once to adjust the LCD
backlight brightness to Hi, Med, Lo or Off.
To program the snooze time, just press and hold the
Snooze/Dimmer Button
until the display shows the current snooze time (default is 9 minutes). Press the
+ Button
and
- Button
to adjust snooze time from 1 to 30 minutes. Press the
Snooze/Dimmer Button
again. Two beeps will confirm the snooze time is set.
Press the
Snooze/Dimmer Button
when the alarm sounds to shut off the alarm
for the programmed amount of snooze time before sounding again. You may
repeat this several times during the one-hour alarm cycle.
Battery Low indicator
The
Battery Low Indicator
is located on the lower left corner of the display and
will flash if backup batteries are low and need to be replaced with fresh batteries.
LCD Display
Alarm 1, Alarm 2
Battery Indicator
PM Indicator
Alarm Clock display
Time display
1
2
3
4
Battery Backup
Alarm 2 Button
Setting Clock Time and Calendar
Setting Clock Time
Press and hold the
Time Set Button
until the display flashes. (If no buttons are
pressed within approx. ten seconds, the display will stop flashing and return to
normal mode.)
When display is flashing, press the
+ Button
and
- Button
to adjust to the correct
time. Press and hold the buttons to advance/reverse rapidly. A
PM Indicator
will appear to the left of the current time; there is no AM indicator.
Press the
Time Set Button
when the correct time is displayed. 2 beeps will
confirm the clock setting is completed.
Setting Calendar
Once the time is set in clock setting mode, the year will flash on the display. If
needed, press the
+
Button
and
-
Button
to adjust the year. Press the
Time
Set Button
when the correct year is showing. Two beeps will confirm the year
is set. The date will flash on the display.
If needed, press the
+ Button
and
- Button
to adjust the date. Press the
Time
Set Button
when the correct date is showing. Two beeps will confirm the date
is set.
Note
: This unit comes with a
Daylight Saving Time (DST) Switch
(located on
the bottom of the unit) to make adjusting for Daylight Saving Time simple. Just
move the
DST Switch
to +1 to add an hour or to -1 to subtract an hour from
current time.
Setting Alarm Time
Press and hold the
Alarm-1
or
Alarm-2
Button
until the alarm time display
(located at the lower right part of display) flashes. If no buttons are pressed within
approx. ten seconds, the display will stop flashing and return to normal mode.
Press the
+ Button
and
- Button
to adjust the alarm time. Press and hold the
buttons to advance/reverse rapidly. A
PM
and
AM Indicator
appears to the left
of the alarm time display.
When the desired alarm time is set, press the
7-5-2 Button
to select the desired
alarm frequency: 7 to wake you everyday, 5 to wake you on weekdays or 2 to
wake you only on the weekend. Using the dual alarms, you can easily set the
alarm clock to wake you at different times during the week and on the weekend.
When the alarm time has been set, press the alarm button again to return to
normal mode. 2 beeps tone will indicate Alarm Setting is complete.
Time Set Button
DST Switch
7-5-2 Button
Alarm Reset Button
Snooze/Dimmer Button
Advance
Button
Reverse
Button
Alarm 1 Button
T116 IB P2
Color: Black, material: 210gsm2, Nov. 2, 2007
size: 420mm x 165mm


