background image

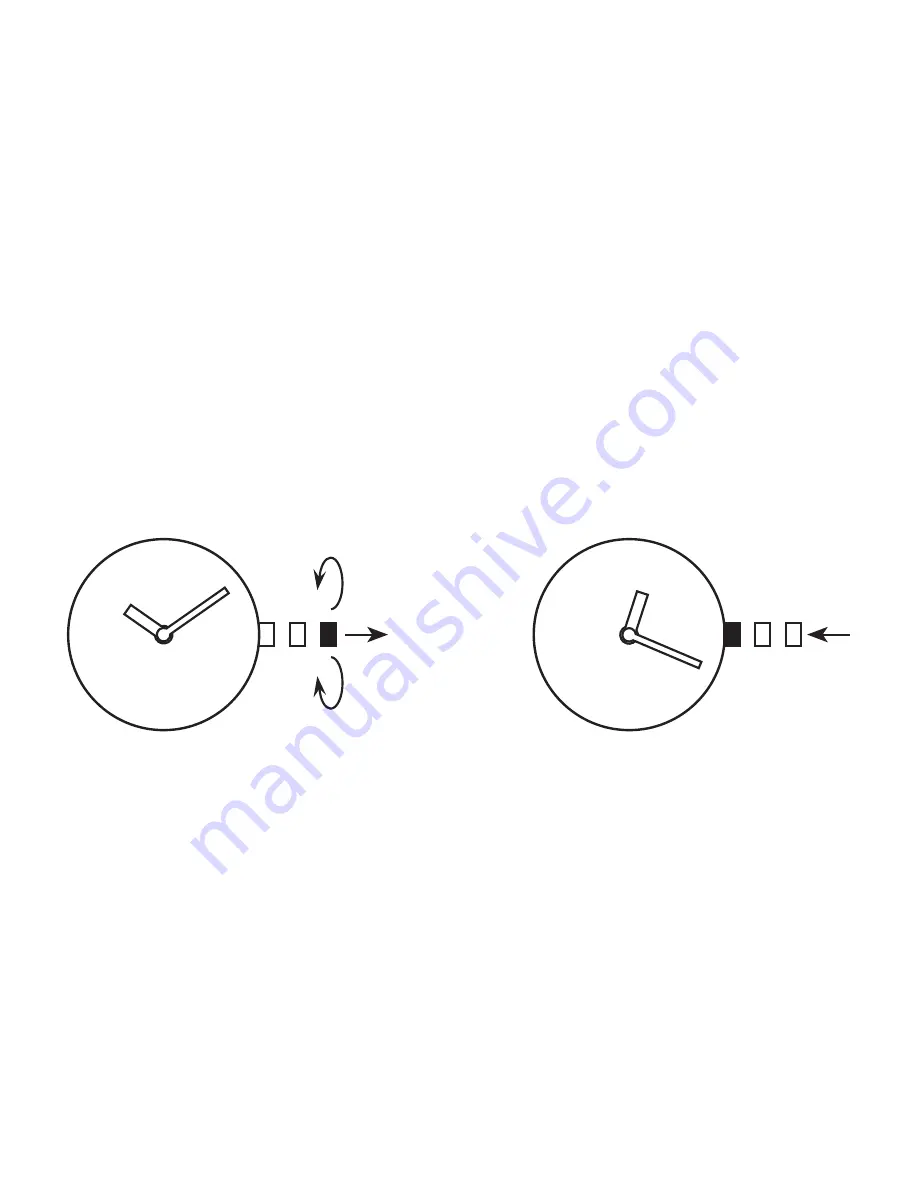
TO  CORRECT THE
TIME HOUR AND
MINUTE

2.1

2.2

RESET

Содержание VD31

Страница 1: ...VD31 VD32 INSTRUCTION MANUAL ...

Страница 2: ...n A 1 hour push Dual time of 24 hour hand adjustment Second position VD31 Time setting First position VD31 Date setting VD32 Time setting Minute hand Second hand Dual time of 24 hour hand Time difference correction 24 hour hand Indicates the time on a 24 hour basis DISPLAY AND CROWN BUTTON OPERATION ...

Страница 3: ...y setting and after battery change please execute the 0 position adjustment 1 Pull out the crown VD31 second click VD32 first click 2 Keep the buttons A B pressed at the same time more than 2 seconds and then release the buttons Dual time of 24 hour hand moves Returned to where it was However confirmation is difficult because the amount of movement is small ADJUSTINGTHE DUALTIME OF 24 HOUR HAND PO...

Страница 4: ...time of 24 hour hand to 0 position By pressing button A the hand move counter clockwise By pressing button B the hand move clockwise Press and hold the button possible to fast forward modification 4 Push the crown back to the normal position ...

Страница 5: ...ngly with the hour hand The moment of the date changes is midnight When setting the hour hand make sure that AM PM is correctly set by using the 24 hour hand as an AM PM indicator Using the time difference correction When moving to a country or area which is in a different timezone the current time in the local time can be corrected 1 Crown at the normal potion 2 To adjust the time by pressing the...

Страница 6: ...osition Crown position VD31 second click VD32 first click 2 To adjust the time by pressing the buttons A or B By pressing button A the hands move counter clockwise By pressing button B the hands move clockwise Push the crown back in to the normal position 3 Push the crown back in to the normal position ...

Страница 7: ...may not change properly If it is necessary to set the date during that time period First change the time to any time outside it set the date and then reset the correct time 1 Pull out the crown to the first click 2 Turn the crown to clockwise until the next data appears 3 Push the crown back in to the normal position ...

Страница 8: ...2H 2HDATE 3H 3HDATE INSTRUCTION MANUAL ...

Страница 9: ... to the correct time Push crown back to position 1 Normal position watch runs Time setting Set to the correct time Push crown back to position 1 DATE MODELS Quick change of the date anticlockwise do not set the date between 9 00 p m and 3 00 a m ...

Страница 10: ...6P25 INSTRUCTION MANUAL ...

Страница 11: ... setting to rotate the hour and minute hands clockwise Note The day is changed during the period from about 0 00 AM to about 5 30 AM Time setting Set to the correct time Push crown back to position 1 Quick change of the date anticlockwise ...

Страница 12: ...6P27 INSTRUCTION MANUAL ...

Страница 13: ...riod from about 0 00 AM to about 5 30 AM Time setting Set to the correct time Push crown back to position 1 Quick change of the date anticlockwise 24 HOUR SUB DIAL SETTING The 24 hour hand moves correspondingly with the hour and minute hands When setting the time be sure to check that the 24 hour hand is set properly 1 2 3 ...

Страница 14: ...8171 201 202 204 INSTRUCTION MANUAL ...

Страница 15: ...30 minute totalizer Hour hand Date window Pushbutton B Crown Pushbutton A start stop Minute hand Second hand Chronographe hand 1 5 second ...

Страница 16: ...TO CORRECT THE DATE 1 1 1 2 RESET do not set the date between 9 00 p m and 3 00 a m ...

Страница 17: ...OPTION MOONPHASE SET THE DATE ACCORDING TO THE LAST FULL MOON AFTERWARDS ADAPT LIKE STEP 1 1 AND 1 2 SET THE DATE LIKE STEP 1 1 AND 1 2 OPTION DATE BY HAND DATUM ...

Страница 18: ...TO CORRECT THE TIME HOUR AND MINUTE 2 1 2 2 RESET ...

Страница 19: ...TO RESET CHRONOGRAPH MINUTE AND SECOND CHRONOGRAPH MINUTE B A B 3 1 3 2 ...

Страница 20: ...SECOND A A B RESET 3 3 3 4 ...

Страница 21: ...CHRONOGRAPH A 4 2 STOP A 4 1 START B 4 3 RESET ...

Страница 22: ...MEASURING CUMULATIVE TIMES A START 5 1 B STOP 5 2 ...

Страница 23: ...B START 5 3 A STOP 5 4 B RESET 5 5 ...

Страница 24: ...8172 220 INSTRUCTION MANUAL ...

Страница 25: ...30 minute totalizer Hour hand Date window Pushbutton B Crown Pushbutton A start stop Minute hand Second hand Chronographe hand 1 5 second Day hand ...

Страница 26: ...TO CORRECT THE DATE RESET 1 2 1 1 ...

Страница 27: ...TO CORRECT THE TIME HOUR AND MINUTE RESET 2 2 2 1 ...

Страница 28: ...TO RESET CHRONOGRAPH MINUTE AND SECOND CHRONOGRAPH MINUTE B A B ENTER ...

Страница 29: ...SECOND A A B RESET EXIT ...

Страница 30: ...A START B STOP MEASURING SPLIT TIMES ...

Страница 31: ...A STOP B RESET B RESTART ...

Страница 32: ...annot be set independently Then turn back the hour hand by about 4 hours and advance it again till the day hand advances to the next day Repeat the same procedure and set the day hand to the desired day of the week Time setting Set to the correct time Be sure to check that AM PM is properly set Push crown back to position 1 DAY HAND ...

Страница 33: ...A STOP A START B RESET MEASURING CUMULATIVE TIMES ...

Страница 34: ...9231 1890 INSTRUCTION MANUAL ...

Страница 35: ...ow the correct time Push crown back to position 1 A button Quick correction of Date Attention Please Do Not set it between 21 00 and 00 30 midnight Day setting to rotate the hour and minute hands clockwise Note The day is changed during the period from about 0 00 AM to about 4 00 AM ...

Страница 36: ...9232 1930 INSTRUCTION MANUAL ...

Страница 37: ...tion 1 24hours hand will move accordingly B button Quick correction of 2nd time zone When using this button to set the 2nd time zone the centre minute hand must be set to between 55th and 05th minute at any hour 1 2 3 Month adjustment button Quick change of the date clockwise do not set the date between 9 00 p m and 3 00 a m ...

Страница 38: ...9238 1970 INSTRUCTION MANUAL ...

Страница 39: ...utton to set the 2nd time zone the centre minute hand must be set to between 55th and 05th minute at any hour C button optional not available in some models Quick correction of Day press 2 times to advance one day Do not use this button between 22 00pm to 6 00am A button Quick correction of Date Day setting to rotate the hour and minute hands clockwise Note The day is changed during the period fro...

Страница 40: ...9239A2 INSTRUCTION MANUAL ...

Страница 41: ...e accordingly B button Quick correction of 2nd time zone When using this button to set the 2nd time zone the centre minute hand must be set to between 55th and 05th minute at any hour A button Quick correction of Date Day setting to rotate the hour and minute hands clockwise Note The day is changed during the period from about 0 00 AM to about 4 00 AM ...

Страница 42: ...13673 INSTRUCTION MANUAL ...

Страница 43: ...nd Light D Set C Mode E STOPWATCH 1 5 second hand 24 hour hand a Normal position b First click c Second click Date STOPWATCH minute hand Small second hand Hour hand Display Hour minute second day date month Alarm hourly chime 12 24 hours selection automatic calendar 1 100 second stopwatch second time zone EL illumination ...

Страница 44: ...ond click position 1 main time setting 2 stopwatch hand position adjustment Once the crown is pulled out to the second click be sure to check and adjust 1 and 2 at the same time CROWN Pull out to second click when the second hand is at the 12 o clock position Hour hand Minute hand CROWN Turn to set the hour and minute hands 1 MAINTIME SETTING ...

Страница 45: ...osition if necessary 3 When setting the hour hand be sure to check that AM PM is correctly set The watch is so designed that the date changes once in 24 hours 4 when setting the minute hand first advance it 4 to 5 minutes ahead of the desired time and then turn it back to the exact minute 24 HOUR SUB DIAL SETTING The 24 hour hand moves correspondingly with the hour and minute hands When setting th...

Страница 46: ...kly if button B is kept pressed Press for 2 second STOPWATCH 1 5 second hand turns a full circle Press repeatedly to set STOPWATCH 1 5 second hand to the 0 position The hand moves quickly if button B is kept pressed CROWN Push back in to normal position in accordance with a time signal STOPWATCH minute hand STOPWATCH 1 5 second hand CROWN Date ...

Страница 47: ...the main time Date CROWN Pull out to first click Turn clockwise until the desired date appears Push back in to normal position 1 It is necessary to adjust the date at the end of february and 30 day months 2 do not set the date between 9 00 p m and 3 00 a m ...

Страница 48: ...TOPWATCH minute hand STOPWATCH 1 5 second hand Before using the stopwatch be sure to check that the crown is set at the normal position and that the STOPWATCH hands are reset to the 0 position If the STOPWATCH hands do not return to the 0 position when the stopwatch is reset to 0 follow the procedure in SETTINGTHETIME AND ADJUSTINGTHE STOPWATCH HAND POSITION ...

Страница 49: ...stop of the stopwatch can be repeated by pressing button A Split time measurement START SPLIT SPLIT RELEASE STOP RESET Measrement and release of split time can be repeated by pressing button B Measurement of two competitors START FINISH TIME OF 1ST COMPETITOR 2ND COMPETITOR FINISHES RESET FINISH TIME OF 2ND COMPETITOR ...

Страница 50: ... Mode E TIME MODE CALENDAR MODE ALARM MODE 2ND TIME ZONE MODE STOPWATCH MODE LCD MODE SELECTION ...

Страница 51: ...pressed for 60 seconds the time setting mode will return to normal time mode 3 Calendar Setting Press E to enter the calendar mode Press C for 2 seconds will enter the calendar setting mode month will flash press E to select the month Press C will flash the date press E to select the date Press C to flash the day press E to select the day When setting the date press and hold E will activate the fa...

Страница 52: ... will flash press E to select the hour Press C will flash the minute press E to select the minute Press C to flash the 12 24 selection press E to select When setting the time press and hold E will activate the fast advance of numbers If no button is pressed for 60 seconds the 2nd time zone setting mode will return to normal 2nd time zone mode 6 Stopwatch Operation Press E to enter the stopwatch mo...

Страница 53: ...14115 INSTRUCTION MANUAL ...

Страница 54: ...Normal position watch runs Time setting Set to the correct time Push crown back to position 1 ...

Страница 55: ...Display Hour minute second day date month Alarm hourly chime 12 24 hours selection automatic calendar 1 100 second stopwatch second time zone 2000 2049 auto calendar EL illumination LIGHT A C SET B MODE ...

Страница 56: ...LCD MODE SELECTION TIME MODE CALENDAR MODE STOPWATCH MODE 2ND TIME ZONE MODE ALARM MODE ...

Страница 57: ...ance of numbers If no button is pressed for 60 seconds the time setting mode will return to normal time mode 3 Calendar setting Press C for 2 seconds will enter the calendar setting mode year will flash press C to select month date 2000 2049 auto calemdar Press B to adjust while year month date are flashing When setting the date press and hold B will activate the fast advance of numbers If no butt...

Страница 58: ...r will flash press B to select the hour Press C will flash the minute press B to select the minute Press C to flash the 12 24 selection press B to select When setting the time press and hold B will activate the fast advance of numbers If no button is pressed for 60 seconds the 2nd time zone setting mode will return to normal 2nd time zone mode 6 Stopwatch Operation Press B to enter the stopwatch m...

Страница 59: ...14260J INSTRUCTION MANUAL ...

Страница 60: ...withstand normal use you should avoid rough use or dropping the watch 5 Avoid exposing the watch to temperature extremes 6 Wipe the watch with dry soft cloth only Avoid allowing it to come into direct contact with chemical materials which can cause deterioration of the plastic parts of the watch 7 Avoid to wear the watch in electromagnetic static conditions Countdown Timer EL Backlight Dual Time 1...

Страница 61: ...tters shown in the illustration DISPLAY The screen shown in below BACKLIGHT The backlight that uses an EL electroluminescent cause the display to glow for easy reading in the dark Start Stop EL backlight Mode Reset Use EL Backlight In the timekeeping mode press C to illuminate the display about 3 seconds ...

Страница 62: ...nce Timekeeping Mode Stopwatch Mode Countdown Mode Alarm Mode Dual Time Mode Pacer Mode 12 24H Format Hour Minutes Seconds Day of week Month Date 100 years Calendar 2000 2099 b STOPWATCH 1 100 second unit Measuring range 00 00 00 23 59 59 c COUNTDOWN Countdown range 23 59 59 0 00 00 ...

Страница 63: ...d ALARM 5 Alarms Hourly time signal The alarm sounds at the preset time each day e DUAL TIME The time for other time zone f PACER 10 tempo ...

Страница 64: ... in set mode 2 Press D to reset the seconds 3 Press B change to the next selection 4 Press D to increase the number press and hold to change at high speed 5 Repeat step 3 and 4 the selection in the following sequence Seconds Hour Minutes Year Month Date 6 Press A to exit the set state after you set The day of week is auto displayed in accordance with year month and date setting ...

Страница 65: ... again 3 Press A to reset the stopwatch 1 In the stopwatch mode press D to start the stopwatch 2 Press A to display the split time stopwatch timing continute internally 3 Press A to clear the split time and to continute time measurement 4 Repeat step 2 and 3 you can measure the multi split time 5 Press D to stop the stopwatch ...

Страница 66: ... mode 2 Press D to increase the hour press and hold to increase at high speed 3 Press B change to the next selection Use Countdown Timer 1 Press D to start the countdown 2 To pause the countdown by pressing D again 4 Press D to increase the number press and hold to change at high speed 5 Repeat step 3 and 4 the selection in the following sequence Hour Minutes Seconds 6 Press A to exit the set stat...

Страница 67: ... the Alarm1 Alarm5 state press D to on off the alarm Alarm1 Setting 1 In the alarm mode press A the hour to flash flashing indicated in set mode 2 Press D to increase the hour press and hold to increase at high speed 3 Press B to select the minutes 4 Press D to increase the minutes press and hold to increase at high speed 5 Press A to exit the set state after you set Setting and operation of the A...

Страница 68: ...art 4 To stop it press D again f PACER e DUAL TIME Dual Time Setting 1 In the dual time mode press A the hour to flash flashing indicated in set mode 2 Press D to increase the hour press and hold to increase at high speed 3 Press B to select the minutes 4 Press D to change the minutes press once change 30 minutes 5 Press A to exit the set state after you set ...

Страница 69: ...JP15 JP25 INSTRUCTION MANUAL ...

Страница 70: ...A DISPLAYS AND BUTTONS Day hand 24 Hour hand Dual time Date disc 24 Hour hand Day hand 24 Hour hand Date disc Button A Button B ...

Страница 71: ... Normal position The day is changed during the period from 0AM to 5AM C SETTING THE DATE 1 Pull the crown out to the 1st Click Position 2 Turn the crown clockwise to set the date If the date is set between the hours of around 9 00 PM and 1 00 AM the date may not change on the following day 3 After the date has been set push the crown back to the Normal position ...

Страница 72: ...nds 3 After the time has been set push the crown back to the Normal position E SETTTING THE DUAL TIME Press button A to set the dual time hand forward in units of 15 minutes Press button B to set the dual time hand back in units of 15 minutes The dual time hand can be put rapidly by continuously pressing button A or B ...

Страница 73: ...JS05 JS15 JS25 INSTRUCTION MANUAL ...

Страница 74: ...ur Hand Stopwatch Second Hand Stopwatch Second Hand Stopwatch Second Hand Stopwatch Minute Hand 24 Hour Hand 24 Hour Hand Calendar Button A Normal Position 1st Click Position 2nd Click Position Button B Second Hand Second Hand Stopwatch Minute Hand JS25 JS05 JS15 ...

Страница 75: ...set push the crown back to the Normal position C SETTING THE DATE 1 Pull the crown out to the 1st Click Position 2 Turn the crown clockwise to set the date If the date is set between the hours of around 9 00 PM and 1 00 AM the date may not change on the following day 3 After the date has been set push the crown back to the Normal position ...

Страница 76: ...to their Zero positions E STOPWATCH RESET INCL AFTER REPLACING BATTERY This procedure should be performed when the stopwatch second minute hand does not return to the Zero position 1 Pull the crown out to the 2nd Click Position 2 Press the button A to set the stopwatch second hand forward Press the button B to set the stopwatch second hand back The stopwatch minute hand is synchronized with stopwa...

Страница 77: ...JS20 INSTRUCTION MANUAL ...

Страница 78: ...A DISPLAYS AND BUTTONS Stopwatch Minute Hand Second Hand Stopwatch Second Hand 24 Hour Hand Button A Normal Position 1st Click Position Button B JS20 ...

Страница 79: ...ure and display time in 1 1 second united up to maximum of 30 minutes Stopwatch will stop automatically after running continuously for 30 minutes Measuring time with the stopwatch 1 Press button A to start the stopwatch 2 The stop watch can be started and stopped each time button A is pressed 3 Pressing button B resets the stopwatch and stopwatch minute and second hands return to their Zero positi...

Страница 80: ...st Click Position 2 Press the button A to set the stopwatch second hand forward Press the button B to set the stopwatch second hand back The stopwatch minute hand is synchronized with stopwatch second hand The stopwatch second hand can be advanced rapidly by continuously pressing button A or B 3 Once the both hands been zeroed reset the time and return the crown to its normal position ...

Страница 81: ...MD11234 INSTRUCTION MANUAL ...

Страница 82: ...designed to withstand normal use you should avoid rough use or dropping the watch 5 Avoid exposing the watch to temperature extremes 6 Wipe the watch with dry soft cloth only Avoid allowing it to come into direct contact with chemical materials which can cause deterioration of the plastic parts of the watch 7 Avoid to wear the watch in electromagnetic static conditions EL Backlight Dual Time 100 Y...

Страница 83: ...tters shown in the illustration DISPLAY The screen shown in below BACKLIGHT The backlight that uses an EL electroluminescent cause the display to glow for easy reading in the dark A Reset B Mode C EL backlight D Start Stop Use EL Backlight In any mode press C to illuminate the display about 3 seconds ...

Страница 84: ... Stopwatch Mode DualTime Mode a TIMEKEEPING 12 24H Format Hour Minutes Seconds Day of week Date 100 years Calendar 2000 2099 b ALARM Hourly time signal The alarm sounds at the preset time each day c STOPWATCH 1 100 second unit Measuring range 00 00 00 23 59 59 d DUAL TIME The time for other time zone ...

Страница 85: ...l the seconds to flash flashing indicated in set mode 2 Press D to reset the seconds 3 Press B change to the next selection 4 Press D to increase the number press and hold to increase at high speed 5 Repeat step 3 and 4 the selection in the following sequence Seconds Hour Minutes Year Month Date 6 Press A to exit the set state after you set The day of week is automatically displayed in accordance ...

Страница 86: ... to select the minutes 4 Press D to increase the minutes press and hold to increase at high speed 5 Press A to exit the set state after you set The alarm sounds at the preset time each day for about 60 seconds press any button to break it Alarm and Chime In the alarm mode press D to on off the alarm and chime in the following seauences Alarm Chime off Alarm on Chime on Alarm Chime on ...

Страница 87: ... again 3 Press A to reset the stopwatch 1 In the stopwatch mode press D to start the stopwatch 2 Press A to display the split time stopwatch timing continutes internally 3 Press A to clear the split time and to continute time measurement 4 Repeat step 2 and 3 you can measure the multi split time 5 Press D to stop the stopwatch ...

Страница 88: ...A the hour to flash flashing indicated in set mode 2 Press D to increase the hour press and hold to increase at high speed 3 Press B to select the minutes 4 Press D to change the minutes press once change 30 minutes 5 Press A to exit the set state after you set ...

Страница 89: ...MD11239 INSTRUCTION MANUAL ...

Страница 90: ...withstand normal use you should avoid rough use or dropping the watch 5 Avoid exposing the watch to temperature extremes 6 Wipe the watch with dry soft cloth only Avoid allowing it to come into direct contact with chemical materials which can cause deterioration of the plastic parts of the watch 7 Avoid to wear the watch in electromagnetic static conditions Countdown Timer EL Backlight Dual Time 1...

Страница 91: ...tters shown in the illustration DISPLAY The screen shown in below BACKLIGHT The backlight that uses an EL electroluminescent cause the display to glow for easy reading in the dark Use EL Backlight In the timekeeping mode press C to illuminate the display about 3 seconds Start Stop EL backlight Mode Reset ...

Страница 92: ...nce Timekeeping Mode Stopwatch Mode Countdown Mode Alarm Mode Dual Time Mode Pacer Mode 12 24H Format Hour Minutes Seconds Day of week Month Date 100 years Calendar 2000 2099 b STOPWATCH 1 100 second unit Measuring range 00 00 00 23 59 59 c COUNTDOWN Countdown range 23 59 59 0 00 00 ...

Страница 93: ...d ALARM 5 Alarms Hourly time signal The alarm sounds at the preset time each day e DUAL TIME The time for other time zone f PACER 10 tempo ...

Страница 94: ... in set mode 2 Press D to reset the seconds 3 Press B change to the next selection 4 Press D to increase the number press and hold to change at high speed 5 Repeat step 3 and 4 the selection in the following sequence Seconds Hour Minutes Year Month Date 6 Press A to exit the set state after you set The day of week is auto displayed in accordance with year month and date setting ...

Страница 95: ... again 3 Press A to reset the stopwatch 1 In the stopwatch mode press D to start the stopwatch 2 Press A to display the split time stopwatch timing continute internally 3 Press A to clear the split time and to continute time measurement 4 Repeat step 2 and 3 you can measure the multi split time 5 Press D to stop the stopwatch ...

Страница 96: ... mode 2 Press D to increase the hour press and hold to increase at high speed 3 Press B change to the next selection Use Countdown Timer 1 Press D to start the countdown 2 To pause the countdown by pressing D again 4 Press D to increase the number press and hold to change at high speed 5 Repeat step 3 and 4 the selection in the following sequence Hour Minutes Seconds 6 Press A to exit the set stat...

Страница 97: ... the Alarm1 Alarm5 state press D to on off the alarm Alarm1 Setting 1 In the alarm mode press A the hour to flash flashing indicated in set mode 2 Press D to increase the hour press and hold to increase at high speed 3 Press B to select the minutes 4 Press D to increase the minutes press and hold to increase at high speed 5 Press A to exit the set state after you set Setting and operation of the A...

Страница 98: ...art 4 To stop it press D again f PACER e DUAL TIME Dual Time Setting 1 In the dual time mode press A the hour to flash flashing indicated in set mode 2 Press D to increase the hour press and hold to increase at high speed 3 Press B to select the minutes 4 Press D to change the minutes press once change 30 minutes 5 Press A to exit the set state after you set ...

Страница 99: ...MD12259 INSTRUCTION MANUAL ...

Страница 100: ...esigned to withstand normal use you should avoid rough use or dropping the watch 5 Avoid exposing the watch to temperature extremes 6 Wipe the watch with dry soft cloth only Avoid all towing it to come into direct contact with chemical materials which can cause deterioration of the plastic parts of the watch 7 Avoid to wear the watch in electromagnetic static conditions EL Backlight Dual Time 100 ...

Страница 101: ... letters shown in the illustration DISPLAY The screen shown in below BACKLIGHT The backlight that uses an EL electro luminescent cause the display to glow for easy reading in the dark A Reset B Mode C EL backlight D Start Stop Use EL Backlight In any mode press C to illuminate the display about 3 seconds ...

Страница 102: ... Stopwatch Mode DualTime Mode a TIMEKEEPING 12 24H Format Hour Minutes Seconds Day of week Date 100 years Calendar 2000 2099 b ALARM Hourly time signal The alarm sounds at the preset time each day c STOPWATCH 1 100 second unit Measuring range 00 00 00 23 59 59 d DUAL TIME The time for other time zone ...

Страница 103: ...l the seconds to flash flashing indicated in set mode 2 Press D to reset the seconds 3 Press B change to the next selection 4 Press D to increase the number press and hold to increase at high speed 5 Repeat step 3 and 4 the selection in the following sequence Seconds Hour Minutes Year Month Date 6 Press A to exit the set state after you set The day of week is automatically displayed in accordance ...

Страница 104: ... to select the minutes 4 Press D to increase the minutes press and hold to increase at high speed 5 Press A to exit the set state after you set The alarm sounds at the preset time each day for about 60 seconds press any button to break it Alarm and Chime In the alarm mode press D to on off the alarm and chime in the following sequences Alarm Chime off Alarm on Chime on Alarm Chime on ...

Страница 105: ... again 3 Press A to reset the stopwatch 1 In the stopwatch mode press D to start the stopwatch 2 Press A to display the split time stopwatch timing continutes internally 3 Press A to clear the split time and to continute time measurement 4 Repeat step 2 and 3 you can measure the multi split time 5 Press D to stop the stopwatch ...

Страница 106: ...A the hour to flash flashing indicated in set mode 2 Press D to increase the hour press and hold to increase at high speed 3 Press B to select the minutes 4 Press D to change the minutes press once change 30 minutes 5 Press A to exit the set state after you set ...

Страница 107: ...VD53 INSTRUCTION MANUAL ...

Страница 108: ... time 3 Return the crown to its normal position SECOND DATE SETTING 1 Pull the crown out to position 2 2 Turn the crown counter clockwise until the correct date is shown in the date window do not set the date between 9 00 p m and 3 00 a m 3 Return the crown to its normal position ...

Страница 109: ...her A to start timing 2 PRESS pusher B to stop timing The stopwatch continues to count seconds elapsed but the hands do not move 3 PRESS pusher B again to resume timing The hands move quickly to indicate elapsed time and continue counting NOTE The hour minute and second hands on the watch will continue to indicate the correct time while using the stopwatch CHRONO MINUTE CHRONO SECOND A B 24 HOUR H...

Страница 110: ...e time be sure to check that the 24 hour hand is set properly ADJUSTINGTHE CHRONOGRAPH 1 Pull the crown to position 3 2 Press A to reset the chronograph second hand to zero 3 Press B to reset the chronograph minute and hour hands 4 Reset the watch to the current time and return the crown to its normal position ...

Страница 111: ...VD54 INSTRUCTION MANUAL ...

Страница 112: ...TIME SETTING 1 Pull crown out to position 2 2 Turn the crown to set the desired time 3 Return the crown to its normal position SECOND 1 2 ...

Страница 113: ...r A to start timing 2 PRESS pusher B to stop timing The stopwatch continues to count seconds elapsed but the hands do not move 3 PRESS pusher B again to resume timing The hands move quickly to indicate elapsed time and continue counting NOTE The hour minute and second hands on the watch will continue to indicate the correct time while using the stopwatch 1 2 A B CHRONO MINUTE CHRONO SECOND 24 HOUR...

Страница 114: ...e time be sure to check that the 24 hour hand is set properly ADJUSTING THE CHRONOGRAPH 1 Pull the crown to position 2 2 Press A to reset the chronograph second hand to zero 3 Press B to reset the chronograph minute and hour hands 4 Reset the watch to the current time and return the crown to its normal position ...

Страница 115: ...VD55 INSTRUCTION MANUAL ...

Страница 116: ...TIME SETTING 1 Pull crown out to position 2 2 Turn the crown to set the desired time 3 Return the crown to its normal position SECOND ...

Страница 117: ...me 1 PRESS pusher A to start timing 2 PRESS pusher B to stop timing The stopwatch continues to count seconds elapsed but the hands do not move 3 PRESS pusher B again to resume timing The hands move quickly to indicate elapsed time and continue counting NOTE The hour minute and second hands on the watch will continue to indicate the correct time while using the stopwatch The stopwatch 1 10 second h...

Страница 118: ... A or B to reset all stopwatch hands to 0 position The stopwatch minute hand moves correspondingly with the stopwatch second The hands move quickly if the respective buttons are kept pressed 3 Reset the watch to the current time and return the crown to its normal position ...

Страница 119: ...VX3J INSTRUCTION MANUAL ...

Страница 120: ...ill the day hand advances to the next day Repeat the same procedure and set the day hand to the desired day of the week Time setting Set to the correct time Be sure to check that AM PM is properly set Push crown back to position 1 DAY HAND 24 HOUR SUB DIAL SETTING The 24 hour hand moves correspondingly with the hour and minute hands When setting the time be sure to check that the 24 hour hand is s...

Страница 121: ...VX9J INSTRUCTION MANUAL ...

Страница 122: ...Features Hour minute and second hands Day date and 24 hour indicators Date hand Second hand 24 hour hand N Normal position 1 First click position Crown Hour hand Day hand Minute hand ...

Страница 123: ...How to set time Pull the crown out to the 1st click position when the seconds hand is at the 12 o clock position Pull out to 1st position Turn to set the time taking AM PM into consideration ...

Страница 124: ...dvance Setting Technique The 24 hour hand moves correspondingly with the hour hand When setting the hour hand check that the 24 hour hand is correctly set When setting the minute hand advance it 4 to 5 minutes ahead of the desired time and then turn it back to the exact time ...

Страница 125: ...ssing of the button A the day hand advances to the next day Note Do not set the date and the day hands between 9 00 p m and 4 00 a m Otherwise they may not move properly While setting the date and the day hands check that they move properly in one day increments It is necessary to adjust the date on the first day after a 30 day month and February ...

Страница 126: ...VX9N INSTRUCTION MANUAL ...

Страница 127: ......

Страница 128: ......

Страница 129: ......

Страница 130: ......

Страница 131: ...VX9P INSTRUCTION MANUAL ...

Страница 132: ......

Страница 133: ......

Страница 134: ......

Страница 135: ...VX36 INSTRUCTION MANUAL ...

Страница 136: ...set independently Then turn back the hour hand by about 4 hours and advance it again till the day hand advances to the next day Repeat the same procedure and set the day hand to the desired day of the week Time setting Set to the correct time Be sure to check that AM PM is properly set Push crown back to position 1 DAY HAND DATE HAND Quick change of the date clockwise ...

Отзывы: