PC Picture Adjustment
21
PC/DTV Input
1
Connect the PC IN cable (D-Sub) from the monitor output socket
of the PC to the PC ANALOG input socket of the TileVision.
2
Connect the PC Audio IN cable from the PC to the PC AUDIO IN
of the TileVision.
3
Press the TV/AV (
) mode.
4
Switch on the PC, and the PC screen appears on the TileVision.
Picture Adjustment
1
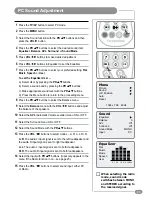
Press the TV/AV button to select the PC Mode.
2
Press the MENU button.
3
Select the Picture function with the PR
UD
buttons and then
the press the VOL
R
button.
4
Press the PR
UD
buttons to select the desired picture item.
5
Press the VOL
LR
buttons to make appropriate adjustments.
6
Press the TV/AV button to exit the menu.
The Auto function is for the automatic adjustment of the screen
position, clock and clock phase. The displayed image will disappear
for a few seconds while the auto configuration is in process.
Reset returns the picture settings to those programmed at the
factory and cannot be changed.
☛
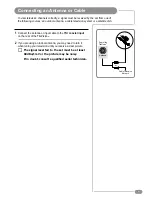
Signals from some graphics boards may not
function properly. If the results are unsatisfactory,
adjust clock and clock phase manually.
TV/AV
TIME
ARC
TV/AV
SLEEP
QV
LIST
Menu
Picture
Sound
H/V Position
Auto
Reset
1024 x 768
60Hz
Picture
Contrast
60
Brightness
80
Colour
9300K
Clock
50
Phase
34
ARC
16:9
Picture
Contrast
60
Brightness
80
Colour
9300K
Clock
50
Phase
34
ARC
16:9
OK
MENU
PR
VOL
Содержание TV/17/FR3/PS
Страница 35: ...Notes 33 ...

