


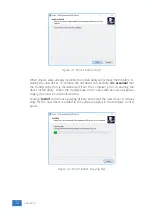


Figure 4.1: Driver install: step 1
When drivers were already installed, the install utility will remove them before in-
stalling the new driver. To remove the old driver successfully,
it is essential
that
the Handyscope HS4 is disconnected from the computer prior to starting the
driver install utility. When the Handyscope HS4 is used with an external power
supply, this must be disconnected too.
Clicking
”
Install
”
will remove existing drivers and install the new driver. A
remove
entry
for the new driver is added to the software applet in the Windows control
panel.
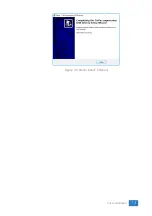
Figure 4.2: Driver install: Copying files
12
Chapter 4
Содержание Handyscope HS4
Страница 1: ...Handyscope HS4 User manual TiePie engineering...
Страница 6: ......
Страница 17: ...Figure 4 3 Driver install Finished Driver installation 13...
Страница 18: ...14 Chapter 4...
Страница 20: ...16 Chapter 5...
Страница 22: ...18 Chapter 6...
Страница 26: ...22 Chapter 7...
Страница 30: ...26 Chapter 8...
Страница 32: ...TiePie engineering Handyscope HS4 instrument manual revision 2 27 February 2020...


