Tie Down • Atlanta, Georgia 30336
7
Solar/Plywood Tie Down and Lifting Instructions
• Use the proper tie down equipment - If you are not securing your cargo with the
proper safety straps, it could come loose during lifting, resulting in injury or death.
• Never hoist anything wider than the 8” - Larger plywood sheets can make
controlling your hoist difficult and dangerous, especially when considering
windy conditions. Wide panels must be centered to prevent tipping.
• Attach your safety straps to slotted tie-down points - Do not hook your tie-down straps
to the plywood, straps must pass over the top. Secure your safety straps to the carriage
top flaps slotted holes (the metal frame) and to the plywood brackets only (refer
to the drawings for tie down slot locations).
• Maintain a manageable speed - The wind’s
effects on sheets of plywood or panel
goods, as well as the higher center of gravity,
can make hoisting difficult and dangerous.
• Check all tie-down connections. Safety straps
may come loose during transport.
Always check strap for damage or wear.
Replace when damaged or worn.
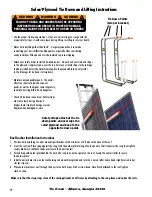
Plywood Bracket
Tie Downs -
Secure straps through
slotted holes provided.
Tie down strap
must loop over
all materials and
must attach at
tie down locations.
NOTE:
ALWAYS CENTER FLAT
PANEL LOADS
Platform Back
Flap Tie Down -
Secure straps through
flap slots provided
on back.
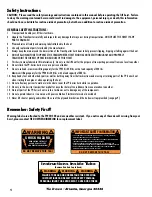
WARNING
WARNING
WARNING
FAILURE TO READ AND UNDERSTAND THE OPERATING
INSTRUCTIONS CAN RESULT IN PROPERTY DAMAGE,
PERSONAL INJURY OR EVEN DEATH TO USER OR OTHERS
Roof Anchor Installation Instructions
1. Position hoist according to owner manual specifications with a minimum of 3 ft. above the eave of the roof.
3. From the roof top: Place strap against the rung, feed the anchor plate through the loop end so that it captures the rung then tighten
snugly. Make sure that both straps are close to the hoist side rail.
4. Extend strap with anchor plate behind the hoist side rung to an anchor point on the roof. Locate the nearest rafter to secure
the anchor plate
5. Install a nail or deck screw on the roof decking underneath shingle tab and into the nearest rafter. Leave head slightly raised so key
slot can slip over.
6. Place anchor plate over nail through the key slot on both straps. Nail or screw down. Once firmly attached to the roof tighten
slack on strap.
Make sure that the strap stays clear of the carriage/tracks at all times by attaching to the rung close and under the rails.
Tie Down Points
(two per bracket)
Safety straps attach at the tie
down points and over laps the
solar/plywood and back to the
opposite tie down point.


