5
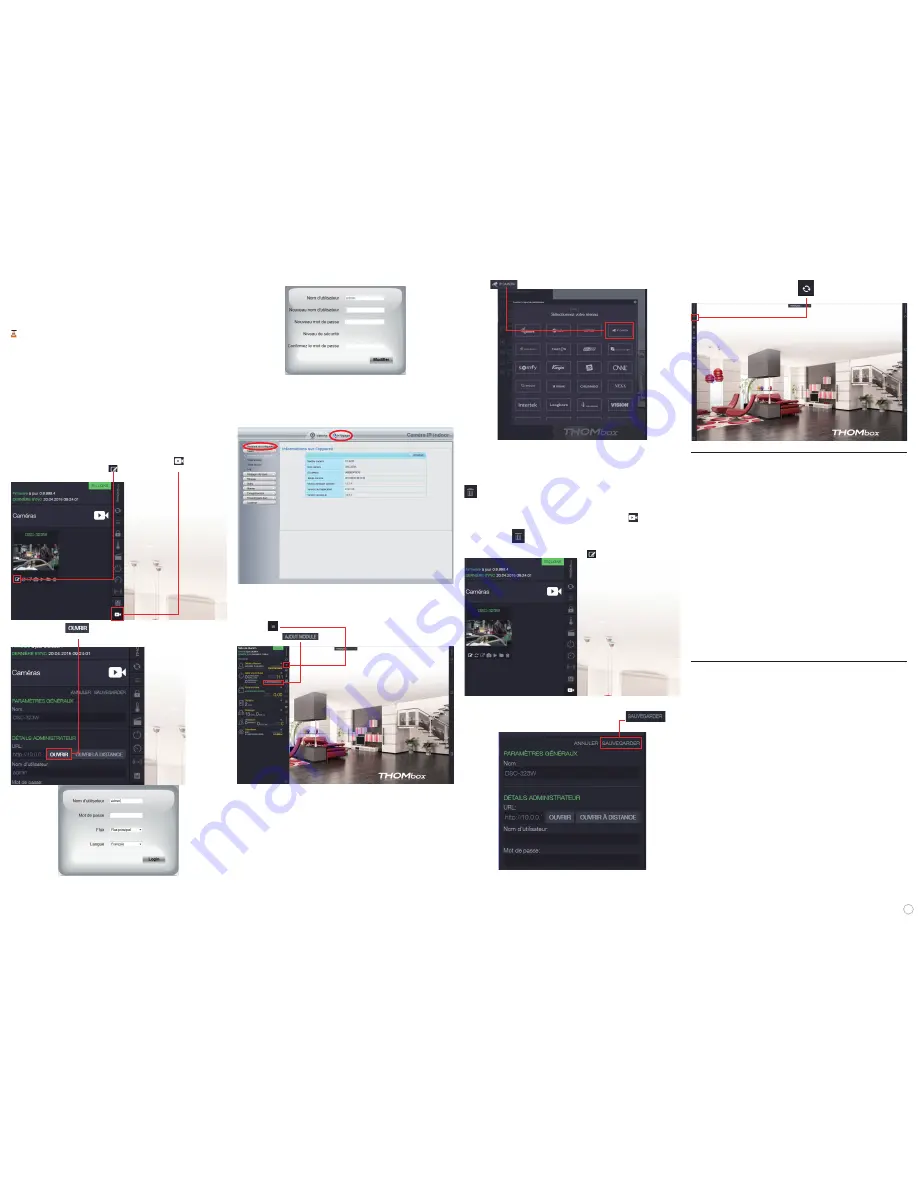
The camera will immediately ask you to change the login username:
Type your new username and the password of your choice.
Connect to your camera using the username and password you have just
created.
Click on the Réglages [Settings] tab then on the 'Assistant de confi guration
[Confi guration wizard]' button to launch the wizard which allows you to set your
camera up for WiFi:
Once you have fi nished, you can disconnect the network cable from your
camera and close the page.
Your camera is now connected to the wireless network. To alert the Thombox
of this change:
- Click on
- Then click on
- Select
from the list of protocols that appears:
Your Thombox scans for your camera, now connected to the wireless network.
Allow the procedure to continue until your camera appears in the search results,
then close the window using the X at the top right. Your camera has been
added.
You can delete the camera at the top left of your interface by clicking on the
icon: this corresponds with the wired connection that will no longer be
used.
- Open your Thombox interface, then the cameras section
- You can delete the camera at the top left of your interface by
clicking on the
icon: this corresponds with the wired connection that will
no longer be used.
- Click on the "Modify camera details" icon
by your newly added camera:
- Fill out the "Username" and "Password" fi elds by entering those that you set
up in the camera in the previous step. You may also assign a suitable name
to the camera. Once the fi elds have been fi lled, click on
Once you have set up the device, you can adjust the focus of the image if it is
lacking sharpness. Gently rotate the lens to adjust the focus.
WARNING: Do not unscrew the lens completely or force it.
Note: The 'Cameras' section of your Thombox uses a third-party software to
display the image from your camera.
Install the media player:
VLC Media Player 32 bit
The software for the VLC Media Player is free and available for download at the
following address: http://www.videolan.org/vlc
When installing the media player, make sure that the software's "full" mode is
selected.
A notifi cation will prompt you to install and enable the VLC plug-in in your
browser.
Restart your browser or computer if necessary.
Optional: wireless camera connection.
By default your camera is confi gured and pre-paired for a wired connection.
To switch your camera to a wireless connection,
fi rst it must be temporarily
connected to the wired network.
- Open your Thombox interface, then the cameras section
and click on
the "Modify camera details" icon
- Then click on the
button to access the confi guration settings for the
camera itself:
Select the language of your choice. The default username is "admin" and there
is no pre-set password.
- Once this step is complete, click on
on the top left.
F. CONFIGURING THE ALARM
Your Thombox works with one or more partitions that can be controlled
completely independently. The security partition is a is a control area where
a number of accessories can be controlled simultaneously by one or more
users. In most case, the standard safety partition, saved by default on your
Thombox, will be suffi cient. If you would like to modify it, go to our website,
www.thomsonbox.eu.
1). ALARM PIN CODE
For optimal security, an additional 4-digit PIN code is requested; it is "0000" by
default followed by "OK". This code is entered using just the mouse, clicking on
the virtual keyboard. We recommend that you change the default PIN code (
see
paragraph 1 – ALARM PIN CODE to change the PIN code, page 5).
2). EMAIL NOTIFICATIONS
- Click on the padlock icon
- In "partition 1", click on the settings icon
- Enter your security PIN code (0000 by default)
- Click on the "Reports" tab
- In "Email reports", under the "send to" drop-down menu: select your
username
- Click "SAVE" to fi nish.
G. SETTING UP SMARTPHONE/TABLET ALERT
NOTIFICATIONS
The Thombox can send push notifi cations to your Android smartphone/tablet
if an event occurs.
This feature is specifi c to each user. If several users wish to be notifi ed by the
system, this must be saved to the Thombox.
Point your mouse to the right of the screen; a window will open. Then click on
the "pencil" icon to the right of "My Rule" to show the parts of the rule on the
screen.
- Click on "CONFIGURE" (opposite send message) to confi gure "PUSH"
notifi cations.
"Type": allows you to defi ne the type of alert; e.g. receive push notifi cation.
"Send to": allows you to defi ne the contact who receives the alert; e.g. user
X will receive the alert on his/her smartphone.
"Subject": allows you to defi ne the subject of the alert; e.g. intrusion alert
(email only).
"Message": allows you to set the alert message; e.g. the front door has been
opened (email and push).
- Click in the "Type" fi eld and select "Push".


