background image

Player menus

17

EN

Preferences

1.

Select the 

Preferences

option using the 

and 

buttons and press 

ENTER

.

2.

Select one of the options using the 

and 

buttons and press 

to access the various options.

Note:The Preferences menu is not available when there is a
disc in the player.

Audio

1.

Press 

to access the sub-menu.

2.

To change the dialogue language, choose the language
using the 

and 

buttons and press 

ENTER

to

confirm.

Note: If the selected language is not available on a disc, the
disc’s default language will be used instead.

3.

To change the language during play, press several times
the 

LANGUAGE

button on the remote control.

Subtitle

1.

Press 

to access the sub-menu.

2.

To change the subtitle language, choose the language
using the 

and 

buttons and press 

ENTER

to

confirm.

Note: If the language chosen is available, it is automatically
selected when you display the subtitles. Otherwise, the subtitle
language indicated on the disc is selected instead.

3.

To change the language of the subtitles during
playback, press several times the 

SUBTITLE

button

on the remote control.

Disc Menu

1.

Press 

to access the sub-menu.

2.

To change the language of the disc menus, choose the
language using the 

and 

buttons and press

ENTER

to confirm.

Rating limits

This setting prevents the playback of DVDs that may not
be suitable for all audiences, by using the rating level that
may be encoded on the disc. If the rating level on the disc
is higher than the preset level the playback function will
not be enabled unless the password is entered.

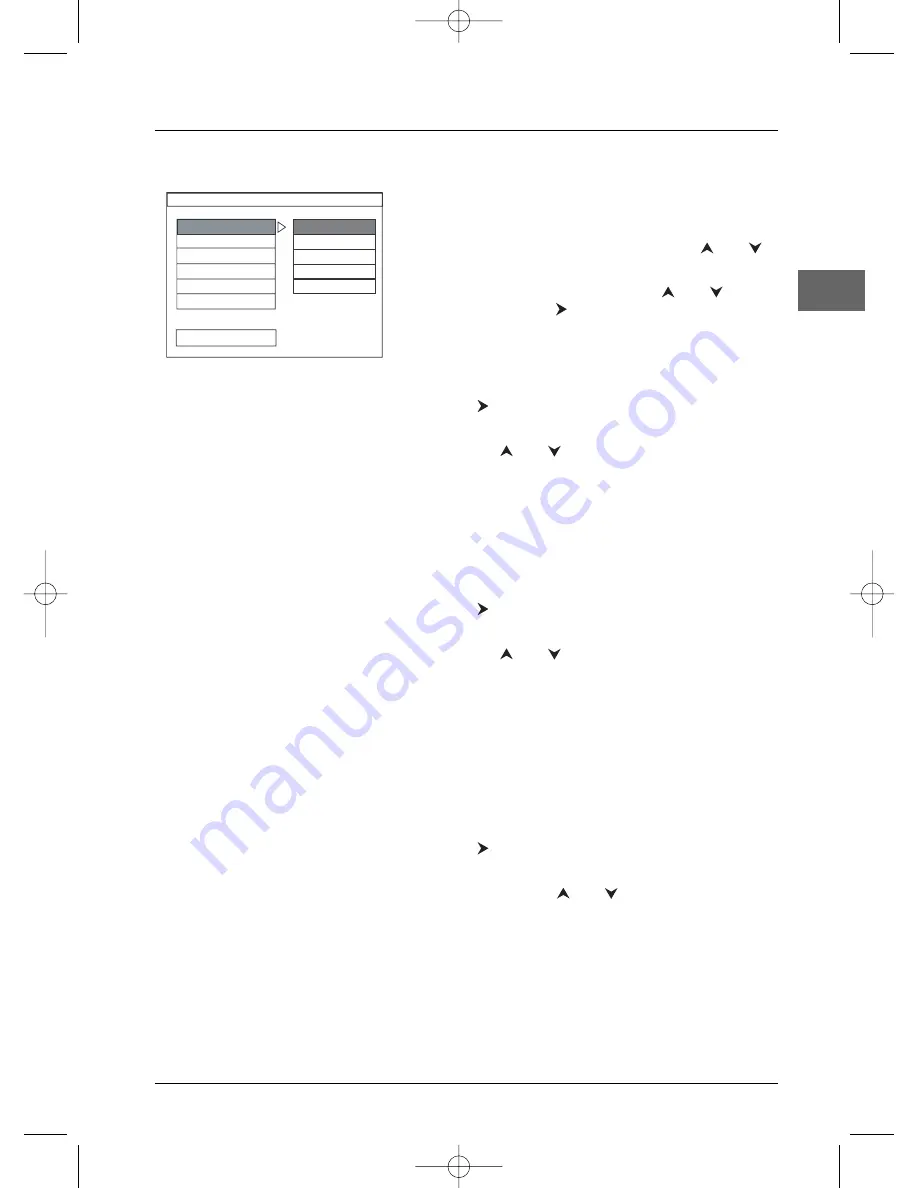
-- PREFERENCES PAGE --

AUDIO

SUBTITLE

DISC MENU

RATING LIMITS

PASSWORD

DEFAULTS

MAIN PAGE

ENGLISH

FRENCH

SPANISH

GERMAN

ITALIAN

DPL906VD_EN  12/08/05  9:54  Page 17

Содержание DPL906

Страница 1: ...6 Preferences 17 Additional Information Troubleshooting 19 Precautions 20 Guarantee 20 Technical data 21 Discs and formats you can play 21 Sound Enhancement Systems 22 In the interest of improving the quality of our products we reserve the right to modify their features The information in this manual is therefore subject to change and does not represent any kind of contract You can contact THOMSON...

Страница 2: ...ning the appliance on again Before moving the player make sure the disc tray is empty Other important information about using and cleaning your appliance is available at the end of the booklet Accessories provided Remote control and 2 non rechargeable batteries type AAA Pig tail aerial wire Left and right front speakers Centre speaker Left and right rear speakers Subwoofer Caution Invisible laser ...

Страница 3: ... location 9 VOLUME To adjust the sound volume Inserting batteries in the remote control Do not mix different types of batteries or new and old batteries Do not use rechargeable batteries In order to avoid any risk of explosion observe the polarities indicated inside the battery compartment Replace only with the type of batteries specified above Do not dispose of them in a fire or recharge them If ...

Страница 4: ...ket yellow is also known as a composite video socket The picture quality obtained using a video connection is poorer compared to that obtained using a Scart connection AUDIO IN L left and AUDIO IN R right sockets These are analogue audio input sockets The AUDIO L socket and cable are white while the AUDIO R socket and cable are red Video cable yellow Scart cable The FM aerial provided should be co...

Страница 5: ...hase effect Do not ground the output line as this will damage the speaker 1 2 1 Centre speaker In surround mode the centre speaker transmits much of the dialogue as well as music and effects It should be positioned between the left and right speakers 2 Left Right Front Speakers They mainly transmit music and sound effects 3 Surround Rear Speakers Their overall sound balance should be as close as p...

Страница 6: ...ative Surround Placement Rear wall If rear wall mounting is the only option direct the speakers at each other A towards the front B or even towards the side walls C D Experiment with their position until the surround sound seems to envelope you rather than come from behind you No adjacent walls Surround speakers can be placed on stands facing each other to replicate the preferred side wall mountin...

Страница 7: ...r track CD InTuner mode to select previous programmed stations PLAY PAUSE To start playing a disc Pause NEXT PRESET To directly access the next chapter DVD or track CD InTuner mode to select next programmed stations BACKWARD To start reverse accelerated play InTuner mode to tune down the radio frequencies SLOW MEMORY To start reverse or forward slow motion during playback InTuner mode to store a s...

Страница 8: ... the remote control 4 Press STOP to stop playback Note The player stores the point where playback was interrupted If you press PLAY PAUSE again playback resumes from this point To stop playback completely or to start again from the beginning press STOP twice If the player is left in STOP mode for more than 30 minutes without any user interaction the player switches off automatically Accelerated pl...

Страница 9: ...ts A and B press the A B button at the beginning of the sequence you want to repeat Then press the A B button again at the end of the sequence Then the sequence is played repeatedly until you press A B to resume normal playback Note A B repeat can only be used within the same chapter or track Programme playback VCD and audio CD With this option you choose and programme the playback order up to 99 ...

Страница 10: ...Subtitles DVD Press several times the SUBTITLE button to select one of the available subtitles languages and press ENTER Note This option is only available if the disc offers a number of subtitle languages Camera angle DVD Some discs offer different camera angles for specific scenes 1 Turn the Angle function on by pressing the ANGLE button once 2 When multiple angles are available the angle icon i...

Страница 11: ... the OPEN CLOSE button 2 Place the disc with the printed side facing up and close the tray 3 Select a folder using the and buttons then press ENTER to display the list of files 4 To start playback select a file using the and buttons and then press ENTER or PLAY PAUSE or enter the file number using the numeric buttons Note During playback use the PREVIOUS PRESET or NEXT PRESET button to go back to ...

Страница 12: ...ctions below to find the registration number of your player 1 Press the SETUP button 2 Select the DivX R VOD option from the Setup menu Main page menu and press ENTER The registration number is displayed 3 Write down thisVOD 8 character registration number so that you can fill in the form on the website you purchase your DivXVOD files from Note If you cannot play a DivX VOD file recorded on a CD R...

Страница 13: ...ter every single radio station yourself or the player can store all available radio stations automatically in ascending order Automatic preset programming 1 Press the SOURCE button to enter the Tuner mode 2 Press and hold PROGRAM down for 3 seconds to start automatic preset programming Note A weak signal can affect the Automatic preset programming function s efficiency Adjust the aerial for better...

Страница 14: ...ENTER 2 Select one of the options using the and buttons and press to access the various options TV Display Depending on the format of the DVD disc you can choose the picture format best suited to the format of your TV screen 1 Press to access the sub menu 2 Select an option using the and buttons then press ENTER to confirm 4 3 PS reproduces a 4 3 picture without distortion 4 3 LB gives best reprod...

Страница 15: ...options Center Delay Rear Delay To make the surround sound more effective and suit the acoustic conditions in the room where you are listening you may need to delay the signal coming from some of the speakers 1 Select Center Delay or Rear Delay using the and buttons and press to access the sub menu 2 Adjust the distance using the and buttons and press ENTER TestTone This function is used to test t...

Страница 16: ...l the different sound levels via dynamic compression It improves the quality of the sound track at a low volume and quietens the loudest sounds 1 Press to access the sub menu 2 Select the level using and then press ENTER Audio Setup AUDIO SETUP D R C MAIN PAGE DivX R VOD 1 Select the DivX R VOD option using the and buttons 2 Press ENTER The registration number is displayed Please refer to page 12 ...

Страница 17: ...ns and press ENTER to confirm Note If the language chosen is available it is automatically selected when you display the subtitles Otherwise the subtitle language indicated on the disc is selected instead 3 To change the language of the subtitles during playback press several times the SUBTITLE button on the remote control Disc Menu 1 Press to access the sub menu 2 To change the language of the di...

Страница 18: ...0 Password This option allows you to change the password 1 Press to access the sub menu 2 Press ENTER 3 To change the password enter the current four digit password in the Old Password box Then enter the new password in the New Password box You are then prompted to enter it again in the Confirm box to confirm and to press ENTER Defaults This option restores the factory set settings 1 Press to acce...

Страница 19: ...tteries are inserted or change them Aim the remote control at the appliance The infrared beam must not be blocked or interrupted The subtitles do not appear Check that the DVD disc provides subtitles Refer to the section on how to display subtitles The disc menu language is not the correct one The disc menu language has not been set up see page 17 The language of your choice is not available on th...

Страница 20: ...ed products risks damaging the appliance If an object or liquid enters inside the appliance unplug it immediately and have it checked by an authorised engineer Handling and caring for discs Handle your discs with care Hold the disc with your fingers at the edges or through the hole Insert the disc with the label facing up for a single sided disc Place the disc properly into the tray in the allotte...

Страница 21: ...igital signals DVD R DVD RW DVD R DVD RW Most DVD R and DVD R one recording only DVD RW and DVD RW discs rewritable Depending on the DVD writer and discs used Recordings using DVD R and DVD RW discs must be made inVideo DVD mode Recordings using DVD RW discs must be made in accordance with the specifications for DVD RW discs with a 4 7 GB capacity VCD Video Compact Disc CD on which you can record ...

Страница 22: ... number of files on a disc should be less than 400 Use a decompression transfer rate of at least 128 kB sec kilobytes second when recording mp3 files Sound quality with mp3 files basically depends on the rate of compression decompression you choose Obtaining audio CD quality sound requires an analogue digital sampling rate that is conversion to mp3 format of at least 128 kB sec and up to 160 kB se...

Отзывы: