


23
EN
WALL MOUNT INSTALLATION (OPTIONAL)
Setup Steps
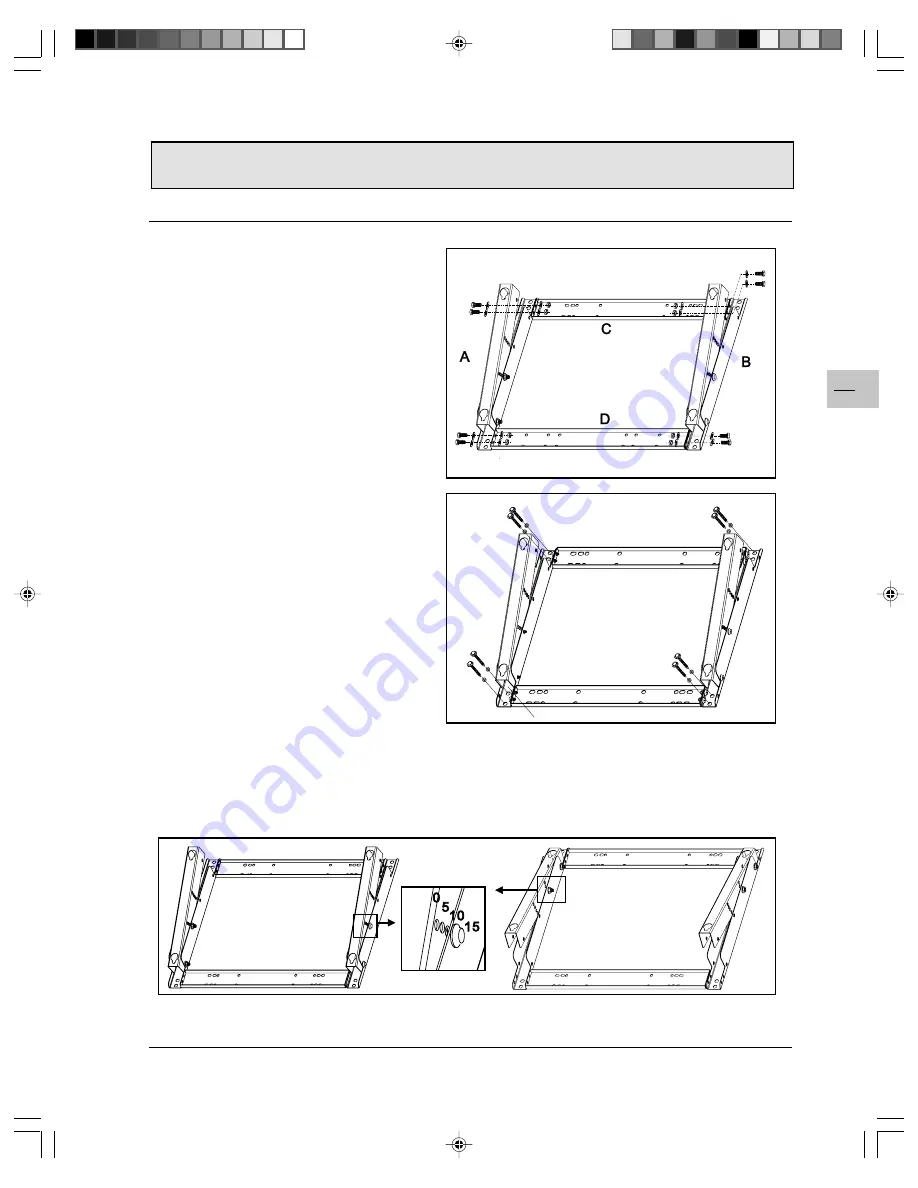
Step 1.
Attach Horizontal Supports (C and D) to the
Left and Right Wall Angle Module ( A and
B) with screws (E).
Step 2.
Install the Wall Mount Bracket onto the wall.
Note:
The screws in this package are for
mounting onto a wooden wall. Different
kind of walls (cement walls, for example)
need different type screws. Please consult
with a qualified installer to make sure your
wall is capable of supporting this bracket
and plasma monitor.
You can adjust the mounting direction and
inclination angle (0, 5, 10, 15 degrees) by
adjusting the screws position on the Wall
Mounting Angle Module.
42WB03SW-EN-5-062303.p65
2003/6/23, PM 04:52
23


