5
STEP 9.
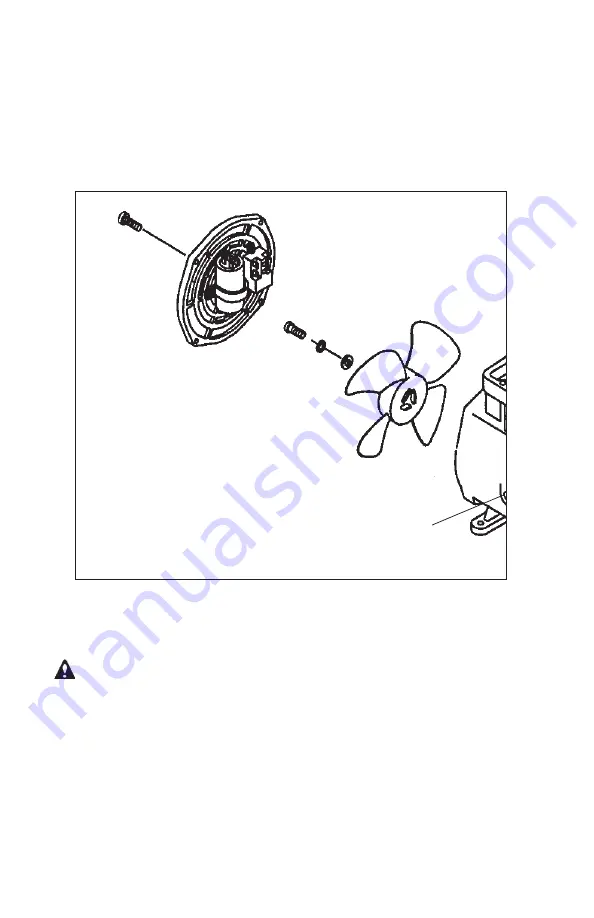
Install the fan onto the eccentric nib. Align the slot marked ‘1007’ with the
notch on the eccentric nib. Insert the screw and washer into the threaded hole in
the nib. Tighten to 30 in-lbs. DO NOT OVERTIGHTEN. When properly assembled
the fan will remain centered in the housing when rotated by hand. NOTE: it may be
helpful to insert the hex key through the hole in the housing, and into the set screw
hole in the eccentric. This will prevent the eccentric from rotating while tightening
the fan screw.
Caution
To avoid property damage or personal injury, always try rotating the fan by
HAND prior to connecting the unit to the power source. Check for suction
at the air inlet port by placing your finger over the port as you turn the fan.
You should feel a slight suction with each rotation of the fan. If you don’t feel
suction, or if you feel or hear a thump as you turn the fan, DO NOT CONNECT
THE UNIT TO A POWER SOURCE; review the assembly procedure for
possible error.
Place Allan
Wrench in
Access Hole
Figure #10


