background image


2

Taking Care of Your Digital Drum Set 

Thank you for purchasing this digital drum module. The drum module has been 

developed to act and play like a drum set but with greater ease. Before you use 

the instrument, we recommend you read through this manual. 


Location


  Do not expose the unit to any of the following conditions :- 

 Direct 

sunlight. 

  High temperature (near a heat source or direct sunlight). 


Excessive humidity.


Power Supply 

  Make sure a suitable AC-Adaptor is used and that the input voltage specified 

on the AC-Adaptor`s label corresponds with your country’s AC-Outlet voltage. 

  Turn the power switch to OFF when the instrument is not in use. 

  An AC adaptor should be unplugged from the AC outlet if the instrument is not 

being used for an extended period of time. 

  Unplug the AC adaptor during electric storms. 

  Avoid plugging the AC adaptor into the same AC outlet as an appliance with 

high power consumption, such as electric heaters or ovens. Also avoid using 
multi-plug adaptors since these can result in reducing the sound quality, 
operation errors, and possible damage. 

Turn power OFF when altering connections 

  To avoid damage to the instrument and other connected devices, turn OFF the 

power switches of all related devices prior to connecting or disconnecting 
cables. 

Handling and Transport 

  Never apply excessive force to the controls, connectors or other parts of the 

instrument. 

  Always unplug cables by gripping the plug firmly, but not pulling on the cable. 

  Disconnect all cables before moving the instrument. 

  Physical shocks caused by dropping, bumping, or placing heavy objects on 

the instrument can result in scratches and more serious damage. 

Cleaning 

  Clean the unit with a dry soft cloth. 

  A slightly damp cloth may be used to remove stubborn grime and dirt. 

  Never use cleaners such as alcohol or thinners. 

  Avoid placing vinyl objects on top of the unit (vinyl can stick to and discolour 

the surface). 

Electrical interference 


This instrument contains digital circuitry and may cause interference if placed 
too close to radio or television receivers. If this occurs, move the instrument 
further away from the affected equipment


Содержание Millenium Transformer Bundle

Страница 1: ...1 Millenium Transformer Bundle Instruction Manual...

Страница 2: ...i plug adaptors since these can result in reducing the sound quality operation errors and possible damage Turn power OFF when altering connections To avoid damage to the instrument and other connected...

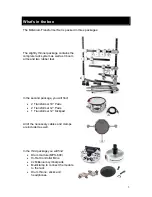
Страница 3: ...nd two rubber feet In the second package you will find 2 Transformer 10 Pads 2 Transformer 12 Pads 1 Transformer 12 Kickpad All of the necessary cables and clamps are included as well In the third pac...

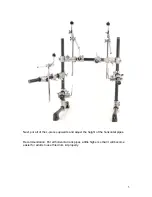
Страница 4: ...ired The rack is already partially set up The two rubber feet should be attached to the pipes on the bottom of the rack Turn the bottom pipes to you so that you get more stability as shown on the righ...

Страница 5: ...ut all of the L pieces upwards and adjust the height of the horizontal pipes Recommendation Put all horizontal rack pipes a little higher so that it will become easier for adults to use this drum kit...

Страница 6: ...Here is included The Pad One short and two longer pipes Foot plate Two rack joints The Millenium Transformer Kickpad contains three brackets for the different pipes The smaller pipe should be connect...

Страница 7: ...connect the rack clamps After setting everything up it should look like this here Now you can connect the rack clamps onto the vertical pipes of the rack just as shown on the picture here The tom pad...

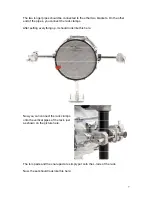
Страница 8: ...m arms just as you mount acoustic cymbals onto boom stands Put the cymbal right between the two felts right under the screw as you can see here and tighten the screw slightly Now it s nearly complete...

Страница 9: ...here You need to turn around the metal part of the multi clamp as you can see here on the picture Then you can simply connect the clamp to the tom holder on the left side of the rack On the other end...

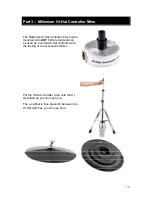
Страница 10: ...e can be mounted onto ANY Hi Hat stand and can be used as a normal Hi Hat controller with the feeling of a real acoustic Hi Hat Put the Hi Hat controller mine onto the Hi Hat stand as you can see here...

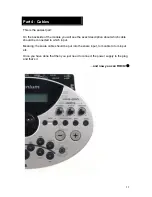
Страница 11: ...ee the exact description about which cable should be connected to which input Meaning the snare cable should be put into the snare input tom cable to tom input etc Once you have done that then you jus...

Отзывы: