Recalibration
a)
Disconnect hot plate from power supply.
b)
Turn hot plate upside down and remove bottom
plate.
c)
Remove the knob from the adjusting shaft by
removing screw from knob.
d)
Turn the adjusting shaft into the control mount-
ing bracket until the contact points just close
with a “snap” action.
e)
Measure the gap between the contact spring
and spring action limiting screw with a feeler
gauge.
f)
This gap should be between .006 and .010 for
normal operation of control.
g)
Adjust the spring action limiting screw until the
proper gap is attained just before the magnetic
attraction is overcome and the points open.
h)
Turn the adjusting shaft until the contact points
close and slide knob over shaft with the FIRST
MARK aligned with the pointer line. (Leave 3/16”
of space between knob and dial plate.)
i)
Tighten screw on knob and check to see that
the contacts “SNAP” closed as the pointer
crosses the index line.
j)
Turn knob counterclockwise until the “OFF”
mark on dial plate aligns with pointer line, and
readjust stop collar against the stop pin at this
point.
k)
Tighten set screw on stop collar and check for
free rotation of the control shaft between stops.
I)
Replace bottom plate.
m)
Turn hot plate upright and reconnect to power
supply.
15
M
AINTENANCE AND
S
ERVICING
Note
Recalibration my be needed for the
control unit due to contact wear, or
because of other repairs to the hot
plate.
Note
The gap between the contact spring
and spring action limiting screw con-
trols the difference between the “ON”
and “OFF” temperatures of the surface
plate when the control is holding a set
temperature. A narrow gap will give a
narrow control band, while a wide gap
will increase the range between the
“ON” and “OFF” temperatures. There
must be a definite “SNAP” opening
and closing of the contact points when
the control shaft is slowly screwed in
and out. This snap action, in conjunc-
tion with magnetic blow out of any arc
which tends to form between the con-
tacts, results in long contact life.
Содержание HPA2230M
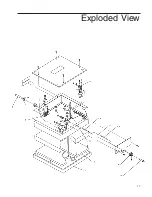
Страница 17: ...17 Exploded View ...
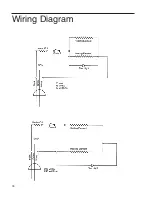
Страница 18: ...18 Wiring Diagram ...


