3-44
Graphical User Interface
3. 7. 7. Unit Name
The
Unit Name
button opens the “Unit Name” screen, where you can set a name for the centrifuge that will be
displayed above the time/date field in the “Info & Health Status” area on top of the “Home” screen.
Proceed as follows to edit the name of the unit:
1. Tap the
Settings
icon on the navigation bar.
2. Tap the
Display
button on the “Settings” screen.
3. Tap the
Unit Name
button on the “Display” screen.
The “Unit Name” screen appears, prompting you to name the centrifuge.
4. Inspect the “Unit Name” field:
If no unit name has been previously set, the “Unit Name” field will read “Tap to enter”.
If a unit name has been previously set, that name appears in the “Unit Name” field.
5. Tap on the
Unit Name
field to display the keypad.
If no unit name has been previously set, a cursor will appear in the”Unit Name” field and prompt you to start
typing.
If a unit name has been previously set, that name will be selected for overwriting.
6. Type the desired unit name.
7. When you have finished typing, do one of the following:
a. Tap the
Save
button on the keypad.
b. Tap anywhere outside of the keypad and the “Unit Name” field to hide the keypad, then tap the
Save
button at the bottom of the screen.
8. To confirm the changes, tap the
OK
button in the pop-up window that appears. Tapping the
X
icon closes
this window and exits without saving.
You will be returned to the “Display” screen.
3. 8. Logs
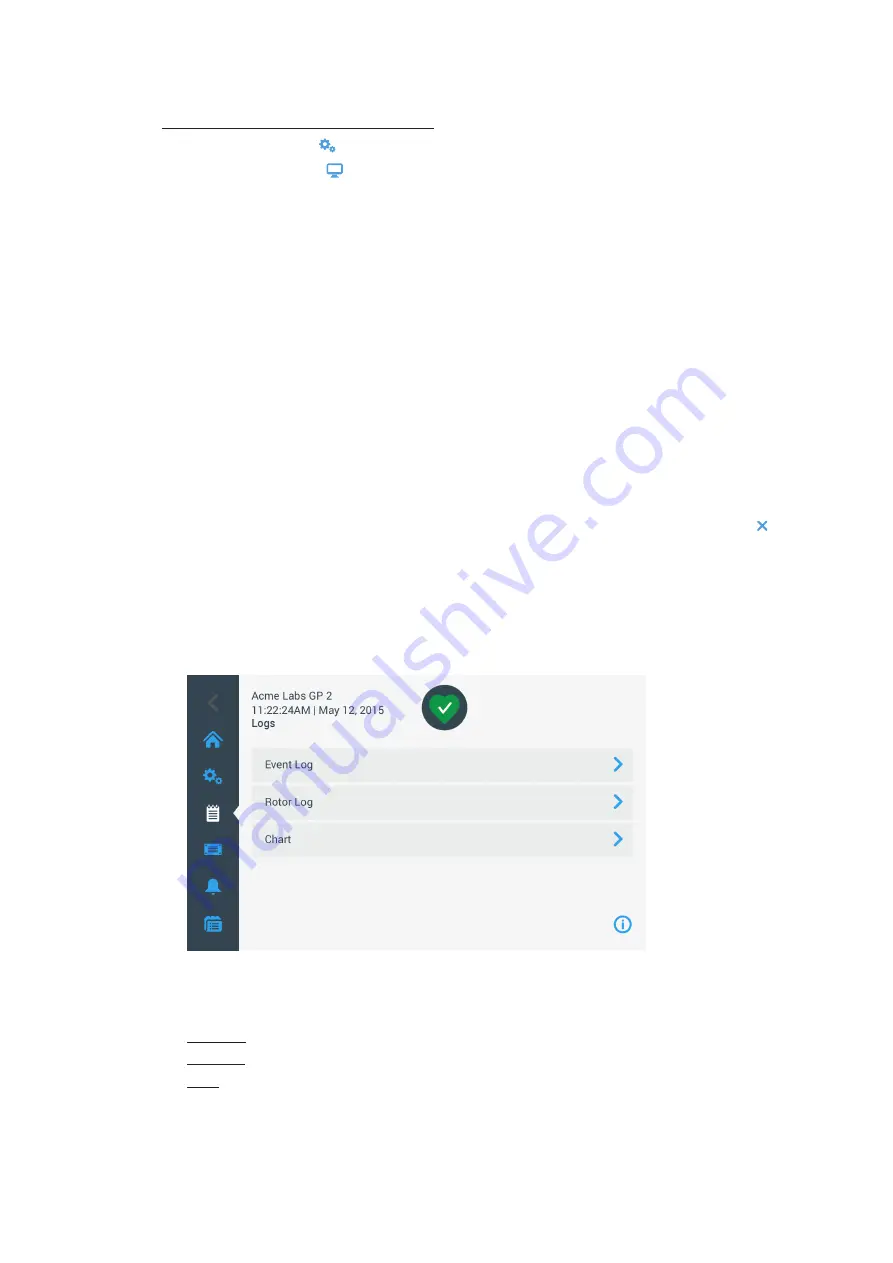
Tapping the
Logs
button on the navigation bar opens the “Logs” main screen shown in
below. The
“Logs” main screen is the point of entry to all operating data logged by the centrifuge.
Figure 3–66: Logs Main Screen
The “Logs” main screen features three buttons that open detailed log screens, where you can view and export
data:
Event Log, described in the following section.
Rotor Log, described in the section
Chart, described in the section
Содержание Sorvall ST Plus Series
Страница 1: ...Thermo Scientific Sorvall X Pro ST Plus Series Centrifuges Instructions for Use 50158527 d 08 2019 ...
Страница 116: ...B 9 TX 750 B 1 4 Biocontainment Certificate ...
Страница 120: ...B 13 TX 1000 B 2 4 Biocontainment Certificate ...
Страница 126: ...B 19 HIGHConic II B 4 4 Biocontainment Certificate ...
Страница 133: ...B 26 Fiberlite F15 6 x 100y B 7 4 Biocontainment Certificate ...
Страница 137: ...B 30 HIGHPlate 6000 B 9 4 Biocontainment Certificate ...
Страница 140: ...B 33 M 20 Microplate B 10 4 Biocontainment Certificate ...
Страница 143: ...B 36 Microliter 48 x 2 B 11 4 Biocontainment Certificate ...
Страница 146: ...B 39 Microliter 30 x 2 B 12 4 Biocontainment Certificate ...
Страница 149: ...B 42 MicroClick 30 x 2 B 13 4 Biocontainment Certificate ...
Страница 152: ...B 45 MicroClick 18 x 5 B 14 4 Biocontainment Certificate ...
Страница 155: ...B 48 Fiberlite F21 48 x 2 B 15 4 Biocontainment Certificate ...
Страница 159: ...B 52 Fiberlite F10 6 x 100 LEX B 17 4 Biocontainment Certificate ...


