3-47
Graphical User Interface
3. 8. 2. Rotor Log
Tapping the
Rotor Log
button on the “Logs” main screen
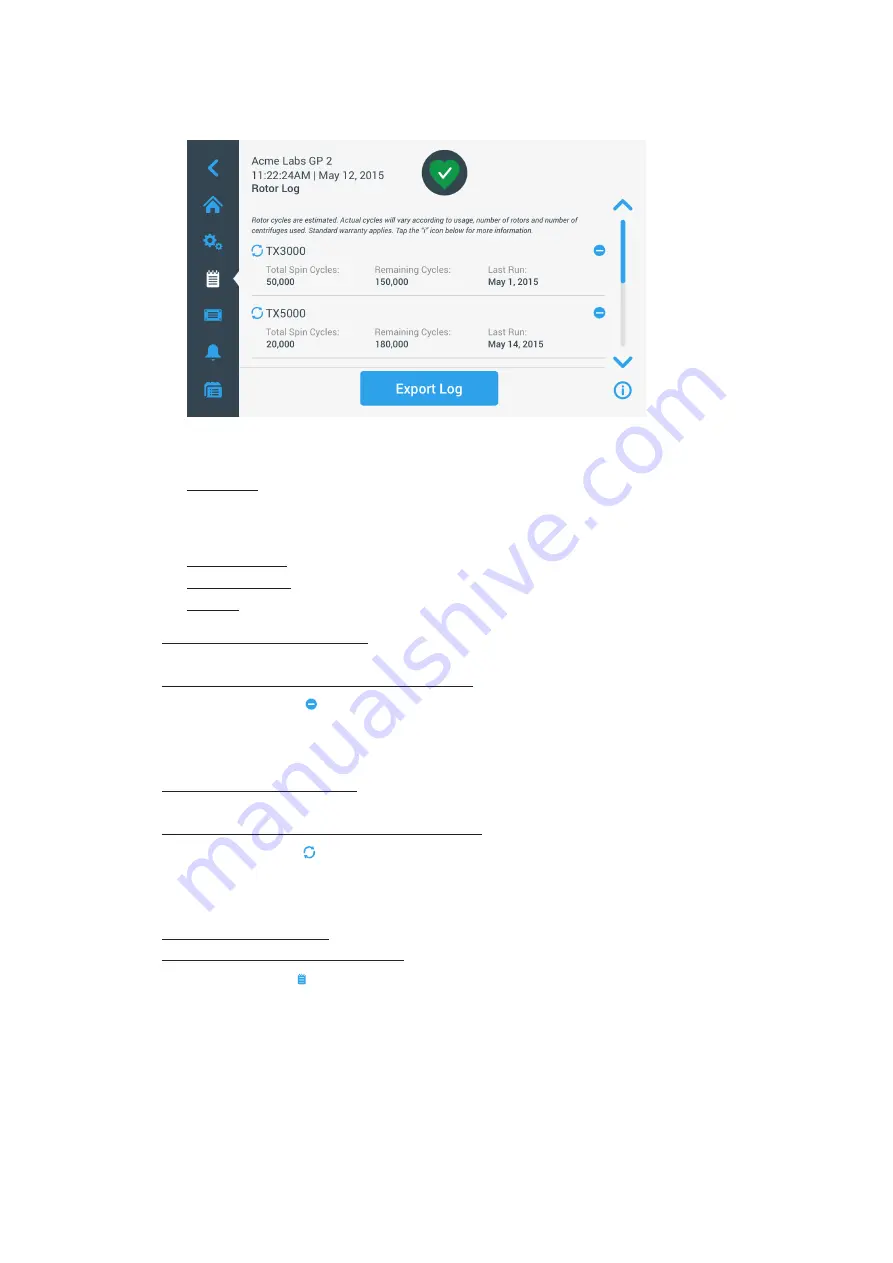
opens the “Rotor Log” screen. The “Rotor Log” screen
keeps track of how many times individual rotor (bucket) types have been spun in the current centrifuge and
issues warnings when a rotor reaches its end of life.
Figure 3–69: Rotor Log Screen
Each time a new rotor is installed in the unit, the rotor log is updated to reflect:
Rotor Name (if it has not already been listed)
For a rotor with swinging buckets, the rotor name must also include the bucket type identified by the user
(see
“Identify Rotor and Buckets” on page 2-8
). For example, the name for a TX-750 rotor with round
buckets would read TX-750 (Round Bucket - 75003608).
Total Spin Cycles (how often the rotor type has been spun in the current centrifuge).
Remaining Cycles (how many times the rotor type can still be spun in the current centrifuge).
Last Run (last date the rotor type was used in the current unit).
Deleting a Rotor from the Log
The “Rotor Log” screen lets you delete a rotor from the log—for example, one that has reached its end of life.
Proceed as follows to delete a rotor type from the log:
1. Tap the
Minus
icon to the right of the rotor entry:
The “Delete Rotor” pop-up window appears, asking you to confirm the deletion.
2. Tap the
Delete
button to confirm.
Resetting the Rotor Counter
The “Rotor Log” screen allows you to reset the cycle counter for a rotor type to zero.
Proceed as follows to reset the counter for a rotor type:
1. Tap the
Reset
icon to the left of the rotor type name:
The “Reset Counter” pop-up window appears, asking you to confirm the deletion.
2. Tap the
Reset
button to confirm.
Exporting the Rotor Log
Proceed as follows to export the rotor log:
1. Tap the
Logs
icon on the navigation bar.
The “Logs” main screen shown in
above appears.
2. Tap the
Rotor
Log
button.
The “Rotor Log” screen appears.
3. Tap the
Export Rotor Log
button to start the export of the rotor log.
The export will start now, as indicated by the “Export Rotor” Log pop-up window below. It shows a
cautioning message not to remove the USB drive and a green and gray progress bar that lets you follow the
process. If you have not inserted a USB drive into the USB port of the centrifuge, the “Export Rotor Log”
pop-up window appears, prompting you to insert a USB drive. If necessary, insert the USB drive into the
USB port of the centrifuge.
Содержание Sorvall ST Plus Series
Страница 1: ...Thermo Scientific Sorvall X Pro ST Plus Series Centrifuges Instructions for Use 50158527 d 08 2019 ...
Страница 116: ...B 9 TX 750 B 1 4 Biocontainment Certificate ...
Страница 120: ...B 13 TX 1000 B 2 4 Biocontainment Certificate ...
Страница 126: ...B 19 HIGHConic II B 4 4 Biocontainment Certificate ...
Страница 133: ...B 26 Fiberlite F15 6 x 100y B 7 4 Biocontainment Certificate ...
Страница 137: ...B 30 HIGHPlate 6000 B 9 4 Biocontainment Certificate ...
Страница 140: ...B 33 M 20 Microplate B 10 4 Biocontainment Certificate ...
Страница 143: ...B 36 Microliter 48 x 2 B 11 4 Biocontainment Certificate ...
Страница 146: ...B 39 Microliter 30 x 2 B 12 4 Biocontainment Certificate ...
Страница 149: ...B 42 MicroClick 30 x 2 B 13 4 Biocontainment Certificate ...
Страница 152: ...B 45 MicroClick 18 x 5 B 14 4 Biocontainment Certificate ...
Страница 155: ...B 48 Fiberlite F21 48 x 2 B 15 4 Biocontainment Certificate ...
Страница 159: ...B 52 Fiberlite F10 6 x 100 LEX B 17 4 Biocontainment Certificate ...


