Lambda SC
Smart
Shutter
™
Controller
If the controller does not power on when you power on the power switch, check the
line power fuse to see if it has blown. The fuse is in the fuse holder on the power input
module on the back of the controller. A spare fuse is also provided in the power input
module.
WARNING!
Replace fuse with the same type and rating: 5 × 20-mm glass tube,
T1.0A 250 V IEC 60127-2 Sheet III.
1.
Unplug power cord from the back of the Lambda SC.
The slot is visible just under the edge of the fuse holder.
2.
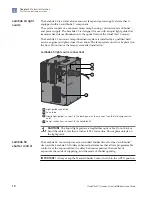
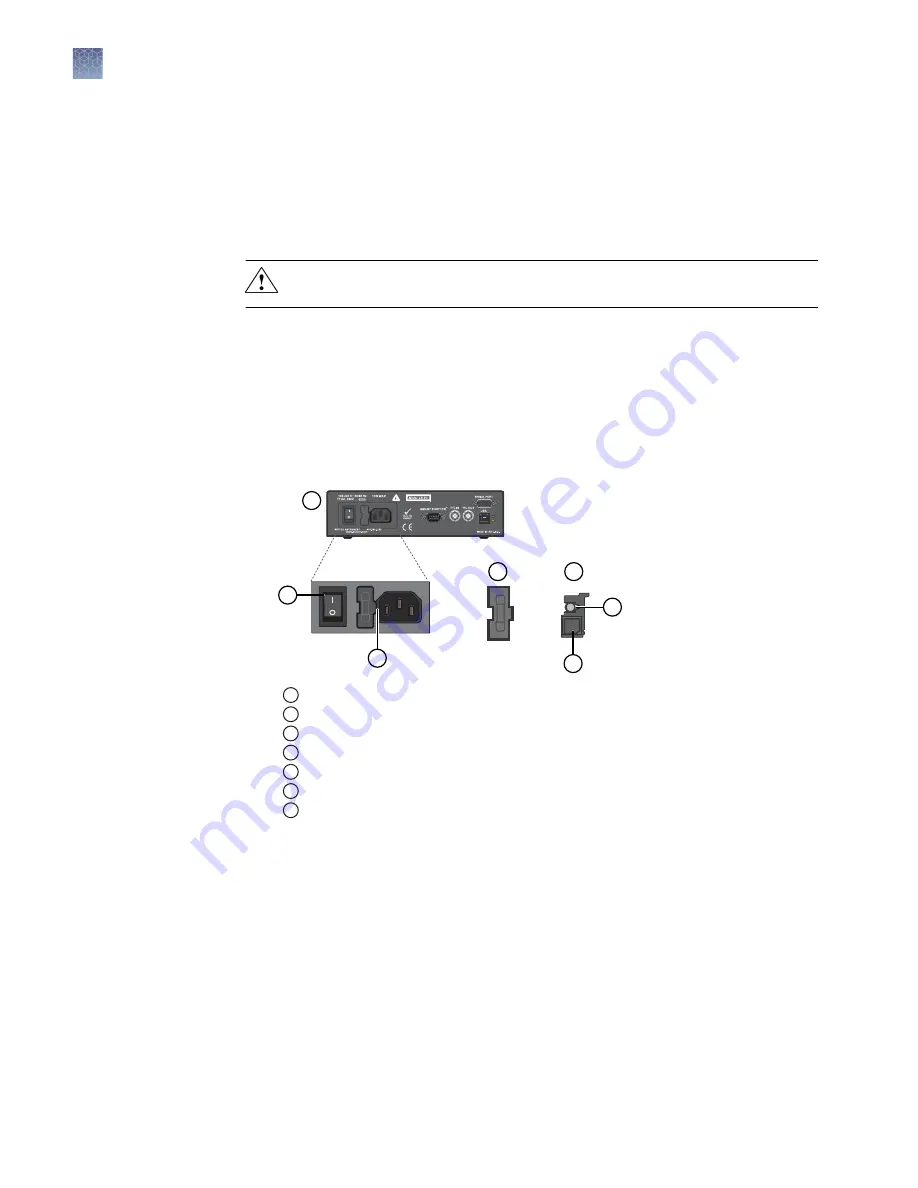
Use a small screwdriver, then pry the holder straight out of the power entry
module.
The fuse that is readily visible in the fuse holder when you take it out is the one
that is "active" when the holder is installed. A spare fuse is also stored within the
fuse holder, as shown following.
1
5
2
6
7
4
3
1
Lambda SC back panel
2
Power switch
3
Pry here to remove the fuse holder
4
Top view of the fuse holder
5
Side view of the fuse holder
6
Active fuse
7
Press here for spare fuse
3.
Press down on compartment end, then push it out of the other end. You can use
the old fuse to push out the spare fuse compartment.
4.
Replace the active fuse with the spare, then reinstall the fuse holder and power
cord.
If the controller fails to power on with the new fuse installed, call Technical
Support.
Replace the
Lambda SC fuse
Chapter 3
Maintain the Instrument
Lambda SC SmartShutter
™
Controller
3
24
GeneTitan
™
Scanner Use and Maintenance Guide

