background image

Türkçe /

Ü

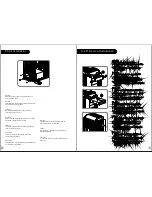
st HDD Ba lant


yuvas

büyük miktarlarda verilerin d

 depolama kasas  kullanma zorunlulu u olmadan bir 

SATA sabit diskine ultra h zl  aktar m n  (en fazla 6,0 Gb/s) sa lamak için yerle ik olarak tasarlanm t r.  
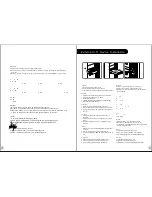
Sorunsuz çal ma için lütfen a a daki ayarlar n do rulu undan emin olun:

-  

Ana kart n z veya SATA denetleyici kart n z için gerekli tüm sürücülerin yüklü oldu undan emin olun.

-  

SATA kablosunu, ana kart veya SATA denetleyici kart  üzerindeki kullan labilir bir SATA konektörüne 


ba lay n.

-  

Güç kablosunu güç kayna na ba lay n.

-  

Ana kartta veya SATA denetleyici kart nda AHCI nin (Geli mi  Ana Bilgisayar Denetleyici Arabirimi)


 etkinle tirildi inden emin olun.  AHCI, sabit disk sürücüsünü ba lamadan veya sürücünün ba lant s n


 kesmeden önce bilgisayar  kapatman za gerek b rakmayan, SATA sabit disk sürücülerine  çal rken


 de i tirilebilme  yetene i sa lar.  AHCI i levini etkinle tirmek için ana kart n z veya SATA denetleyici


 kart n z taraf ndan sa lanan a a daki yönergeyi izleyin.

Daha önce hiç kullan lmam  bir sabit disk sürücüsü kullan yorsan z, sabit disk sürücüsünün eri ilebilir 
olmadan önce ba lat lmas  (biçimlendirilmesi) gerekir.  Yeni bir sabit disk sürücüsünün nas l ba lat laca  
(biçimlendirilece i) konusunda daha fazla bilgi için sabit disk sürücüsü kullan c  k lavuzuna bak n veya 
a a daki adresleri ziyaret edin: 
Windows 7 üzerinde çal an sistem: http://www.thermaltakeusa.com/Faq.aspx?ID=1143
Windows Vista üzerinde çal an sistem: http://www.thermaltakeusa.com/Faq.aspx?ID=1079
Windows XP üzerinde çal an sistem: http://www.thermaltakeusa.com/Faq.aspx?ID=1073

 SATA 

 (

 6.0 Gbps) 


:

-  

 SATA 

-  

 SATA 

 SATA 


 SATA 

-  
-  

 AHCI (Advanced Host Controller Interface) 


SATA 

  AHCI 

 "Hotswap" (


 SATA 


 SATA 

 AHCI


 (


 (


 Windows 7: http://www.thermaltakeusa.com/Faq.aspx?ID=1143
 Windows Vista:http://www.thermaltakeusa.com/Faq.aspx?ID=1079
 Windows XP: http://www.thermaltakeusa.com/Faq.aspx?ID=1073

 /


 (

).  


(


  . 


-


Windows 7: http://www.thermaltakeusa.com/Faq.aspx?ID=1143


Windows Vista: http://www.thermaltakeusa.com/Faq.aspx?ID=1079


Windows XP: http://www.thermaltakeusa.com/Faq.aspx?ID=1073

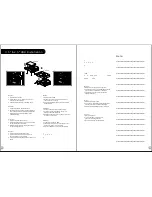
PCI Card Installation

Português /

1.  Desaperte os parafusos com a chave de fendas. 

2.  Instale a placa PCI no local adequado e 

aparafuse.

English /

1.  

Loosen the screws with a screwdriver.

2.  Install the PCI card in proper location and secure 

it with screws.

Deutsche /

1.  

Lösen Sie die Schrauben mit einem  

Schraubendreher.

2.  Installieren Sie die PCI-Card in der 

vorgesehenen Position und sichern Sie sie mit 

Schrauben.

Français /

1.  

Desserrez les vis à l aide d un tournevis.

2.  Installez la carte PCI dans l'endroit approprié et 

fixez-la avec des vis.

Español /

1.  

Afloje los tornillos con un destornillador.

2.  Instale la tarjeta PCI en la ubicación adecuada y 

asegúrela con tornillos.

Italiano /

1.  

Allentare le viti con un cacciavite.

2.  Installare la scheda PCI nella posizione 

appropriata e fissarla con le viti.


/

1. 


2. 


 PCI 


.

 /

1. 


2

.


 PCI 

 /

1. 

.

2.


 /

1. 

2.  

PCI  

 /

1. 

.

2. 

Türkçe


/

1.  

Vidalar

bir tornavida ile gev etin.

2

.

  PCI kart n  uygun konuma tak n ve vidalarla 

sabitleyin.

 /

1. 


.

2.


PCI


.

17

18

V O 80 0 0 S e rie s

A RMOR REVO GEN E

12/0 7/ 24

A

32

80

X

X

X

X

X

2

(g/m )

MARKETING

CHECK

DESIGN

PRODUCT GM

2

(g/m )

)

Peipei

125 

mm

176 

mm

Содержание ARMOR REVO GENE Snow Edition VO800M6W2N

Страница 1: ...л чит т нич ю н льт цию гл т чн Б з вы дны www sotmarket ru д бн я инф м ция т в тзывы бз ы и ы Инструкция REVO Gene VO800M6W2N Thermaltake Armor Перейти в карточку товара 8 800 775 98 98 ...

Страница 2: ...spective companies www thermaltake com User s Manual Benutzerhandbuch Mode d emploi Manual del usuario Manuale dell utente Manual do Utilizador kullan c elkitab EEE Yönetmeli ine Uygundur Tested To Comply With FCC Standards FOR HOME OR OFFICE USE 12 07 24 A X X X X X MARKETING CHECK DES PRODUCT GM 2 g m Pei 125 mm ...

Страница 3: ...5 mm Turbo fan 1000rpm 16dBA Top exhaust 200 x 200 x 30 mm fan x 1 600rpm 13dBA Side intake optional 200 x 200 x 30 mm fan or 140 x 140 x 25 mm fan x 1 Bottom Intake optional 120 x 120 x 25 mm USB 3 0 x 2 USB 2 0 x 2 HD Audio x 1 Supports 1 2 3 8 1 4 water tube 4 x 5 25 1 x 3 5 5 x 3 5 or 2 5 1 x 3 5 or 2 5 Side Panel Disassembly Motherboard Installation PSU Installation 5 25 Device Installation E...

Страница 4: ...calor de la CPU es de 175 mm 6 9 pulgadas Límite de longitud para la tarjeta gráfica VGA El límite de longitud para la tarjeta gráfica VGA en de 315 mm 12 4 pulgadas Attenzione Limite di altezza per il dissipatore di calore della CPU Il limite di altezza per il dissipatore di calore della CPU è 175 mm 6 9 Limite di lunghezza per la VGA schede grafiche Il limite di lunghezza per la VGA scheda grafi...

Страница 5: ...nglish 1 Lay down the chassis 2 Install the motherboard in proper location and secure it with screws Deutsch 1 Legen Sie das Gehäuse auf die Seite 2 Installieren Sie die Hauptplatine in ihrer vorgesehenen Position und sichern Sie sie mit Schrauben Français 1 Posez à plat le châssis 2 Installez la carte mère dans l endroit approprié et sécurisez la avec des vis Español 1 Tumbe el chasis 2 Instale l...

Страница 6: ...schacht um die Einheit zu sperren Anmerkung Drücken Sie den 5 25 Zoll werkzeuglosen Mechanismus um die Einheit zu verriegeln Français 1 Enlevez le couvercle de la baie de lecteur de 5 25 2 Faites glisser le périphérique de 5 25 dans la baie de lecteur Remarque Appuyez sur le mécanisme sans outil de 5 25 pour déverrouiller le périphérique Español 1 Extraiga la tapa del hueco de la unidad de 5 25 2 ...

Страница 7: ...e il coperchio dell alloggiamento dell unità da 3 5 pollici 2 Inserire il dispositivo nel vano dell unità da 3 5 3 Inserire il dispositivo HDD da 3 5 e fissarlo con le viti Português 1 Remova a cobertura da baía da unidade de 3 5 2 Insira o dispositivo na baía da unidade de 3 5 3 Insira o disco rígido de 3 5 e aparafuse 1 3 5 2 3 5 3 3 5 1 3 5 2 3 5 3 3 5 HDD 1 3 5 2 3 5 3 3 5 1 3 5 2 3 5 3 3 5 Tü...

Страница 8: ... wieder in den Festplattenkäfig 3 Deslize a bandeja do disco rígido de volta para a caixa do disco rígido Français 1 Enlevez le boîtier du disque dur 1 HDD 2 Placez le disque dur de 2 5 ou de 3 5 dans le boîtier et fixez le avec des vis 2 2 5 3 5 3 Refaites glisser le boîtier du disque dur dans la cage de disques durs 3 HDD HDD Español 1 Extraiga la bandeja del disco duro 1 2 Coloque el disco duro...

Страница 9: ...ange à chaud des disques durs SATA sans devoir éteindre l ordinateur avant de connecter ou de débrancher le disque dur Veuillez suivre les directives de votre carte mère ou de votre carte contrôleur SATA pour activer la fonction AHCI Si vous utilisez un disque dur neuf il devra être initialisé formaté avant de devenir accessible Pour plus d informations sur comment initialiser formater un nouveau ...

Страница 10: ...ido ou visite Sistema a funcionar no Windows 7 http www thermaltakeusa com Faq aspx ID 1143 Sistema a funcionar no Windows Vista http www thermaltakeusa com Faq aspx ID 1079 Sistema a funcionar no Windows XP http www thermaltakeusa com Faq aspx ID 1073 6 Gbps SATA SATA SATA SATA SATA AHCI Advanced Host Controller Interface SATA AHCI hotswap SATA SATA AHCI Windows 7 http www thermaltakeusa com Faq ...

Страница 11: ...a üzerinde çal an sistem http www thermaltakeusa com Faq aspx ID 1079 Windows XP üzerinde çal an sistem http www thermaltakeusa com Faq aspx ID 1073 SATA 6 0 Gbps SATA SATA SATA SATA AHCI Advanced Host Controller Interface SATA AHCI Hotswap SATA SATA AHCI Windows 7 http www thermaltakeusa com Faq aspx ID 1143 Windows Vista http www thermaltakeusa com Faq aspx ID 1079 Windows XP http www thermaltak...

Страница 12: ... souris à travers le verrou de sécurité de clavier souris puis sécurisez les sur le panneau arrière à l intérieur du châssis avec des vis Posizionare i cavi della tastiera o del mouse sulla tastiera e il blocco di sicurezza del mouse quindi fissarli sul pannello posteriore dall interno dello chassis con la relativa vite Türkçe Klavye veya fare kablolar n Klavye ve Fare Güvenlik Kilidi üzerinden ye...

Страница 13: ... R PORT1 L BLUE PORT2 L SENSE_SEND KEY PURPLE GREEN ORANGE BLACK AUDIO AZALIA Function Guide d installation des fils Connexion des voyants du boîtier Sur la face avant du boîtier vous trouverez plusieurs voyants et les fils des boutons S il vous plaît consultez le guide d utilisateur du fabricant de votre carte mère puis connectez ces fils aux onnecteurs sur la carte mère Connexion USB 2 0 S il vo...

Страница 14: ...therboard Ligação UBS 2 0 Consulte o manual da sua motherboard para ver a secção de Ligação USB Ligação USB 3 0 1 Certifique se que a sua motherboard suporta ligação USB 3 0 interna 2 Ligue o cabo USB 3 0 à porta USB 3 0 disponível no seu computador Ligação Áudio Consulte a imagem seguinte do conector Áudio e o manual de utilizador da sua motherboard Seleccione a motherboard que utiliza AC 97 ou H...

Страница 15: ...zuna bak n ve daha sonra bu ara kablolar anakart üzerindeki panel ba lant noktalar na ba lay n USB 2 0 ba lant s Lütfen anakart k lavuzunuzun USB ba lant s bölümüne bak n USB 3 0 Ba lant s 1 Ana kart n z n dahili USB 3 0 ba lant s n destekledi inden emin olun 2 USB 3 0 kablosunu bilgisayar n zdaki kullan labilir USB 3 0 ba lant noktas na ba lay n Ses Ba lant s Lütfen a a daki Ses konektörü resmine...

Страница 16: ...upply unit can survive and protect both users and their systems when the voltage volume surges Less is more In order to prevent wasted energy all of Thermaltake s products should have at least 80 of transforming efficiency and we re also one of the manufacturers that have the most 80 PLUS certificates Because Thermaltake knows how to save for the earth and customers we know what makes less to be m...

Страница 17: ...27 Note 12 07 24 A X X X X X MARKETING CHECK DES PRODUCT GM 2 g m Pei 125 mm ...

Страница 18: ...л т з з любым д бным б м гл т чн я л жб дд ж и Д т в з з в в ии ф мл ни дит нл н з 2 мин ты м нии Д т в и л т вин и тзывы ции и ид и REVO Gene VO800M6W2N Thermaltake Armor Описание Характеристики ...

Отзывы: