


20
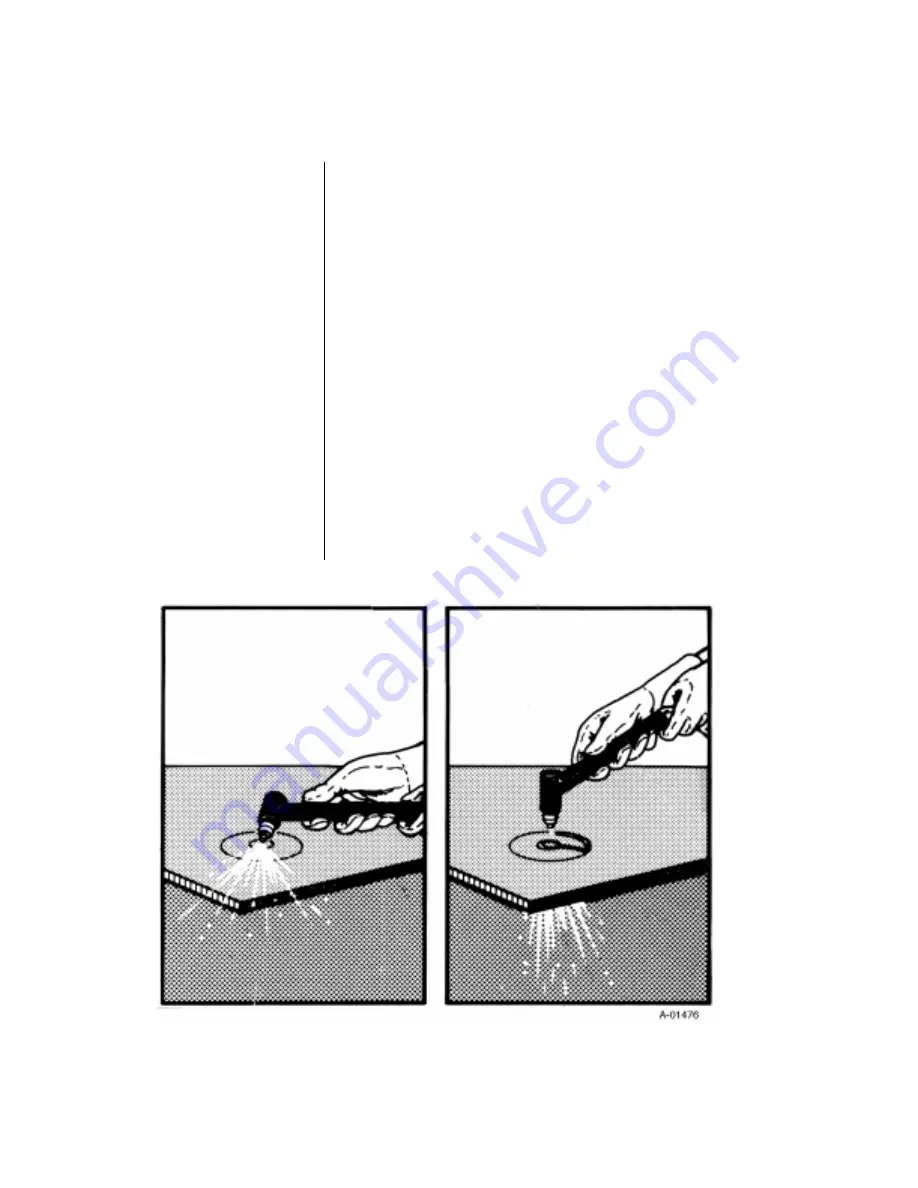
Figure 3-F Piercing with a Hand Torch
OPERATION
3.3 CUTTING OPERATION (continued)
Piercing Technique
Piercing with a Hand Torch
Piercing with a Machine Torch
In some cutting operations, it may be desirable to start the
cut within the plate area rather than at the plate edge.
Piercing the plate is not recommended on plates having a
thickness greater than 1/2 in (13 mm). Blowback from the
piercing operation can shorten the life of torch parts. All
piercing should therefore be done as quickly as possible
and at maximum amperage (105 amps).
When piercing with a hand torch, tip the torch slightly so
that blowback particles blow away from the torch tip (and
operator) rather than directly back into it (see Figure 3-F).
Pierce off the cutting line and then continue the cut as
shown in Figure 3-F. Clean spatter and scale from the
shield cup and the tip as soon as possible. Spraying or
dipping the shield cup in anti-spatter compound will
minimize the amount of scale which adheres to it.
A method called “running start” is recommended when
piercing with a machine mounted torch. The torch should
be positioned far enough off the cutting line to allow the
pierce to be complete before the cutting line is reached.
This allowance depends on the thickness of the material
and the torch travel speed.
Содержание SIGNATURE PAK 1250XRTM
Страница 2: ......
Страница 38: ...26 Figure 3 J Sequence of Operation 3 8 SEQUENCE OF OPERATION OPERATION...
Страница 55: ...PARTS LIST 43 5 4 BASE COMPONENTS continued Figure 5 4 Base Components A 01467...
Страница 62: ...PARTS LIST 50 5 9 TROUBLESHOOTING DIAGRAM...
Страница 64: ...PARTS LIST 52 A 01583 5 11 SIGNATURE PAK 1250 XR SYSTEM SCHEMATIC SHEET 1...
Страница 65: ...PARTS LIST 53 A 01583...
Страница 66: ...PARTS LIST 54 SIGNATURE PAK 1250 XR SYSTEM SCHEMATIC SHEET 2 A 01584...
Страница 67: ...PARTS LIST 55 A 01584...
Страница 68: ......


