Owner’s Manual
4
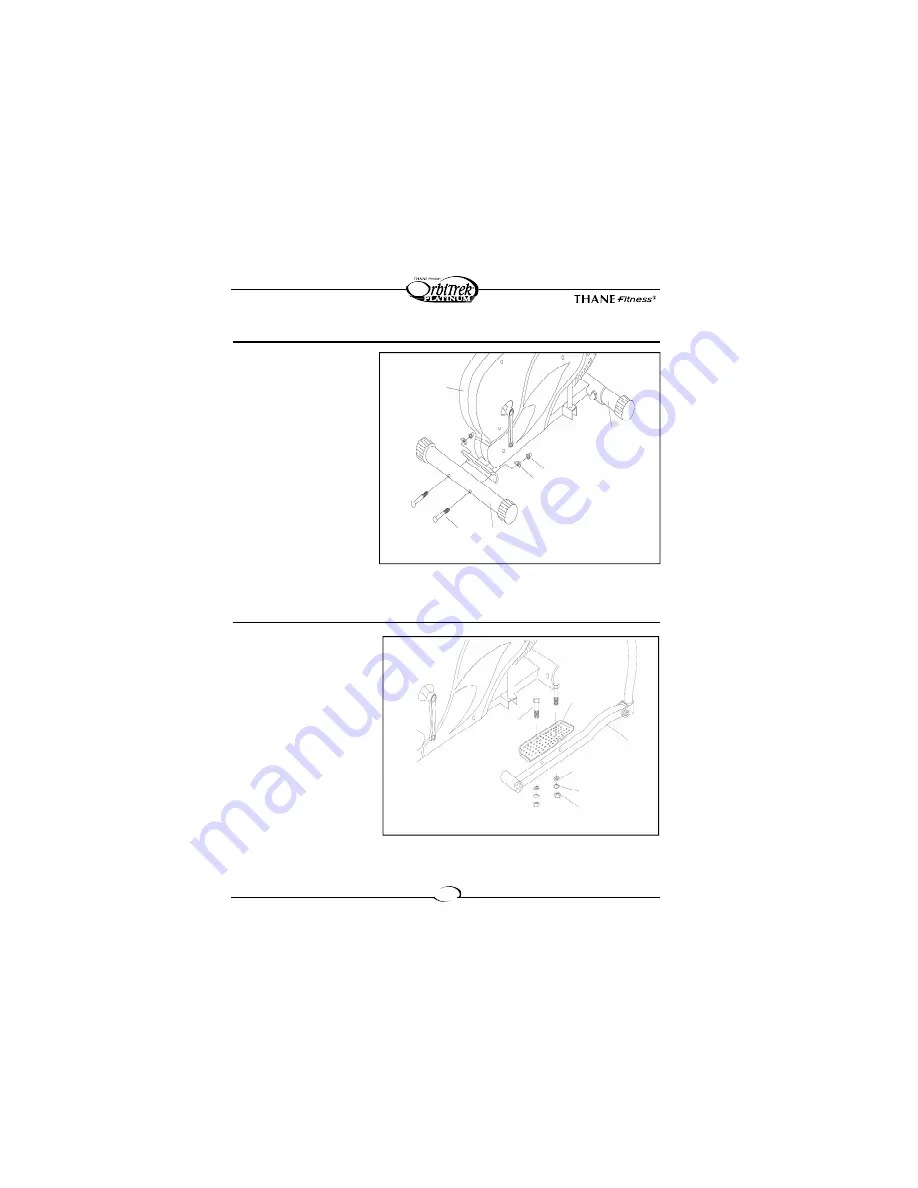
Attach the front and rear bottom
tubes (#2 and #3) which are clearly
marked FRONT and REAR to the
main frame (#1) using:
4 – 3/8” carriage bolts (#46)
4 – 3/8” arc washers (# 53)
4 – 3/8” acorn nuts (#47)
Place the front tube (#2) against
the main frame and be sure the
holes line up. Take two of the car-
riage bolts (#46) and pass them
through the holes and through the
tube support located on the unit.
Slip the two arc washers (#53) over
the threaded portions of the car-
riage bolts. Attach and firmly tight-
en down the acorn nuts (#47)
using the wrench provided.
Notice
: The front tube (#2) has rolling front end caps for moving your OrbiTrek Platinum.
Follow the same procedure for attaching the rear tube.
Fig. 1
Attach the pedals (#11L and #11R)
to their respective pedal tubes (#6L
and #6R) using:
4 – 3/8” hex head bolts (#59)
4 – 3/8” washers (#60)
4 – 3/8” spring washers (#61)
4 – 3/8” nuts (#62)
Line up the holes in the pedal with
the holes on the pedal tube. Insert
the hex head bolt (#59) through the
holes. Slide the washer (#60), the
spring washer (#61) and the nut
(#62) over the hex head bolt (#59)
and tighten the nut (#62) with the
wrench.
NOTE
: The foot pedals are posi-
tioned properly when the round ridge is to the front and in along the side closest to the main body of
the OrbiTrek Platinum. If you install them opposite of what they should be, you will not be able to
attach the pedal tubings to the crankshaft (#27).
1
2
47
53
3
46
59
62
61
60
6R
11R
Fig. 2
Step 1: Attaching front and rear stabilizers
Step 2: Attaching the pedals
Содержание OrbiTrek Platinum
Страница 10: ......


