


24
6.8 Wi-Fi CONNECTION
y
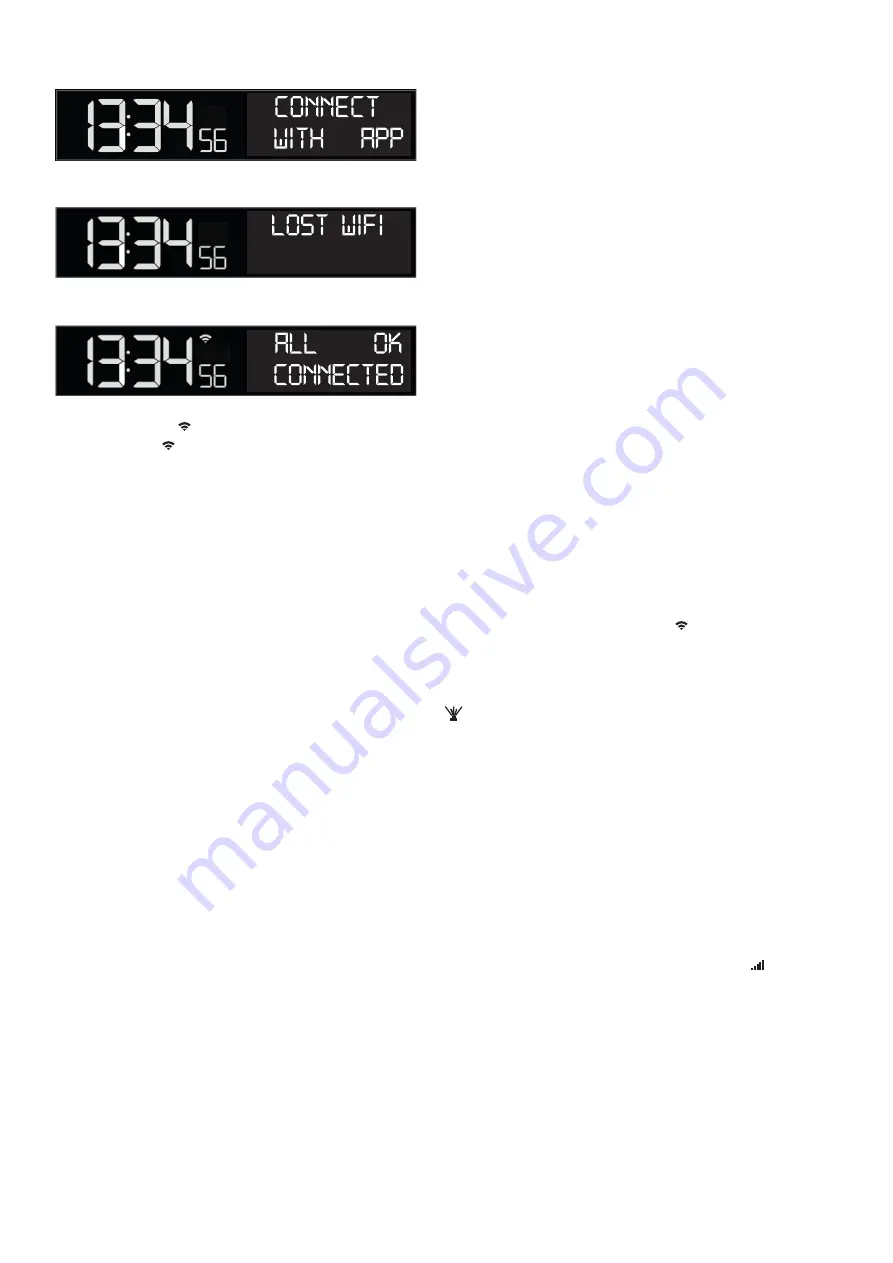
Press the SET button (Fig.2-H) once briefly in normal mode to display the Wi-Fi status for 3 seconds.
y
CONNECT WITH APP - the projection alarm clock is trying to connect with the already registered Wi-Fi network or is in
Wi-Fi configuration mode.
y
LOST WIFI - the projection alarm clock has not yet been connected to the local Wi-Fi network or currently has no contact with the Wi-Fi
network already registered.
y
ALL OK CONNECTED - the projection alarm clock is actively connected to the Wi-Fi network.
y
The Wi-Fi symbol next to the time is permanently displayed when the projection alarm clock is actively connected to the Wi-Fi network.
y
The Wi-Fi icon next to the time flashes when the projection alarm clock is in the process of connecting to the already registered network
or in Wi-Fi configuration mode.
y
If no information for the local Wi-Fi network has been transferred yet or if it has to be transferred again (because the network name or
password has changed, for example), initiate a new configuration via the app.
y
If the projection alarm clock has not yet been connected to the local Wi-Fi network or to the app/account, please add the projection
alarm clock via the device management (described in detail in point 5.2).
y
If the projection alarm clock has already been registered in the app or the account and only the Wi-Fi configuration needs to be per-
formed again, please select the option “Connect Wi-Fi” in the menu of the app.
y
During Wi-Fi configuration, the app will ask you to activate Wi-Fi configuration mode on the projection alarm clock by pressing and holding
the SET and + buttons (Fig.2-H+G) simultaneously (for 5 seconds).
y
After a restart, the projection alarm clock automatically tries to connect to the known network (Wi-Fi symbol flashes). If no connection
could be established after 15 minutes, the Wi-Fi symbol disappears.
6.9 Checking device ID and additional transmitters
6.9.1 Device ID of the projection alarm clock
y
If you press and hold the SNOOZE/LIGHT and PROJECTION button
(Fig.2-E+C) at the same time, the device ID of the projection
alarm clock is displayed.
y
Stop pressing the button to return to normal mode.
6.9.2 EXTRA button, transmitters
y
Up to 4 optional transmitters can be displayed on the projection alarm clock instead of the alarm time or the NAP function as
an extra sensor.
y
The measured values of the extra sensor devices can also be selected for the projection display (further information on this can also be
found under point 6.3.4 and point 6.5).
y
When selecting via the EXTRA SENSOR button (Fig.2-B) , the ID of the corresponding transmitter is also displayed briefly.
y
If you want to remove a certain extra transmitter, select the transmitter and press and hold the - button (Fig.2-G) for 5 seconds.
y
If other compatible transmitters are within reception range of the projection alarm clock, they are automatically forwarded directly to the
server and can be added and checked within the app.
6.9.3 Manual search for the transmitter
y
Press and hold the EXTRA SENSOR button in normal mode for 3 seconds to start the transmitter search. The radio symbol is shown
flashing in this area.
y
For a successful transmitter search, it is recommended to place the desired transmitter next to the projection alarm clock during the
search and to insert the batteries in the corresponding transmitter immediately after initiating the manual search, or to briefly press
the TX button of the corresponding transmitter.
y
After a transmitter has been successfully received, a short beep is emitted, its measured values and the corresponding radio symbol
are permanently displayed (if the corresponding extra sensor is selected).
Содержание 35.8002.01
Страница 2: ...2 Fig 1 Fig 2 A A B C D E F G H J B C D E...
Страница 3: ...3 Fig 3 A C B D E E F...


