25
24
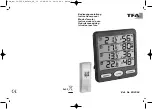
KLIMA-MONITOR
- Wireless Thermo-Hygrometer
KLIMA-MONITOR
- Wireless Thermo-Hygrometer
No transmitter reception
➜
No transmitter installed
Display “---”
➜
Check batteries of transmitter
(do not use rechargeable batteries!)
➜
Restart the transmitter and the basic station
according to the manual
➜
Manual search for the transmitter according to
the manual
➜
Choose another place for the transmitter and/or
the basic station
➜
Reduce the distance between the transmitter and
the basic station
➜
Check if there is any source of interference
Incorrect indication
➜
Change the batteries
➜
Use the calibration function
11. Calibration function
• The wireless thermo-hygrometer allows the user to calibrate the display of
temperature and humidity measurements on the basic station with an exter-
nal, better reference source. The user can make adjustments to the tempera-
ture and humidity displays within the measuring range.
11.1 Calibration of the display of the humidity
• Press the
CHANNEL / +
button until the arrow appears on the desired channel.
• Press the
ALARM / SET
and the
MIN/MAX / –
button at the same time for
5 seconds.
• The display of the humidity will be flashing.
• Press the
CHANNEL / +
or the
MIN/MAX / –
button to correct the humidity
value.
• Press the
ALARM / SET
button briefly, on the display appears the normal
measurement or press and hold the
ALARM / SET
button for 3 seconds to
confirm the set value.
11.2 Calibration of the display of the temperature
• Press the
CHANNEL / +
button until the arrow appears on the desired channel.
• Press the
ALARM / SET
and the
CHANNEL / +
button at the same time for
5 seconds.
• HI AL and the last adjusted upper temperature limit is indicated.
• Press and hold the
ALARM / SET
button to deactivate the alarm function.
• The alarm symbol disappears on the display.
• Confirm the setting with the
ALARM / SET
button.
• Repeat the above steps until all alarms are deactivated.
8. Positioning and fixing of the basic station and the transmitter
• With the foldable leg at the back of the basic station it can be placed onto
any flat surface or wall mounted at the respective location by the hanging
hole at the back of the unit. Avoid the vicinity of any interfering field like
computer monitors or TV sets and solid metal objects.
• With the hanging hole at the back, the transmitter can be wall mounted at
the respective location. Choose a shady and dry position for the transmitter
when used outside. (Direct sunshine falsifies the measurement and continu-
ous humidity strains the electronic components needlessly).
• Check the transmission of the signal from the transmitter to the basic station
(transmission range of up to 100 m free field). Within ferro-concrete rooms
(basements, superstructures), the received signal is naturally weakened.
• If necessary choose another position for the transmitter and/or basic station.
9. Care and maintenance
• Clean the device with a soft damp cloth. Do not use solvents or scouring agents.
• Remove the batteries if you do not use the device for a long period of time.
• Keep the device in a dry place.
9.1 Battery replacement
• When the battery symbol appears in the display line of a channel, please
change the batteries in the respective transmitter.
• When the battery symbol appears in the display line of the indoor values,
please change the batteries in the basic station.
•
Please note:
When the batteries are changed, the contact between transmit-
ter and basic station must be restored – so always insert new batteries into
both units or start a manual transmitter search.
10. Troubleshooting
Problems
Solution
No indication on the
➜
Ensure that the batteries polarity are correct
basic station/transmitter
➜
Change the batteries
TFA_No. 30.3054_Anleit_08_16 05.08.2016 09:30 Uhr Seite 13


