


INSTALLATION
Sensors supplied with your system are ready to turn on and connect to your Main Sensor.
They are battery operated and come with an alkaline battery installed.
The Main Sensor must be turned on and located near the Room Sensor before the Rom
Sensor is turned on. NB Your TextCare system recognises the Main Sensor as Room
Sensor 1. The default name for this on the display is Main.
PAGE 6
ADDING SENSORS
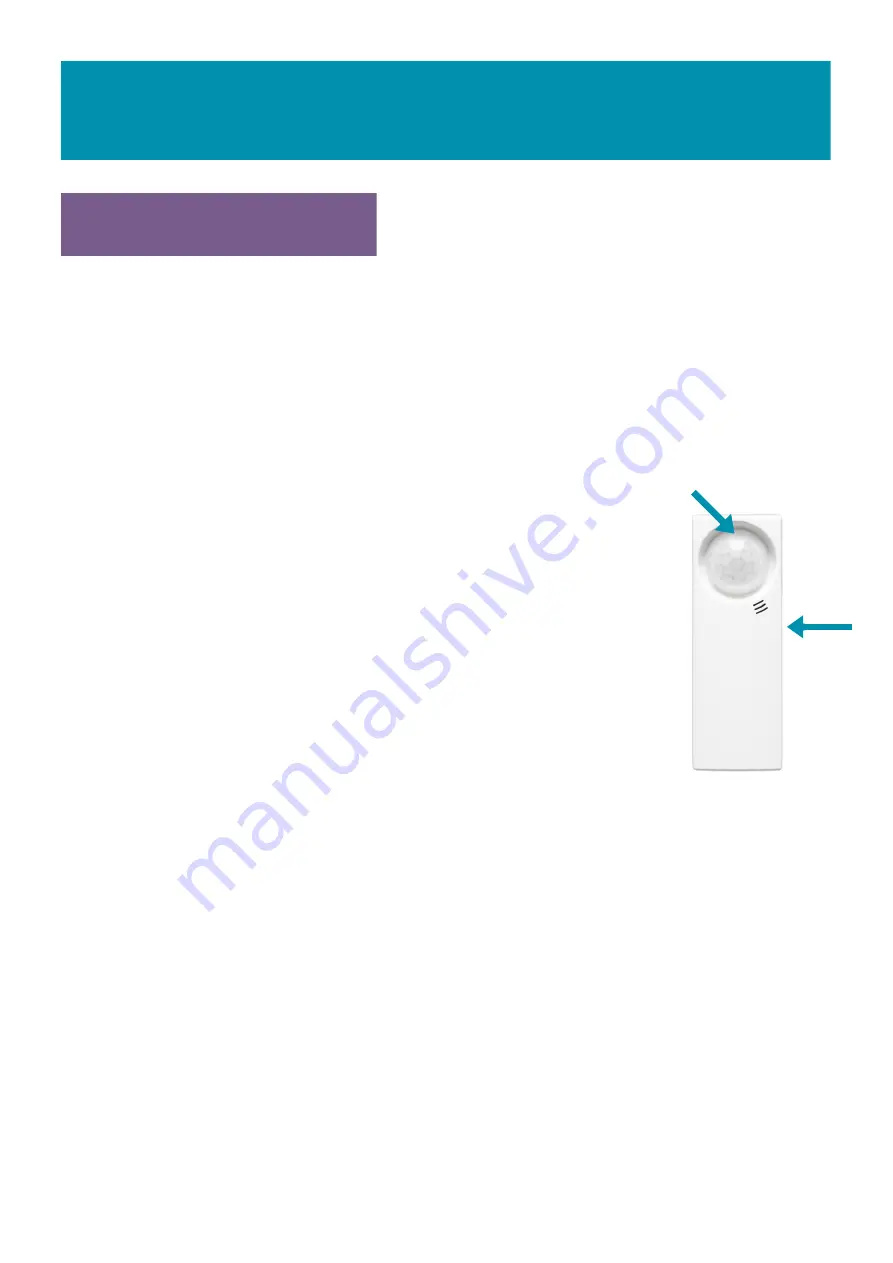
LED Window
Pairing
button
on rear
ROOM SENSOR
Switch on: If the Room Sensor was supplied with the Main Sensor it will
already be paired, you simply need to switch it on by using a pen nib to
press the recessed button (on rear next to screw); the white LED window
will flash.
Fix in position: The Room Sensor should be placed at a hight so it has a
good line of sight of the area where movement will normally occur. Fix in
position using the pre-fitted stick-on-Velcro-pads.
NB Do not position near
other electrical devices such as heating controllers, phones, radiators, etc.
ADDING SUBSEQUENT ROOM SENSORS
If you have decided to add further Room Sensors: use a pen nib to press the recessed button
(on rear next to screw); after a few seconds the Main Sensor will display the Room Sensor in
the Sensors Menu. The Room Sensor can now be renamed, see 'Advanced Setup'. The Main
Sensor screen will now display the sensor with the default name ROOM and the default sensor
number eg.ROOM2. So a room sensor added in the sensor 2 position will be assigned the
default name ROOM2 and to 3 would be ROOM3 etc.
ROOM SENSOR RESET
If a problem occurs then it may be necessary to reset the Sensor. Insert a pin or a ball point
pen into the pairing button hole on the rear of the unit, and press and hold down. The LED
window will turn red. Keep holding down and after approximately 10 seconds the LED will turn
off. The Room Sensor is now reset, the pairing will be cleared and the sensor switched off.


