


Step 2: Connecting Peripheral Cables to the SDB
2-5
Installing the TMS320C8x SDB
2.3
Step 2: Connecting Peripheral Cables to the SDB
Use the peripheral cables to connect the SDB to external input or output
sources depending on how you will use your SDB. For example, you may want
to connect video, graphics, and audio peripherals to your SDB.
To connect peripherals to the SDB, follow these steps:
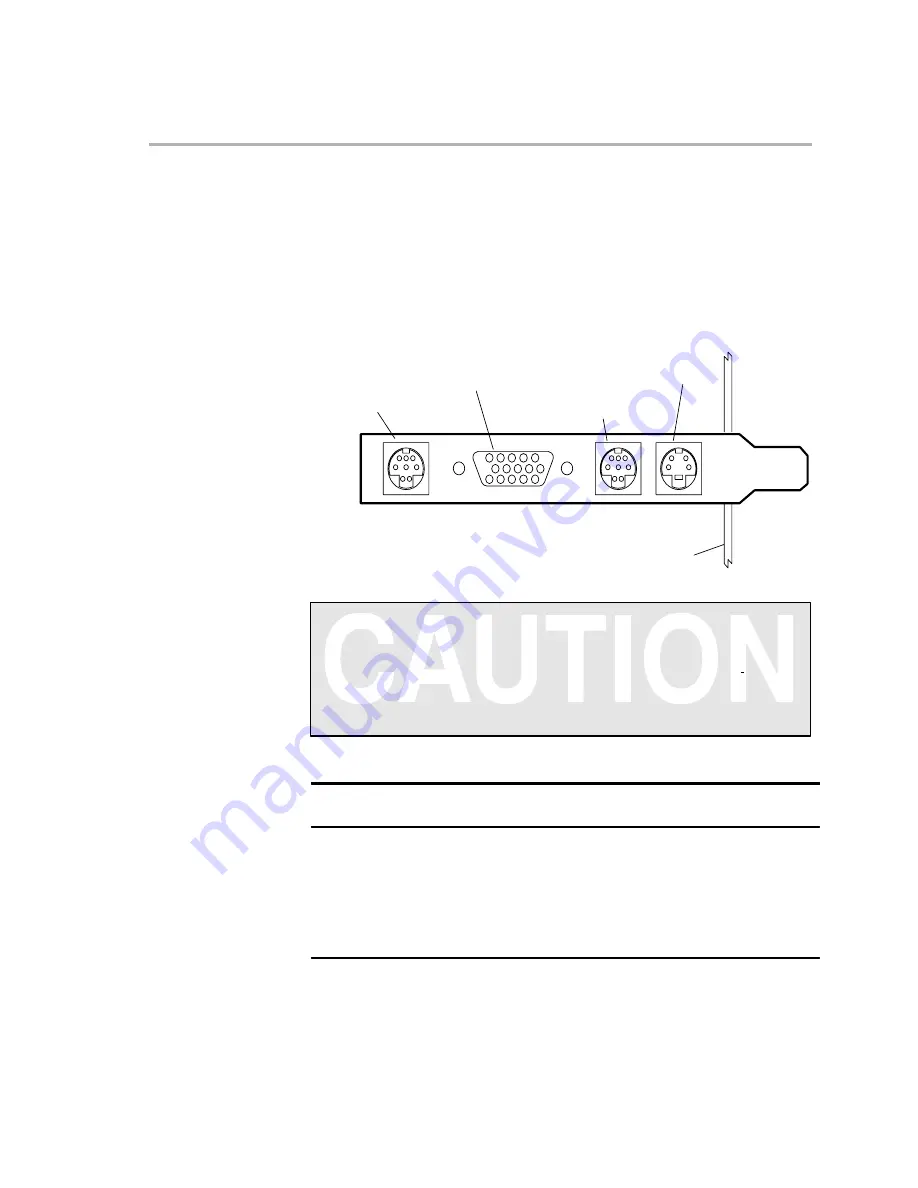
1) Locate the peripheral connectors on the SDB retaining bracket.
ÁÁÁÁÁÁÁÁÁÁÁÁÁÁÁÁÁÁÁÁ
ÁÁÁÁÁÁÁÁÁÁÁÁÁÁÁÁÁÁÁÁ
ÁÁÁÁÁÁÁÁÁÁÁÁÁÁÁÁÁÁÁÁ
ÁÁÁÁÁÁÁÁÁÁÁÁÁÁÁÁÁÁÁÁ
PC motherboard
(4-pin mini-DIN)
S-VHS input
(8-pin mini-DIN)
VGA pass-through
(15-pin D-sub)
Graphics output monitor
(8-pin mini-DIN)
Audio I/O
Connecting the Wrong Connectors
The VGA pass-through and audio I/O connectors are not keyed,
and both are 8-pin mini-DIN. Connecting an
audio peripheral to the
VGA pass-through connector or a
VGA peripheral to the audio I/O
connector by mistake can permanently damage the SDB and your
equipment.
2) Locate the peripheral cables you need:
To connect the SDB to...
You need this cable:
See
step:
Monitor for graphics output
Graphics output monitor cable
(supplied by monitor manufacturer)
3
Video source
S-VHS-to-RCA adapter cable
4
Audio equipment
Audio breakout cable
5
External VGA-compatible adapter
VGA pass-through cable
6
3) Connect the graphics output monitor cable to the SDB’s graphics output
monitor 15-pin D-sub connector and to the monitor.