


3.2
Basic Operating Set-Up—Windows XP
3.2.1 Basic Setup Before Evaluation
www.ti.com
Basic Operating Set-Up—Windows XP
This section reviews how to set up the DEM-PCM2912A EVM for use with a PC equipped with the
Microsoft XP (including Service Pack 2 updates) operating system.
When the installation is complete, the EVM software is ready to use.
Follow these steps to set up the DEM-PCM2912A EVM for use with Windows XP.
Step 1.
Connect the USB connector of the DEM-PCM2912A EVM to an available USB connector (or
hub) port on the lab PC. The DEM-PCM2912A EVM can be connected directly to the PC
without an additional USB cable.
After the EVM is connected to the PC, the standard Windows XP driver installs automatically
to the PC. A custom driver for the DEM-PCM2912A is unnecessary.
Step 2.
Open the
Control Panel
from the Start menu (
Start
→
Control Panel
. Open the
Sound and
Audio Devices
group from the Control Panel.
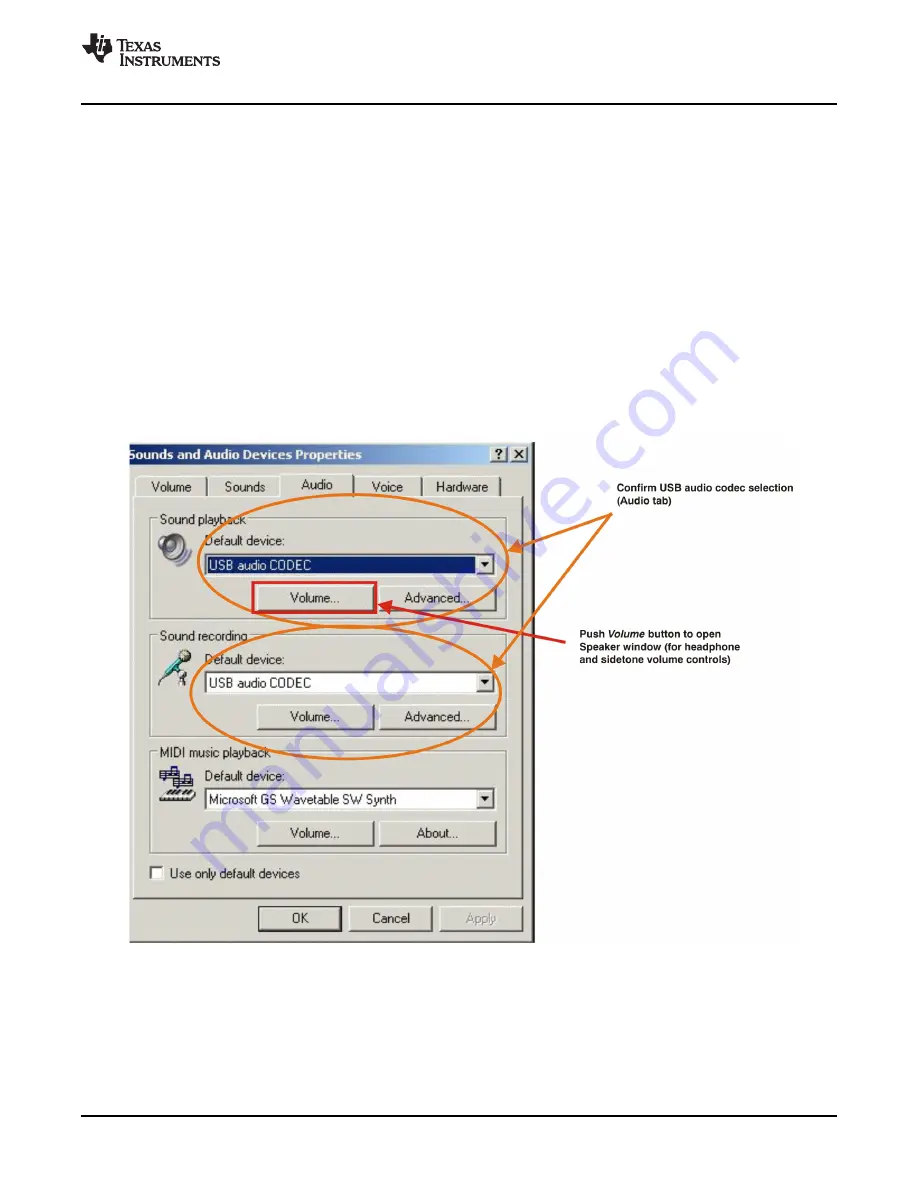
Step 3.
Select the
Audio
tab and confirm the USB audio codec appearance as the default playback
and recording device, as shown in
Figure 3-7
.
Figure 3-7. Sound and Audio Devices Properties—Audio Tab (Windows XP)
This process confirms the proper recognition of the DEM-PCM2912A EVM by Windows XP.
SBAU141 – January 2009
Set-Up Guide
23
Submit Documentation Feedback
Содержание DEM-PCM2912A EVM
Страница 1: ...DEM PCM2912A EVM User s Guide Literature Number SBAU141 January 2009...
Страница 2: ...2 SBAU141 January 2009 Submit Documentation Feedback...
Страница 6: ...List of Tables 6 SBAU141 January 2009 Submit Documentation Feedback...
Страница 14: ...Description 14 SBAU141 January 2009 Submit Documentation Feedback...
Страница 32: ...Set Up Guide 32 SBAU141 January 2009 Submit Documentation Feedback...