


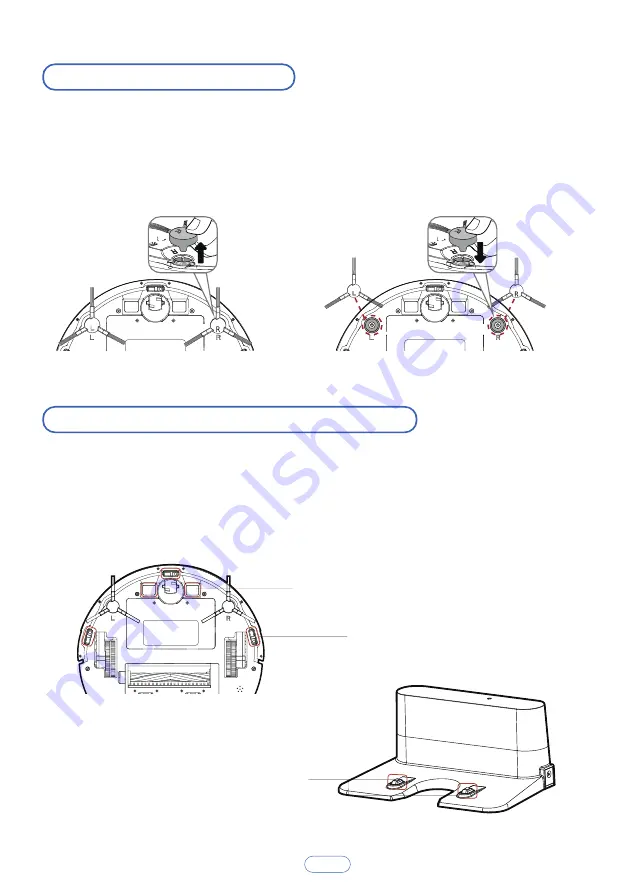
Replace the Side Brushes
The side brushes may become bent or damaged after being used for a period of
time.
Follow the instructions below to replace them.
Pull off the old side brushes and snap the new ones into place.
Clean the Sensors and Charging Terminals
To maintain the best performance, clean the drop sensors and charging terminal
regularly.
Use a soft cloth or cleaning brush to clean the sensors and charging terminals
periodically.
Charging terminal
Electrode slice
Sensor
16


