6
ENG
Always lift pans off the ceramic hob - do not slide, or they may scratch the glass.
USING YOUR CERAMIC HOB
To start cooking
1. Place a suitable pan on the cooking zone that you wish to use.
• Make sure the bottom of the pan and the surface Of the cooking zone are
clean and dry.
2. Touch the ON/OFF key for 1 seconds.
After power on, the buzzer beeps once, all displays show" 0", indicating that
the ceramic hob has entered the state of standby mode.
3. According to the heating zone where the pan is placed, select a relevant zone select key by pressing key (A).
The symbol 0. selected will be flashing.
4. Adjust heat setting by touching the slider regulating key(C) control.
• If you don't choose a heat setting within 20 seconds, the ceramic hob will automatically switch off. You will
need to start again at step 2.
• You can modify the heat setting at any time during cooking.
Using Child Lock Function
Using the Timer
• You can lock the controls to prevent unintended use (for example children accidentally turning the cooking
zones on).
• When the controls are locked, all the controls except the OFF control are disabled.
To lock the controls
Press the "
" key Start child lock. The hob emits a beep and the indicator will show "Lo ".
To unlock the controls
1. Press the"
" key Relieving child lock.
2. You can now start using your hob.
• You can set it to turn one cooking zone off after the set time is up.
• You can set the timer for up to 99 minutes.
1. Select the relevant cooking zone which is working by touching the zone select key (A).
2. Press the timer key "
", the timer indicators will show "00".
3. Using the "
+
" or "
—
" buttons , you can realize the setting of timing from 1 to 99 minutes.
4. When the time is set, it will begin to count down immediately. The indicator will return to show power level
after 5 seconds. The red dot next to power level indicator will illuminate indicating that zone has set timer.
Power down
Power up
Содержание HV6400TB
Страница 2: ......
Страница 23: ...23 BG 8 8 a...
Страница 24: ...24 BG A B C 220 240V 50 60 Hz 1200W 1800W 1200W 1800W 6000W 230V D E Child Lock...
Страница 25: ...25 BG H 10 ER03 H ER03 1 2 3 4 5 9 360 300 240 90...
Страница 26: ...26 BG 1 2 1 3 A 0 4 C 20 2 Child lock OFF Start child lock Lo 1 Relieving child lock 2 Power down Power up...
Страница 27: ...27 BG 5 1 2 6 F 99 1 A 2 00 3 1 99 4 5...
Страница 28: ...28 BG ER03 E ER21...
Страница 30: ...30 BG A mm B mm C mm D E 650 50 mini 20 mini 5 mm 3 mm 650 mm...
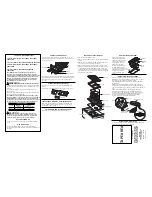
Страница 31: ...31 BG 3 1 2 3 01 04 x1 1 2 3 4 5 WARNING THIS APPLIANCE MUST BE EARTHED...
Страница 32: ...32 BG 3 mm 32 3 L N E 1 2 3 75 C...
Страница 33: ...33 BG 2011 65 EC WEEE...
Страница 34: ...34 GR 8 8...
Страница 35: ...35 GR A B ON OFF C 220 240V 50 60 Hz 1200W 1800W 1200W 1800W 6000W 230V D E...
Страница 36: ...36 GR H 10 ER03 H ER03 1 2 3 4 5 9 360 300 240 90...
Страница 38: ...38 GR 5 1 2 6 F...
Страница 39: ...39 GR ER03 E ER21...
Страница 41: ...41 GR A mm B mm C mm D E 650 50 min 20 min 5 mm 3 mm 1 01 04 x1 650 mm...
Страница 42: ...42 GR 3 2 3 1 2 3 4 5 6 1 2 3 75 C...
Страница 43: ...43 GR 2011 65 E 3 mm Miniature 32 Amp 3 L E...
Страница 54: ...54 MK A 8 8...
Страница 55: ...55 MK A B ON OFF C 220 240V 50 60 Hz 1200W 1800W 1200W 1800W 6000W 230V D E...
Страница 56: ...56 MK H 1 2 3 4 5 9 360 300 240 90 10 ER03 H ER03...
Страница 57: ...57 MK 1 2 ON OFF 1 0 3 A 0 4 C 20 2 OFF Start child lock Lo 1 Relieving child lock 2 99 1 A Power down Power up...
Страница 58: ...58 MK 2 00 3 1 99 5 4 1 2 5 F...
Страница 59: ...59 MK ER03 E ER21...
Страница 61: ...61 MK A mm B mm C mm D E 650 50 mini 20 mini 5mm 3 mm 650mm...
Страница 62: ...62 MK Installation 3 1 2 3 01 04 x1 1 2 3 4 5...
Страница 63: ...63 MK 3 mm 32 3 L N E 1 2 3 75 C...
Страница 64: ...64 MK 2011 65 EU WEEE...
Страница 95: ......
Страница 96: ...tesla info...