


17
a. Without the OSD menu on screen, press and hold
“Menu” key ,and press “UP”
once then release
“MENU” key. The factory menu will appear on the screen.
d. Use the "UP
” and “DOWN key to select main functions, then press “SELECT” to
enter sub menu for adjusting (or setting) those values.
c. Select
“GoTo Main” and press “SELECT” to exit factory OSD menu, it will
automatically switch to user menu for normal OSD operation.
4. In power saving status, to press
“Menu” button can wake up OSD for selecting video port.
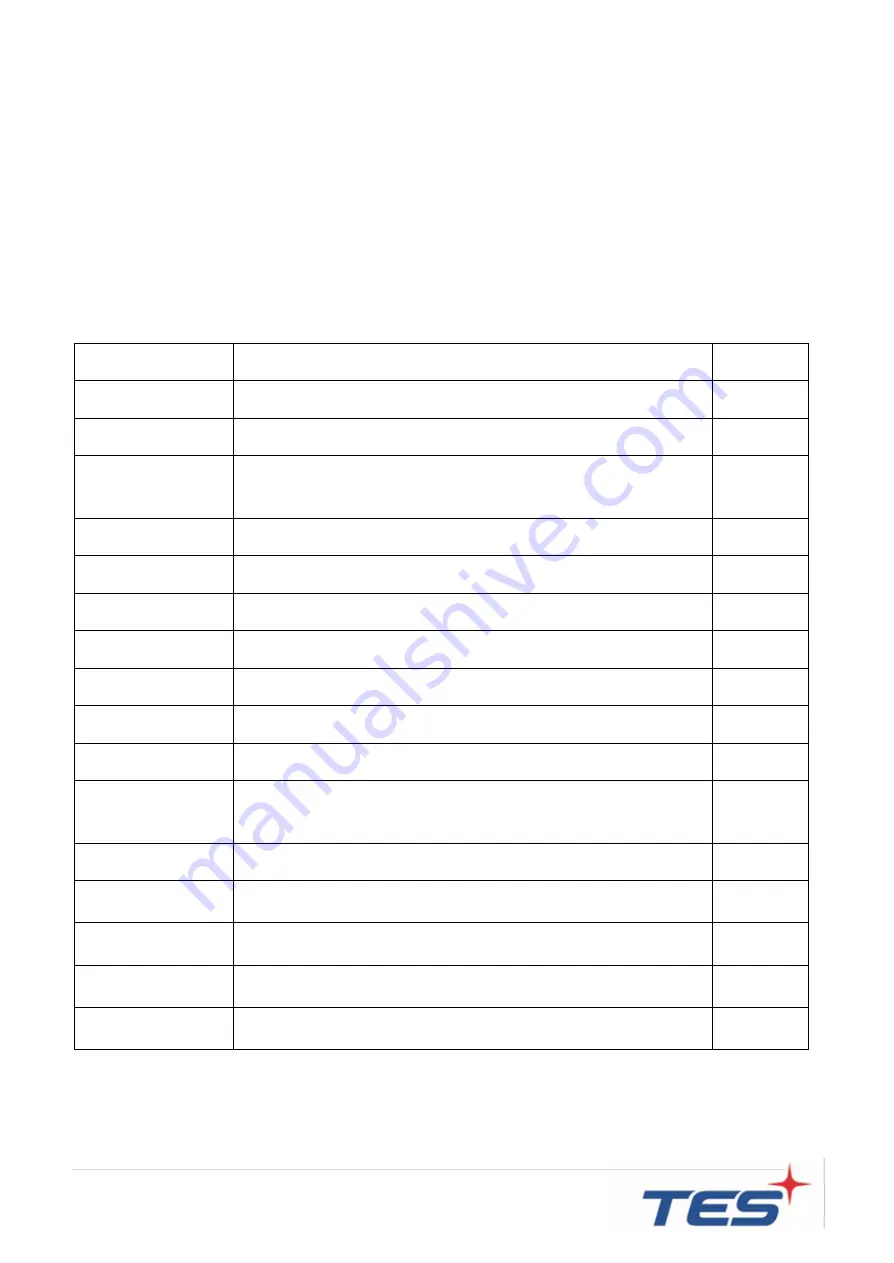
2.3.1 OSD Function Description
ITEM
CONTENT
Default
Contrast
The monitor luminance level control.
50
Brightness
The monitor backlight level control.
50
Auto Adjust
Automatically adjusts the screen image of VGA signal,
affecting the H-position, V-position, Frequency, and
Phase menu.
NA
Left/Right
Moving screen image horizontal position to left or right.
NA
Up/Down
Moving screen image vertical position to up or down.
NA
Horizontal size
The screen image horizontal dot clock adjustment.
NA
Fine
The screen image pixel phase adjustment.
NA
OSD Left/Right
Moving OSD menu horizontal position to left or right.
50
OSD Up/Down
Moving OSD menu vertical position to up or down.
50
OSD Time out
OSD auto-disappear time selection.
15
OSD Language
OSD menu language selection.
( English, French, Deutsch, Italian, Spanish, Japanese
, Simplified Chinese and Korean )
English
Factory Reset
Factory default value restored.
NA
Color
Temperature
Color temperature selection.
(5500K, 6500K, 7500K, 9300K, User; default: User )
USER
Red
Red gain of selected color temperature.
(only User mode can be adjusted)
97
Green
Green gain of selected color temperature.
(only User mode can be adjusted)
100
Blue
Blue gain of selected color temperature.
(only User mode can be adjusted)
97
Содержание TDS-55-P
Страница 1: ...TDS 55 P standard version TDS 55 P Touch Monitor User Manual Version 2 0 2018 07 ...
Страница 6: ...5 Chapter 1 Product Introduction ...
Страница 11: ...10 Audio Line in Line out connector ...
Страница 13: ...12 Chapter 2 Product Installation ...
Страница 20: ...19 2 4 Dimension 2 4 1 Front View 2 4 2 Side View ...
Страница 21: ...20 2 4 3 Rear View 2 4 4 Back View ...
Страница 22: ...21 Appendix ...


