12
CameoConvert
(English)
Note: there is no sound in the preview.
8. End the recording after a few seconds by pressing the “ESC” key. You have now stored
your first video clip on your hard drive, ready for editing.
Repeat the steps described above a second time for another video clip so that you have
enough suitable material for the instructions in the next chapter. Please be sure to use a dif-
ferent name for your second video clip so that you do not overwrite the first one.
We generally recommend using descriptive names for your video captures as this simplifies
finding and sorting the clips at a later date.
DV editing with the Video Editor.
Close Video Capture and open the Video Editor. You can cut your video clips and add titles
and effects to them here.
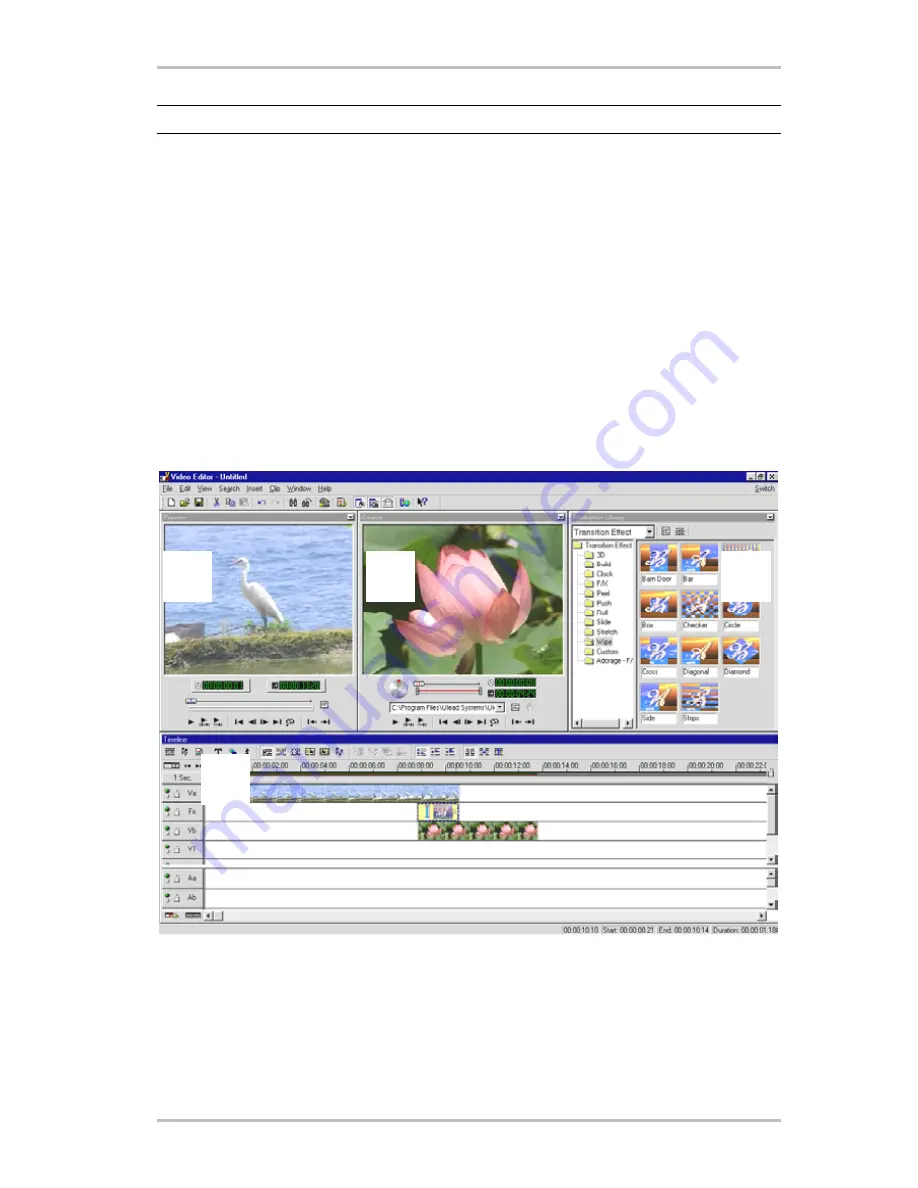
The user interface consists of the following areas:
Ê
Ë
Ì
Í
1. Preview window (Here you can preview your project with reduced quality.)
2. Source window (Cut your video or audio clips here before inserting them.)
3. Production archive (This contains all of the tools you will need for your work: video ef-
fects, filters, audio effects, and an archive for your video and audio material.)
4. Time axis (The time axis provides a complete overview of your project. Old video clips,
effects, audio tracks etc. are displayed here in sequence from left to right.)
Содержание Cameo Convert
Страница 1: ...English Manual Version 08 11 02...


