TerraMaster D5-300C Скачать руководство пользователя страница 4

3

The  D5-300C  houses  5  drive  bays.  The  first  two  are  RAID-capable,  and  the  remaining  3  are 
independent.  This  gives  you  maximum  security,  flexibility,  and  storage  space  in  the  same 
chassis. This is known as a RAID 2 + 3 configuration (i.e., 2 RAID drives and 3 single drives). 

HDD1 and HDD2 support RAID 0, RAID 1, and the single disk mode. The default setting for HDD1 
and  HDD2  is  single  disk  mode.  Using  single  disk  mode,  each  drive  displays  and  operates 
independently. HDD3, 4, and 5 can only operate in single disk mode. They work as independent 
drives (i.e., they are not RAID-capable), and so will show as separate drives on your computer.

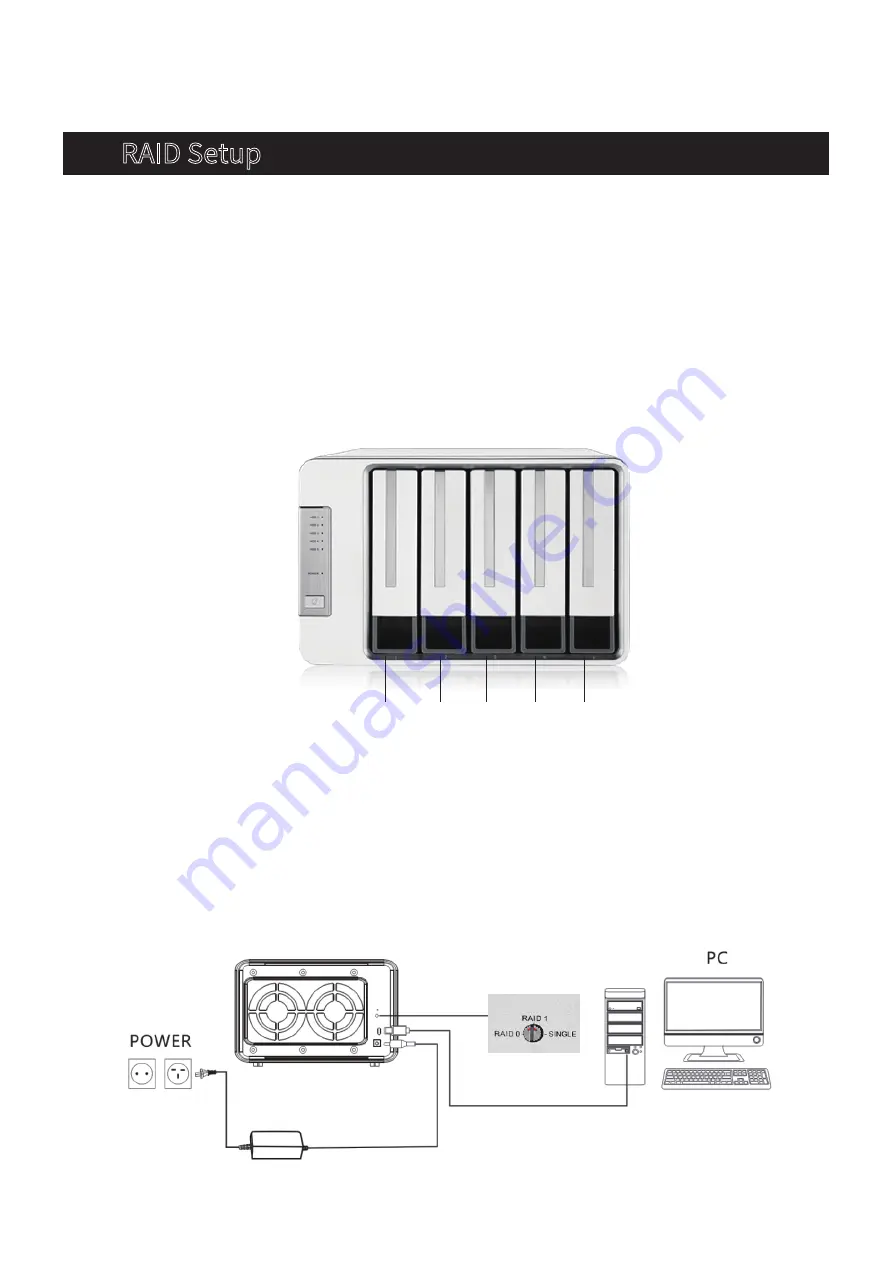
Step 1: Connect the device to your computer using a USB cable. Power on the device.

RAID Setup for HDD1 and HDD2

3.  RAID Setup

HDD1

SINGLE

HDD1 and HDD2 can be created  RAIDO/RAID1 randomly

HDD2

SINGLE

HDD3

SINGLE

HDD4

SINGLE

HDD5

SINGLE

D5-300C

Содержание D5-300C

Страница 1: ...User Manual Copyright 2017 TerraMaster All Rights Reserved Model D5 300C TerraMaster RAID Storage Data Storage Master...

Страница 2: ...drive in sleep mode Green Hard drive is ready Flashing Green Reading writing Flashing Red Hard drive fault or array damage Note During the process of data recovery on RAID 1 mode one hard drive indica...

Страница 3: ...erted into the device correctly 2 Once the tray is fully inserted close the handle Hard drive installation is now complete To install additional hard drives repeat steps 1 and 2 Push the lower part of...

Страница 4: ...ault setting for HDD1 and HDD2 is single disk mode Using single disk mode each drive displays and operates independently HDD3 4 and 5 can only operate in single disk mode They work as independent driv...

Страница 5: ...t apply to you 1 Open Computer Management and navigate to Storage Disk Management 2 Find an unallocated disk in the menu right click the disk and select Initialise Disk from the drop down menu 3 Compl...

Страница 6: ...5...

Страница 7: ...rnal 2 Use the menu to nd an unallocated disk 3 Select the unallocated disk and click Erase 4 Select the relevant Name Format and Scheme from the menu and click Erase 5 Once the Erase process is nishe...

Страница 8: ...d drive please refer to Section 2 of the user manual 4 Wait for approximately 1 minute until a the indicator of the newly inserted hard disk ashes orange and b the indicator of the original hard disk...

Страница 9: ...hard drive is greater than or equal to the capacity of the faulty hard drive 3 The data recovery process can last anywhere from several hours to tens of hours The length of time taken depends on the...

Отзывы: