


18
19
UK USER MANUAL
UK USER MANUAL
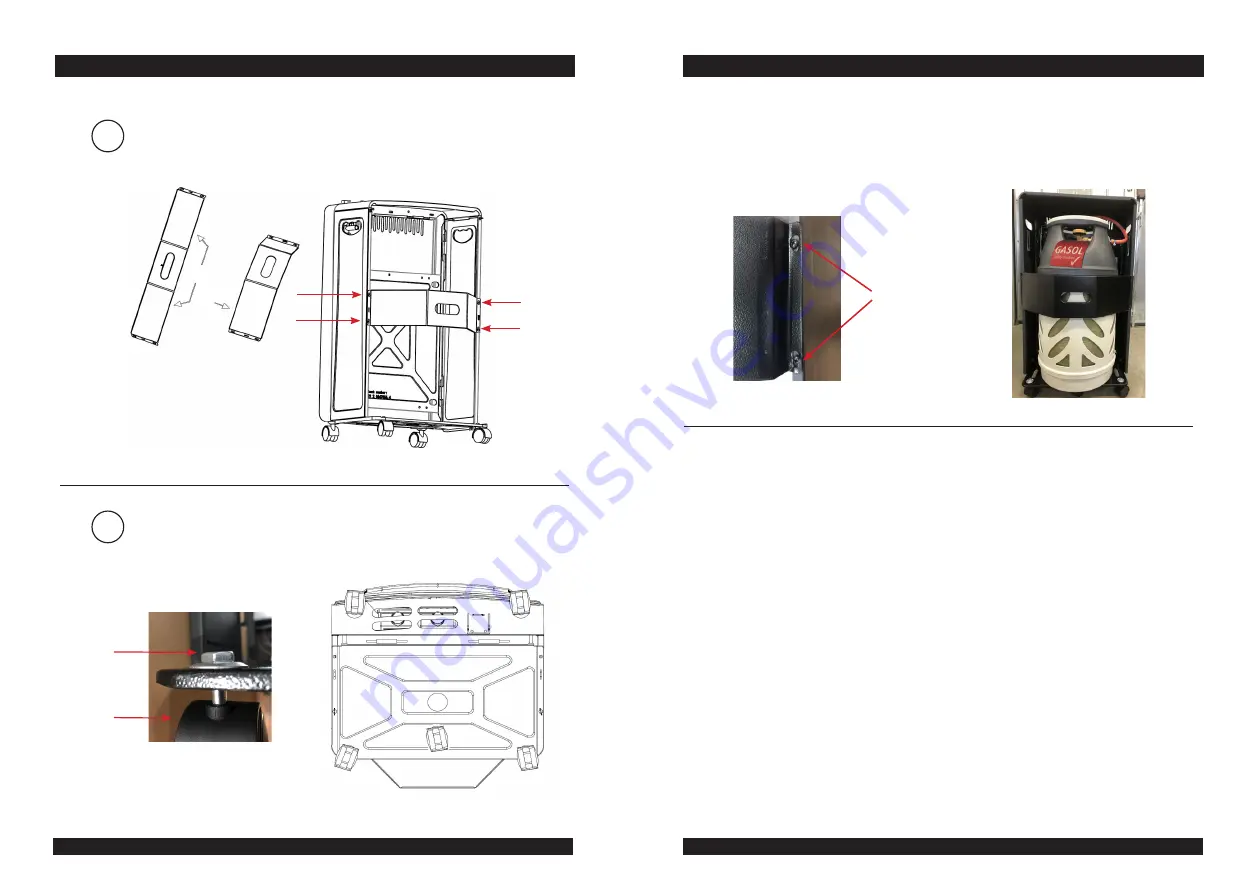
• Insert the gas bottle into the gas heater and attach the regulator securely to the
gas bottle. The connection hose must be between 50 and 100 cm long.
• Perform a leak test (see below).
• The gas heater is now assembled.
4 pcs screws in total
for left and right
side.
• Fixation Bracket
gastube
• Fold the rear panel and mount it with 4 screws.
• Fit the wheels under the base plate as shown. (5 wheels).
Mutter/nut
Hjul/Wheel
4.
5.
LEAK TEST
• The leak test must be done in a well ventilated place, away from any naked flames
or other ignition sources nearby.
• The gas heater must be tested for leaks before first use. All connections and joints
must be tested. It is important that the leak test is undertaken with a full gas bottle.
Smoking and use of naked flames is forbidden during the test.
• Make a soap solution of 1 part washing-up liquid and 1 part water.
• Open the regulator and test all the valves, hoses and connections, as well as the
regulator using the solution.
• If there are leaks anywhere, bubbles will form. Close the regulator and tighten any
leaky connections. Open the regulator again.
If there are still leaks:
• Do not use the gas heater.
• Do not use a naked flame.
• Do not use electrical equipment near the gas heater.
• Contact your retailer.
Once the leak test is complete and there is no leak, replace the rear plate. Make sure
that the gas hose is straight and there are no kinks in it.