background image

Operator's Manual


Second Edition • First Printing


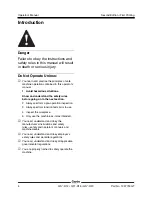
Introduction 


2 QS

-R12 • QS

-R15 • QS

-R20


Part No. 1297730GT 


Platform controls symbology and related 
machine movement: 


Lift function enable button 


Drive function enable button  


Platform up/down (when lift function 
selected) 

Drive forward/reverse (when drive function 
selected) 

Steer right/left (when drive function 
selected) 


Area of operation, indoor use button 


Area of operation, outdoor use button 

Ground controls symbology and related 
machine movement: 

Lift function enable button 

Platform up/down button 


Sequential functions and movement: 


Drive and steer. 

Interlocked functions: 


Elevated drive speed. 


Elevated drive in an off-level condition. 


All platform and ground controls. 

Limitations of use: 


The intended use of this machine is to lift 
personnel, including tools, and materials to an 
aerial work site. 


Do not elevate the platform unless the machine 
is on firm level ground. 

Содержание Genie QS-12R

Страница 1: ...Operator s Manual Serial Number Range QS 12R from QSP 6000 AUS Australia QS 15R QS 20R with Maintenance Information Second Edition First Printing Part No 1297730GT...

Страница 2: ...k Area Safety 11 Legend 18 Controls 19 Inspections 22 Operating Instructions 34 Transport and Lifting Instructions 45 Maintenance 50 Specifications 52 Copyright 2011 Terex Corporation Second Edition F...

Страница 3: ...hassis Serial label located on chassis Intended Use and Familiarization Guide The intended use of this machine is to lift personnel including tools and materials to an aerial work site Before operatin...

Страница 4: ...lected Area of operation indoor use button Area of operation outdoor use button Ground controls symbology and related machine movement Lift function enable button Platform up down button Sequential fu...

Страница 5: ...the action indicated in a respective bulletin To view any open bulletins for your machine visit us on the web at www genielift com Contacting the Manufacturer At times it may be necessary to contact...

Страница 6: ...ons Know and understand the safety rules before going on to the next section 2 Always perform a pre operation inspection 3 Always perform function tests prior to use 4 Inspect the workplace 5 Only use...

Страница 7: ...machine use symbols color coding and signal words to identify the following Safety alert symbol used to alert you to potential personal injury hazards Obey all safety messages that follow this symbol...

Страница 8: ...ad the service manual Crush hazard No smoking Collision hazard Collision hazard Tip over hazard Tip over hazard Electrocution hazard Electrocution hazard Burn hazard Explosion hazard Fire hazard Batte...

Страница 9: ...Access by trained and authorized personnel only Chock the wheels Release brakes Grounded AC 3 wire only Replace damaged wires and cords Wheel load Lanyard anchorage points Side force Manual force Lif...

Страница 10: ...Operator s Manual Second Edition First Printing General Safety 8 QS R12 QS R15 QS R20 Part No 1297730GT General Safety...

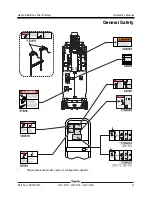
Страница 11: ...Second Edition First Printing Operator s Manual General Safety Part No 1297730GT QS R12 QS R15 QS R20 9 These decals are model option or configuration specific...

Страница 12: ...sonal Fall Protection Personal fall protection equipment PFPE is not required when operating this machine If PFPE is required by job site or employer rules the following shall apply All PFPE must comp...

Страница 13: ...rgized power lines Personnel on the ground or in the platform must not touch or operate the machine until energized power lines are shut off Do not operate the machine during lightning or storms Do no...

Страница 14: ...r the platform and do not continue to operate the machine Outdoor Use Do not operate the machine outdoors with the indoor use button selected Do not operate the machine in strong or gusty winds Do not...

Страница 15: ...hat weigh less than the original equipment Batteries are used as counterweight and are critical to machine stability Each battery must weigh a minimum of 62 lbs 28 kg Do not modify or alter a mobile e...

Страница 16: ...g stowed position 30 16 7 Maximum side slope rating stowed position 30 16 7 Note Slope rating is subject to ground conditions with one person in the platform and adequate traction Additional platform...

Страница 17: ...or other possible hazards Be aware of crushing hazards when grasping the platform guard rail Do not lower the platform unless the area below is clear of personnel and obstructions Limit travel speed a...

Страница 18: ...attery in hazardous locations or locations where potentially flammable or explosive gases or particles may be present Damaged Machine Hazards Do not use a damaged or malfunctioning machine Conduct a t...

Страница 19: ...y battery charger greater than 24V to charge the batteries Electrocution Burn Hazards Connect the battery charger to a grounded AC 3 wire electrical outlet only Inspect daily for damaged cords cables...

Страница 20: ...g valve 6 Battery charger display 7 Covers 8 Ground controls 9 Hydraulic oil level indicator 10 Mast 11 Brake release pump knob under covers 12 Platform controls 13 Work station tray 14 Dual entry gat...

Страница 21: ...n to the off position to stop all functions Pull out the red Emergency Stop button to the on position to operate the machine 3 Menu down button 4 Menu enter button 5 Platform up button 6 Platform down...

Страница 22: ...for drive steer and lift functions Lift function Press and hold the function enable switch to enable the lift function on the platform control handle Move the control handle in the direction indicate...

Страница 23: ...the direction the yellow triangle points on the platform control panel 7 LED diagnostic readout battery charge indicator and lift drive mode indicator 8 Drive function button Push this button to activ...

Страница 24: ...pection is designed to discover if anything is apparently wrong with a machine before the operator performs the function tests The pre operation inspection also serves to determine if routine maintena...

Страница 25: ...gs cylinders and manifolds Battery pack and connections Drive motors Tires and wheels Ground strap Limit switches alarms and horn Beacons if equipped Nuts bolts and other fasteners Platform entry mid...

Страница 26: ...nly use the machine as it was intended Function Test Fundamentals The function tests are designed to discover any malfunctions before the machine is put into service The operator must follow the step...

Страница 27: ...constant tone The descent alarm sounds at 60 beeps per minute The alarm sounds at 180 beeps per minute when the pothole guards have not deployed and when the machine is not level An optional automotiv...

Страница 28: ...d sound Test the Function Enable Switch and the Up Down Functions 25 Press the outdoor use button Result The outdoor use button should illuminate 26 Do not hold the function enable switch on the contr...

Страница 29: ...The alarm should sound The platform controls LED readout should display OHL Test the Drive Function Button 39 Press the drive function button 40 Wait seven seconds for the drive function to time out S...

Страница 30: ...he control panel then come to an abrupt stop when the control handle is returned to the center position Note The brakes must be able to hold the machine on any slope it is able to climb Test Drive Til...

Страница 31: ...ntrol handle in the direction indicated by the blue arrow then move the control handle in the direction indicated by the yellow arrow Result The drive function should not work in either direction 65 F...

Страница 32: ...iece of wood under a pothole guard 77 Raise the platform Result Before the platform is raised approximately 7 ft 2 1 m from the ground an alarm should sound The platform controls LED readout should di...

Страница 33: ...e operator determine if the workplace is suitable for safe machine operation It should be performed by the operator prior to moving the machine to the workplace It is the operator s responsibility to...

Страница 34: ...g Collision Hazard 1 109519 Danger Max Capacity 150 lbs 68 kg Work Tray 2 114325 Instructions Battery Connection Diagram 1 133013 Danger Electrocution Hazard 1 133092 Danger Crushing Hazard Use Safety...

Страница 35: ...Second Edition First Printing Operator s Manual Inspections Part No 1297730GT QS R12 QS R15 QS R20 33...

Страница 36: ...is the operator s responsibility to follow all the safety rules and instructions in the operator s safety and responsibilities manuals Using the machine for anything other than lifting personnel alon...

Страница 37: ...e changed when the machine is in the stowed position 2 Press and hold the lift function enable 3 Press the platform up or down button Operation from Platform 1 Be sure the battery pack is connected be...

Страница 38: ...perate Press the drive function button again 2 Press and hold the function enable switch on the control handle 3 Increase speed Slowly move the control handle off center Decrease speed Slowly move the...

Страница 39: ...u will need carpenter s level straight piece of wood at least 3 feet 1 m long tape measure Lay the piece of wood on the slope At the downhill end lay the level on the top edge of the piece of wood and...

Страница 40: ...an also be viewed at the ground controls LCD display Platform Overload If the platform controls LED diagnostic readout displays a flashing OL and the ground controls LCD diagnostic readout displays OL...

Страница 41: ...Machine Tilted and the tilt alarm sounds at 180 beeps per minute the following functions are affected drive steer and elevate functions are disabled Return the machine to level ground to restore lift...

Страница 42: ...button to reset the system To Raise and Lower Work Tray To raise the work tray 1 Grasp a side rail carefully with one hand 2 Grasp the hole located in the center of the work tray with the other hand 3...

Страница 43: ...p pin is no longer aligned with the snap pin hole 4 Remove hand from the snap pin and grasp the upper handle 5 Using the upper handle lift the tray to the desired height while the hand on the lower ha...

Страница 44: ...igned with the snap pin hole 4 Remove hand from the snap pin and grasp the upper handle 5 While holding the upper handle use the lower handle to rotate the tray to the vertical position and to engage...

Страница 45: ...attach personal safety lanyard Lift Tools Work Tray Operation 1 Place the load so that it rests inside the Lift Tools Work Tray The Lift Tools Work Tray assembly weighs 4 lbs 1 8 kg Maximum capacity o...

Страница 46: ...The compartment may remain closed for the entire charging cycle Maintenance free batteries 1 Connect the battery charger to a grounded AC circuit 2 The charger will indicate when the battery is fully...

Страница 47: ...ould move the machine on or off the truck The transport vehicle must be parked on a level surface The transport vehicle must be secured to prevent rolling while the machine is being loaded Be sure the...

Страница 48: ...r the machine is loaded 1 Chock the wheels to prevent the machine from rolling 2 Pull out the red Emergency Stop button at both the ground and platform controls to the on position and turn the key swi...

Страница 49: ...deck lock when the machine is transported Turn the key switch to the off position and remove the key before transporting Inspect the entire machine for loose or unsecured items Use the tie down points...

Страница 50: ...achine with a Forklift Be sure the extension deck controls and component trays are secure Remove all loose items on the machine Fully lower the platform The platform must remain lowered during all loa...

Страница 51: ...y lower the platform Be sure the extension deck controls and component trays are secure Remove all loose items on the machine Use the lifting eye mounted on the rear mast column Make sure the mast is...

Страница 52: ...ppear at the beginning of a maintenance procedure it conveys the meaning below Indicates that tools will be required to perform this procedure Indicates that new parts will be required to perform this...

Страница 53: ...oda and water Note Perform this test after fully charging the batteries 1 Put on protective clothing and eye wear 2 Be sure that the battery cable connections are tight and free of corrosion 3 Be sure...

Страница 54: ...ic machine weight Power source 4 Batteries 6V 225AH AC outlet in platform Standard Maximum hydraulic pressure functions 3500 psi 241 bar Tire size 10 x 3 x 1 in 25 4 x 7 6 x 2 5 cm Airborne noise emis...

Страница 55: ...ne weight Power source 4 Batteries 6V 225AH AC outlet in platform Standard Maximum hydraulic pressure functions 3500 psi 241 bar Tire size 10 x 3 x 1 in 25 4 x 7 6 x 2 5 cm Airborne noise emissions So...

Страница 56: ...225AH AC outlet in platform Standard Maximum hydraulic pressure functions 3500 psi 241 bar Tire size 10 x 3 x 1 in 25 4 x 7 6 x 2 5 cm Airborne noise emissions Sound pressure level at ground workstati...

Страница 57: ......

Отзывы: