background image

ENGINE–GAS/LP

6-9

6200G/LP 330375 (6–99)

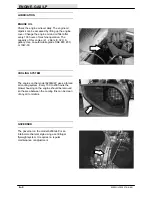
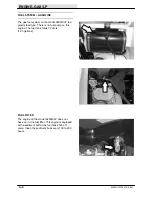
ENGINE CHOKE KNOB

An engine choke knob is standard equipment on
all gas powered machines.

On: For cold starting, pull the engine choke knob
out.

Off: Push the choke knob in.

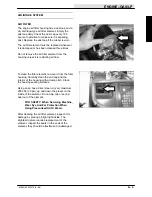
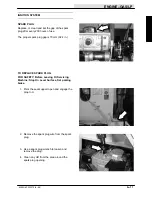
LP FUEL TANK

The standard LP tank is a 20lb Vapor withdrawal
type.

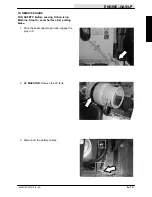
TO CHANGE  LPG FUEL TANK

FOR SAFETY: Before Leaving Or Servicing
Machine; Stop On Level Surface, Set parking
brake.

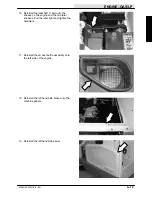
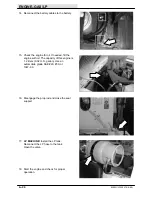
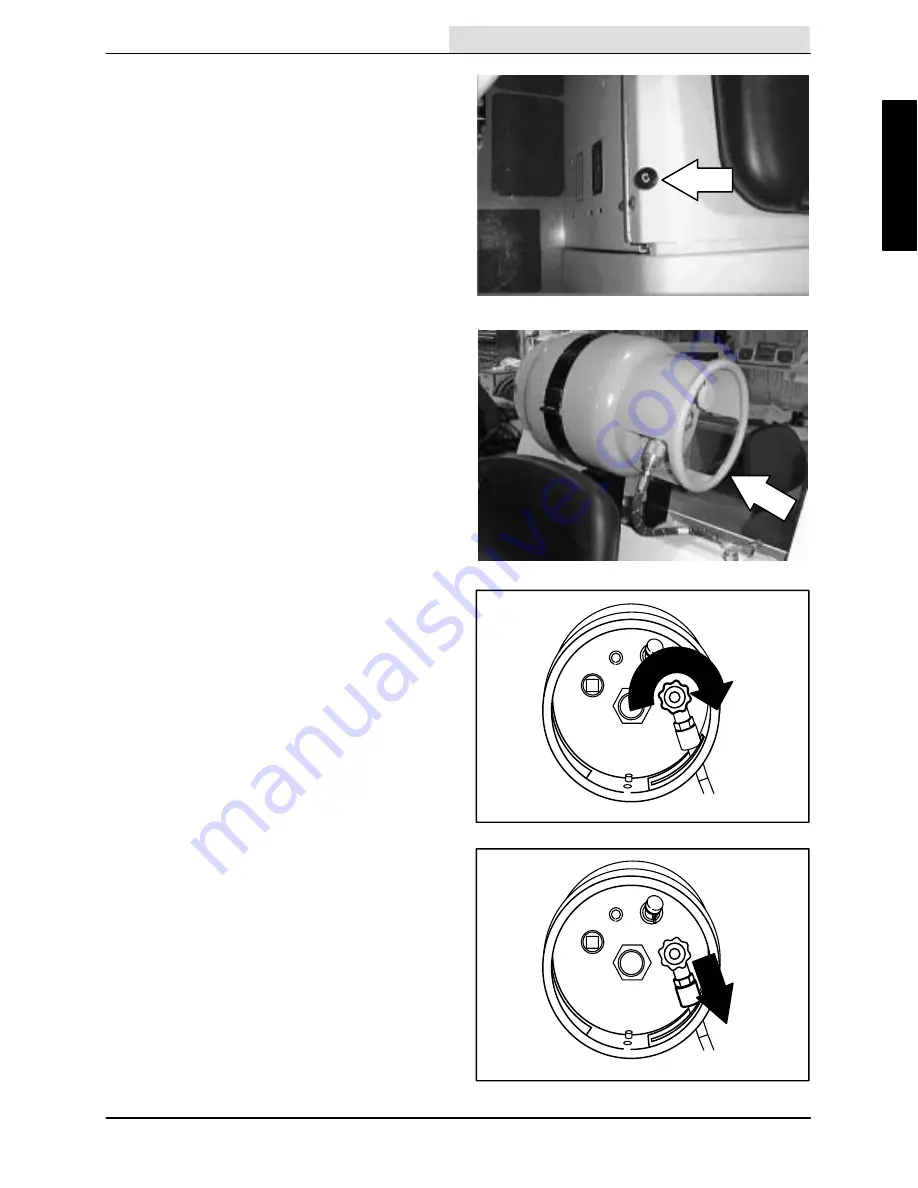
1. Close the valve on the LP tank.

2. Run the engine until all of the LP gas has

been used up in the fuel lines.

3. Disconnect the coupler at the tank outlet.

Содержание 6200G

Страница 1: ...330375 Rev 00 6 99 Service Manual 6200G LP ...

Страница 2: ...el replacement brake adjustment and replacement steering adjustment and replacement Sweeping V belt replacement brush replacement bearing replacement skirt seal repair replacement and sweeping troubleshooting Electrical Battery maintenance and replacement electrical schematics and electrical troubleshooting Hydraulics Cylinder replacement pump s replacement hydraulic motor replacement hydraulic sc...

Страница 3: ...ART 1 9 PUSHING TOWING AND TRANSPORTING THE MACHINE 1 11 MACHINE JACKING 1 12 STORING MACHINE 1 12 HARDWARE INFORMATION 1 13 STANDARD BOLT TORQUE CHART 1 13 METRIC BOLT TORQUE CHART 1 13 BOLT IDENTIFICATION 1 13 THREAD SEALANT AND LOCKING COMPOUNDS 1 13 HYDRAULIC FITTING INFORMATION 1 14 HYDRAULIC TAPERED PIPE FITTING NPT TORQUE CHART 1 14 HYDRAULIC TAPERED SEAT FITTING JIC TORQUE CHART 1 14 HYDRA...

Страница 4: ...GENERAL INFORMATION 1 2 6200G LP 330375 6 99 ...

Страница 5: ...ake and directional pedal in neutral 4 When using machine Use brakes to stop machine Go slowly on inclines and slippery surfaces Use care when reversing machine Do not carry riders on machine Always follow safety and traffic rules Report machine damage or faulty operation immediately 5 Before leaving or servicing machine Stop on level surface Set parking brake Turn off machine and remove key 6 Whe...

Страница 6: ...If these or any labels become damaged or illegible install a new label in its place FOR SAFETY LABEL LOCATED ON THE SIDE OF THE OPERATOR COMPARTMENT HOPPER SUPPORT LABEL LOCATED ON INSIDE METAL PANEL ON BOTH SIDES OF THE MACHINE HOPPER LIFT ARMS LABEL LOCATED ON BOTH LIFT ARMS EMISSIONS LABEL LOCATED BEHIND THE OPERATOR S SEAT ...

Страница 7: ... one side brush 1070 mm 42 in Sweeping path width with two side brushes 1400 mm 55 in Main sweeping brush pattern width 65 mm 2 5 in Hopper weight capacity 135 kg 300 lb Hopper volume capacity 85 L 3 cu ft Dust filter area 4 6 sq m 49 sq ft GVWR 927 kg 2700 lb Ceiling height minimum dumping clearance 2286 mm 90 in GENERAL MACHINE PERFORMANCE Item Measure Maximum forward speed 9 7 km h 6 mph Maximu...

Страница 8: ...200 rpm gov 1 Spark plug gap Valve clearance cold Engine lubricating oil 6 mm 0 024 in Gasoline and LPG 0 145 to 0 185 mm 0 0057 to 0 0072 in intake and exhaust 1 20 L 1 3 qt 10W30 SAE SG SH STEERING Type Power source Emergency steering Front wheel manual controlled Manual steering Manual HYDRAULIC SYSTEM System Capacity Fluid Type Hydraulic reservoir 7 58 L 2 gal TENNANT part no 65869 above 7 C 4...

Страница 9: ...GENERAL INFORMATION 1 7 6200G LP 330375 6 99 TOP VIEW SIDE VIEW 1956 mm 77 in 1245 mm 49 in 1440 mm 57 in FRONT VIEW 352185 MACHINE DIMENSIONS ...

Страница 10: ...Check air intake and cooling areas for debris 1 6 Brush compartment skirts Check for damage wear and adjustment 6 4 Main brush Check for damage or wear 1 5 Side brush es Check for damage or wear 1 2 Check brush pattern 1 2 7 Hopper dust filter Shake 1 25 Hours 3 Engine Check air filter element for damage 1 50 Hours 4 Main brush Rotate end for end 1 Check brush pattern 1 15 QuickMop broom Option Ro...

Страница 11: ... for damage or wear 3 9 Large Debris Trap Flap Check for damage or wear 1 10 Propelling chain Lubricate and check tension EO 1 12 Hopper Seal Check for damage or wear 4 200 Hours 11 Brake Check adjustment 1 13 Side brush es Check pivot adjustment 1 2 2 Vacuum fan belt Check tension and wear 1 3 Main brush belt Check for wear 1 800 Hours 1 Engine Replace fuel filter 3 Battery Clean and tighten batt...

Страница 12: ...GENERAL INFORMATION 1 10 6200G LP 330375 6 99 ...

Страница 13: ...cal harness before attempting to push the machine The machine will become much easier to maneuver when it is unplugged The front tie down locations are the holes in the front of the machine frame The rear tie down locations are the holes in the sides of the machine frame near the rear bumper When transporting the machine on a trailer or in a truck be sure to set the parking brake and block the tir...

Страница 14: ...ing brake turn off machine and remove key The front jacking locations are on the flat bottom edge of the front of the machine frame The rear jacking locations are on the corners of the rear frame FOR SAFETY When servicing machine block machine tires before jacking up machine FOR SAFETY When servicing machine jack up machine at designated locations only Block machine up with jack stands STORING MAC...

Страница 15: ...0 291 380 313 407 424 552 1 00 in 500 650 678 881 757 984 1026 1334 NOTE Decrease torque by 20 when using a thread lubricant METRIC BOLT TORQUE CHART Thread Size Class 8 8 Torque ft lb _Nm Class 10 9 Torque ft lb Nm M4 2 3 3 4 M5 4 5 6 8 M6 7 9 10 14 M8 18 24 25 34 M10 32 43 47 64 M12 58 79 83 112 M14 94 127 133 180 M16 144 195 196 265 M20 260 352 336 455 M24 470 637 664 900 NOTE Decrease torque b...

Страница 16: ... 9 ft lb 12 Nm 0 38 0 56 18 20 ft lb 27 Nm 0 50 0 75 16 30 ft lb 41 Nm 0 62 0 88 14 40 ft lb 54 Nm 0 75 1 12 12 70 ft lb 95 Nm 1 0 1 31 12 90 ft lb 122 Nm HYDRAULIC O RING FITTING TORQUE CHART Tube O D in Thread Size Minimum Torque Maximum Torque 0 25 0 44 20 6 ft lb 8 Nm 9 ft lb 12 Nm 0 38 0 56 18 13 ft lb 18 Nm 20 ft lb 27 Nm 10 ft lb 14 Nm 12 ft lb 16 Nm 0 50 0 75 16 20 ft lb 27 Nm 30 ft lb 41 ...

Страница 17: ...ce brushes Main and side brushes not adjusted properly Adjust main and side brushes Debris caught in main brush drive mechanism Remove debris from drive mechanism Main brush drive failure Contact Tennant service personnel Side brush drive failure Contact Tennant service personnel Hopper full Empty hopper Hopper lip skirts worn or damaged Replace lip skirts Wrong sweeping brush Contact Tennant repr...

Страница 18: ...GENERAL INFORMATION 1 16 6200G LP 330375 6 99 ...

Страница 19: ...ASTER BEARING ASSEMBLY 2 17 TO REMOVE FRONT DRIVE ASSEMBLY 2 18 TO INSTALL FRONT DRIVE ASSEMBLY 2 20 TO REPLACE DRIVE ASSEMBLY CASTER BEARING AND THRUST WASHERS 2 22 TO REPLACE DRIVE ASSEMBLY PIVOT CONE BEARING 2 27 TO REPLACE FRONT TIRE AND WHEEL ASSEMBLY 2 30 TO REPLACE FRONT DRIVE ASSEMBLY OUTER WHEEL BEARING 2 34 TO REPLACE FRONT DRIVE ASSEMBLY INNER WHEEL BEARING 2 36 Page STEERING 2 40 TO AD...

Страница 20: ...CHASSIS 2 2 6200G LP 330375 6 99 ...

Страница 21: ...CHASSIS 2 3 6200G LP 330375 6 99 INTRODUCTION This section includes information on the main chassis related components for example the seat steering front drive assembly brakes and tires ...

Страница 22: ...E SUSPENSION SEAT OPTION The deluxe suspension seat has four adjustments The adjustments are for the lumbar support backrest angle operator weight adjustment and front to back adjustment The lumbar adjustment knob controls the firmness of the lumbar support Increase firmness Turn knob clockwise Decrease firmness Turn knob counterclockwise The backrest angle knob adjusts the angle of the backrest I...

Страница 23: ...nob clockwise Decrease firmness Turn the weight adjustment knob counterclockwise Use the gauge next to the weight adjustment knob to help determine proper seat firmness for the operator The front to back adjustment lever adjusts the seat position Adjust Pull the lever out and slide the seat forward or backward to the desired position Release the lever ...

Страница 24: ...n is touching the floor at all times BRAKES AND TIRES SERVICE BRAKES The service brake is located on the front wheel assembly It is actuated with a foot brake pedal in the operators compartment PARKING BRAKE The parking brake is located on the front wheel assembly It is actuated with a smaller toe lever on the top of the foot brake pedal in the operators compartment It is deactivated by simply pus...

Страница 25: ...hes to the drive support The beginning adjustment should be 1 375 in of conduit showing on the cable end 3 Turn the steering wheel all the way to the right Note Spin the tire wheel assembly to make sure the brakes are not dragging with the brake pedal NOT engaged 4 Loosen the two jam nuts on the brake cable where it attaches to the drive support casting 5 Move the cable away from the brake lever f...

Страница 26: ... corner 2 Locate the area where the brake cable attaches to the drive support The beginning adjustment should be 1 375 in of conduit showing on the cable end 3 Turn the steering wheel all the way to the right 4 Loosen the two jam nuts on the brake cable where it attaches to the drive support casting 5 Move the cable away from the brake lever far enough to remove the slack in the pedal movement 6 R...

Страница 27: ...ace Block Rear Wheels 1 Raise the seat support and disconnect the battery cables 2 Raise the front of the machine and place jack stands under the frame 3 Mark disconnect and plug the hydraulic hoses leading to the drive motor NOTE Observe hydraulic cleanliness requirements when opening hydraulic lines 4 Remove the four hex screws holding the outer plate motor and drive hub to the main drive assemb...

Страница 28: ...m the drive assembly This will expose the brake shoes 10 Loosen the two jam nuts on the brake cable where it attaches to the drive support casting Pull the brake cable off the drive assembly 11 Remove the large C spring holding the two brake shoes together Remove the brake shoes NOTE There is a great deal of tension on the C spring Care must be used when spreading the spring for removal or install...

Страница 29: ...eve assembly this is a left hand thread nut Tighten to at least 100 ft lbs and then back off the hex sleeve to 0 ft lbs Re torque hex sleeve to 30 ft lbs 16 Install the lock bolt in the end of the hex sleeve Tighten the lock bolt to 200 Nm 150 ft lb while holding the hex sleeve from turning 17 Reinstall the hub cap in the drive assembly Reinstall the brake cable onto the drive assembly See TO ADJU...

Страница 30: ...e assembly 19 Install the 4 hex screws and washers Tighten to 18 24 Nm 15 20 ft lb 20 Reconnect the hydraulic hoses to the drive motor 21 Remove the jack stands and lower the machine 22 Reconnect the battery cables 23 Drive the machine and check the brakes for proper operation Adjust if necessary See TO ADJUST SERVICE BRAKES instructions ...

Страница 31: ...rface Set Parking Brake 1 Jack up the rear corner of the machine where the tire needs to be removed NOTE Do not raise both rear wheels off the floor at the same time The machine will become unstable because of the single front tire 2 Go under the machine in the area of the rear tire Locate the lock nut holding the axle shaft to the machine frame Remove the lock nut and washer 3 Support the tire wh...

Страница 32: ...n the hole in the wheel bearing with the axle hole in the frame NOTE The lug nuts must face the outside of the machine 2 Install the axle shaft in the machine from the outside of the frame NOTE The axle has a flat portion that must line up with the flat in the axle mount hole 3 Install the washer and nut on the axle Tighten to 68 81 Nm 50 60 ft lb 4 Remove the jack stands and lower the machine 5 D...

Страница 33: ...ake 1 Remove the rear wheel assembly See TO REMOVE REAR TIRE instructions 2 Remove the three lug nuts holding the bearing housing to the wheel assembly Remove the bearing housing 3 Use a press to remove the wheel bearings from the housing 4 Press the new wheel bearings into the housing Press the bearing in until the flange is seated on the housing ...

Страница 34: ...eel on the bearing housing coining on wheel facing lug nuts Tighten the three lug nuts to 58 76 Nm 43 56 ft lb NOTE The lug nuts must face the outside of the machine 6 Reinstall the rear wheel assembly in the machine See TO INSTALL REAR TIRE instructions ...

Страница 35: ... and steering The brakes are actuated with a cable and uses a sprocket and chain assembly for the steering Forward and reverse is accomplished with an hydraulic motor and drive hub FRONT WHEEL SUPPORT CASTER BEARING ASSEMBLY The front wheel support caster bearing is located between the bottom swivel plate and the upper swivel plate weldment The bearing is a flat needle bearing style ...

Страница 36: ...s 2 Raise the front of the machine and place jack stands under the frame 3 Mark plug and disconnect the hydraulic hoses leading to the drive motor NOTE Observe hydraulic cleanliness requirements when opening hydraulic lines 4 Go in operators compartment and loosen the lower steering shaft mount screws 5 Pull the mount back to give the steering chain slack Locate and remove the master link and stee...

Страница 37: ...o the wheel support Remove the brake cable from the wheel support 8 Position a floor jack or transmission jack under the drive wheel This will support the drive assembly when the hardware is removed 9 Go to the operators compartment and locate the 4 button head screws holding the drive assembly to the floor plate Remove the 4 screws while supporting the drive assembly 10 Remove the drive assembly ...

Страница 38: ... support the drive assembly when installing it in the machine 4 Position the drive assembly under the machine in front 5 Raise the drive assembly up until the mount holes in the floor plate are aligned with the mount holes in the upper swivel plate weldment on top of the drive assembly NOTE Make sure to position the grease zerk in the access hole in the machine floor plate 6 Install the four butto...

Страница 39: ...pin and clevis pin in the end of the brake cable where it attaches to the lever on the wheel support 10 Reconnect the hydraulic hoses to the drive motor 11 Remove the jack stands and lower the machine 12 Reconnect the battery cables 13 Operate the machine and check for proper operation Check the brakes for proper operation Adjust if necessary See TO ADJUST SERVICE BRAKES instructions ...

Страница 40: ...op On Level Surface Set Parking Brake 1 Remove the drive assembly from the machine See TO REMOVE FRONT DRIVE ASSEMBLY instructions 2 Remove the four hex screws holding the outer plate drive motor and drive hub to the main drive assembly 3 Pull the drive hub outer plate and hydraulic motor out of the drive wheel and away from the drive assembly ...

Страница 41: ...et assembly to the drive assembly 5 Remove the sprocket from the pivot assembly 6 Remove the cotter pin and castle nut from the upper swivel plate weldment 7 Remove the flat washer and cone bearing from the bottom swivel plate 8 Lift the bottom swivel plate off the upper swivel plate weldment ...

Страница 42: ...sition the new caster bearing on top of the new lower thrust washer 12 Reinstall the second new thrust washer on top of the new caster bearing 13 Reinstall the bottom swivel plate on the upper swivel plate weldment Make sure the grease seal is in place on the upper swivel plate weldment 14 Reinstall the bearing cone and flat washer on the bottom swivel plate Make sure the bearing cone is greased ...

Страница 43: ...be turned by hand Reduce torque if necessary 16 Reinstall the sprocket on the front drive assembly 17 Reinstall the pivot and sprocket assembly on the drive assembly Reinstall the four screws and tighten to 68 81 Nm 50 60 ft lb 18 Install the drive hub outer plate and drive motor assembly onto the pins of the drive assembly 19 Install the 4 hex screws and washers Tighten to 18 24 Nm 15 20 ft lb ...

Страница 44: ...l the drive assembly in the machine See TO INSTALL FRONT DRIVE ASSEMBLY instructions 21 Operate the machine and check for smooth steering operation Check the brakes for proper operation Adjust if necessary See TO ADJUST SERVICE BRAKES instructions ...

Страница 45: ...face Set Parking Brake 1 Remove the drive assembly from the machine See TO REMOVE FRONT DRIVE ASSEMBLY instructions 2 Remove the four hex screws holding the outer plate drive motor and drive hub assembly to the main drive assembly 3 Pull the drive hub outer plate and drive motor assembly out of the drive wheel and away from the drive assembly ...

Страница 46: ...e nut from the upper swivel plate weldment 7 Remove the flat washer and old cone bearing from the bottom swivel plate 8 Install the new cone bearing and flat washer on the bottom swivel plate Make sure the new cone bearing is greased 9 Reinstall the castle nut and tighten to 200 Nm 150 ft lbs Then tighten to the next nearest hole and install the cotter pin 10 Reinstall the sprocket on the pivot as...

Страница 47: ... motor assembly into the wheel assembly and onto the pins of the drive assembly 13 Install the 4 hex screws and washers Tighten to 18 24 Nm 15 20 ft lb 14 Reinstall the drive assembly in the machine See TO INSTALL FRONT DRIVE ASSEMBLY instructions 15 Operate the machine and check for smooth steering operation Check the brakes for proper operation Adjust if necessary See TO ADJUST SERVICE BRAKES in...

Страница 48: ...he front of the machine and place jack stands under the frame 3 Mark disconnect and plug the hydraulic hoses leading to the drive motor NOTE Observe hydraulic cleanliness requirements when opening hydraulic lines 4 Remove the four hex screws holding the outer plate drive motor and drive hub assembly to the main drive assembly 5 Pull the drive hub outer plate and drive motor out of the drive wheel ...

Страница 49: ... the lock bolt this is a right hand thread screw 8 Remove the hex sleeve and outer bearing cone assembly this is a left hand thread nut 9 The inner bearing axle shaft and tire wheel assembly can now be removed from the drive assembly Use a press to remove the inner bearing from the existing tire wheel assembly 10 Install the inner bearing on the new tire wheel assembly ...

Страница 50: ...ng 12 Reinstall the outer bearing and hex sleeve assembly this is a left hand thread nut Tighten to at least 100 ft lbs and then back off the hex sleeve to 0 ft lbs Re torque hex sleeve to 30 ft lbs 13 Install the lock bolt in the end of the hex sleeve Tighten the lock bolt to 200 Nm 150 ft lb while holding the hex sleeve from turning 14 Reinstall the hub cap in the drive assembly ...

Страница 51: ...r assembly into the wheel assembly and onto the pins of the drive assembly 16 Install the 4 hex screws and washers Tighten to 18 24 Nm 15 20 ft lb 17 Reconnect the hydraulic hoses to the drive motor 18 Reconnect the battery cables 19 Remove the jack stands and lower the machine 20 Drive the machine and check for proper operation ...

Страница 52: ... the frame 3 Go to the side of the drive assembly opposite the drive motor and remove the hub cap This will expose the outer bearing hex sleeve and lock bolt 4 Remove the lock bolt this is a right hand thread screw 5 Remove the hex sleeve and outer bearing cone assembly this is a left hand thread nut 6 Use a press to remove the old outer bearing cone from the hex sleeve Install a new outer bearing...

Страница 53: ...leeve to 0 ft lbs Re torque hex sleeve to 30 ft lbs 8 Install the lock bolt this is a right hand thread screw in the end of the hex sleeve Tighten the lock bolt to 200 Nm 150 ft lb while holding the hex sleeve from turning 9 Reinstall the hub cap in the drive assembly 10 Reconnect the battery cables 11 Remove the jack stands and lower the machine 12 Drive the machine and check for proper operation...

Страница 54: ...the front of the machine and place jack stands under the frame 3 Mark disconnect and plug the hydraulic hoses leading to the drive motor NOTE Observe hydraulic cleanliness requirements when opening hydraulic lines 4 Remove the four hex screws holding the outer plate drive motor and drive hub assembly to the main drive assembly 5 Pull the drive hub outer plate and drive motor assembly out of the dr...

Страница 55: ...ht hand thread screw 8 Remove the hex sleeve and outer bearing cone assembly this is a left hand thread nut 9 The inner bearing axle shaft and tire wheel assembly can now be removed from the drive assembly Use a press to remove the inner bearing from the existing tire wheel assembly Discard the old wheel bearing 10 Press a new inner wheel bearing on the wheel shaft Apply grease to the new bearing ...

Страница 56: ... 12 Reinstall the outer bearing and hex sleeve assembly this is a left hand thread nut Tighten to at least 100 ft lbs and then back off the hex sleeve to 0 ft lbs Re torque hex sleeve to 30 ft lbs 13 Install the lock bolt in the end of the hex sleeve Tighten the lock bolt to 200 Nm 150 ft lb while holding the hex sleeve from turning 14 Reinstall the hub cap in the drive assembly ...

Страница 57: ...r assembly into the wheel assembly and onto the pins of the drive assembly 16 Install the 4 hex screws and washers Tighten to 18 24 Nm 15 20 ft lb 17 Reconnect the hydraulic hoses to the drive motor 18 Reconnect the battery cables 19 Remove the jack stands and lower the machine 20 Drive the machine and check for proper operation ...

Страница 58: ...emoved by following the adjustment procedure listed below TO ADJUST STEERING CHAIN FOR SAFETY Before Leaving Or Servicing Machine Stop On Level Surface Set Parking Brake 1 Go into the operators compartment and locate the two hex screws holding the lower steering shaft bearing assembly to the floor plate Loosen these two hex screws 2 Push the lower steering shaft assembly forward until the slack ha...

Страница 59: ...Go under the machine and locate the steering chain 4 Rotate the steering wheel until the master link on the chain is accessible 5 Remove the chain master link Remove the steering chain from both sprockets 6 Remove and discard the steering chain from the machine 7 Route the new chain around both steering sprockets Install the master link 8 Remove the jack stands and lower the machine Reconnect the ...

Страница 60: ...op On Level Surface Set Parking Brake 1 Remove the drive assembly from the machine See TO REMOVE FRONT DRIVE ASSEMBLY instructions 2 Remove the four hex screws holding the pivot and sprocket assembly to the drive assembly 3 Remove the old sprocket from the pivot assembly 4 Install the new sprocket on the pivot assembly ...

Страница 61: ... sprocket 5 Reinstall the pivot and sprocket assembly on the drive assembly Reinstall the four screws and tighten to 68 81 Nm 50 60 ft lb 6 Reinstall the drive assembly in the machine See TO INSTALL FRONT DRIVE ASSEMBLY instructions 7 Reconnect the battery cables 8 Operate the machine and check for smooth steering operation ...

Страница 62: ...ront of the machine and place jack stands under the frame 3 Go into the operators compartment and locate the lower steering shaft mount assembly Loosen the two screws and pull the mount back to give the steering chain slack 4 Go under the machine and locate the steering chain 5 Rotate the steering wheel until the master link on the chain is accessible 6 Remove the chain master link Remove the stee...

Страница 63: ...ll the new small sprocket on the lower steering shaft Firmly tighten the set screws 9 Route the steering chain around both steering sprockets Install the master link 10 Adjust the steering chain See TO ADJUST STEERING CHAIN instructions 11 Remove the jack stands and lower the machine 12 Operate the machine and check the steering for proper operation ...

Страница 64: ...nds under the machine frame 2 Turn the steering wheel all the way to the left 3 Go to the operators compartment and locate the steering U joint Loosen the two set screws on the top of the steering U joint 4 Pull the steering wheel and long steering shaft up and out of the top of the steering U joint 5 Remove the two hex screws holding the steering bearing housing to the machine frame Push the bear...

Страница 65: ...t 7 Locate the master link on the steering chain Remove the master link and steering chain from the small steering sprocket 8 Remove the steering housing from the machine 9 Loosen the two set screws holding the U joint to the top of the short steering shaft Remove and retain the U joint and square key ...

Страница 66: ...Discard the bearings Retain the short shaft Note the orientation of the shaft in the housing 12 Use the arbor press to install the new bearings into the steering housing 13 Use the arbor press to install the short steering shaft into the new bearings 14 Reinstall the small steering sprocket and woodruff key on the bottom of the steering housing Tighten the set screws tight 15 Reinstall the U joint...

Страница 67: ...ing chain around the small steering sprocket Reinstall the master link 19 Turn the steering wheel all the way to the left and then to the right Find the point in the rotation where the steering chain is the tightest 20 Push the bearing housing forward in the slots This will remove any excess slack in the steering chain Tighten the two hex screws to 37 48 Nm 26 34 ft lb 21 Remove the jack stands an...

Страница 68: ...t Install jack stands under the machine frame 2 Go to the operators compartment and locate the steering U joint Loosen the two set screws on the top of the steering U joint 3 Pull the steering wheel and long steering shaft up and out of the top of the steering U joint 4 Loosen the two set screws holding the U joint to the top of the short steering shaft Remove and discard the U joint and square ke...

Страница 69: ...quare key on the top of the steering housing Tighten the set screws tight 6 Position the long steering shaft and steering wheel into the top of the steering U joint Tighten the set screws tight 7 Operate the machine and check the steering U joint for proper operation ...

Страница 70: ...eed of the machine with the pressure of your foot on the pedal the harder you press the faster the machine travels Use the brake pedal to stop the machine TO REMOVE DIRECTIONAL PEDAL ASSEMBLY FOR SAFETY Before Leaving Or Servicing Machine Stop On Level Surface Set Parking Brake 1 Open the seat support and engage the prop rod 2 Disconnect the machine batteries ...

Страница 71: ...te the directional pedal linkage rod and control valve 5 Disconnect the directional pedal link at the lower ball joint 6 Go the the operators compartment and locate the directional pedal assembly Remove the four thread rolling screws holding the directional pedal to the floor plate 7 Remove the pedal assembly from the machine ...

Страница 72: ...et Parking Brake 1 Position the directional pedal assembly in the machines operators compartment 2 Position the pedal link through the access hole in the floor plate 3 Line up the mount holes in the pedal assembly plate with the mount holes in the machines floor plate 4 Reinstall the four thread rolling screws and tighten to 8 10 Nm 6 7 ft lb ...

Страница 73: ...ea of the right hand side brush Locate the control valve pivot link Position the ball joint into the hole on the pivot Tighten the nut 6 Reconnect the battery cables 7 Disengage the prop rod and lower the seat support 8 Start the machine and check for proper operation ...

Страница 74: ...CHASSIS 2 56 6200G LP 330375 6 99 ...

Страница 75: ...23 JACK SHAFT BRUSH BELT 3 25 TO REPLACE MAIN BRUSH JACKSHAFT BELT 3 25 TO REPLACE MAIN BRUSH JACKSHAFT INNER BEARING 3 28 TO REPLACE MAIN BRUSH JACKSHAFT OUTER BEARING 3 33 SIDE BRUSH 3 41 TO REPLACE SIDE BRUSH 3 41 SIDE BRUSH GUARD 3 43 SIDE BRUSH PIVOT 3 43 TO REPLACE SIDE BRUSH LIFT CABLE 3 44 SKIRTS AND SEALS 3 47 REAR SKIRT 3 47 SIDE SKIRTS 3 47 LARGE DEBRIS TRAP SKIRT 3 48 HOPPER SEAL 3 48 ...

Страница 76: ...SWEEPING 3 2 6200G LP 330375 6 99 ...

Страница 77: ... section includes information on the sweeping operation of the model 6200G LP The side brush sweeps debris in front of the machine and the main brush sweeps the debris into the hopper The vacuum fan pulls air from the hopper and through the dust filter ...

Страница 78: ...e behind the battery compartment The hopper is raised and lowered with an hydraulic lift cylinder The lift cylinder is provided hydraulic flow from a electro hydraulic unit The electro hydraulic unit is activated with a dash mounted switch The hopper is held in the raised position with a prop arm ...

Страница 79: ...er switch to the Filter shaker position TAPPING Remove the filter and tap the filter gently on a flat surface with the dirty side down Do not damage the edges of the filter element and seals or the filter will not seat properly in the filter frame AIR Blow air through the dust filter opposite the direction of the arrows This may be done with the dust filter in the machine Always wear eye protectio...

Страница 80: ...ower off FOR SAFETY Before leaving or servicing machine stop on level surface set parking brake turn off machine and remove key 2 Unlatch and remove hopper cover 3 Unplug the two electrical connections from the VCS system filter shaker Note Carefully pull the wires from the shaking mechanism from the body of the plug Do not pull on the wire Damage could occur to the wires 4 Lift dust filter elemen...

Страница 81: ...ring releasing tension from the shaking mechanism 6 Lift the VCS system filter shaker off of the filter 7 Clean or discard the Instant Access filter as required 8 Replace the VCS system filter shaker Use care to insert the shaking pin into the filter comb correctly ...

Страница 82: ...in either front to back or side to side directions If the shaker is loose it will not function properly 10 Check the shaker solenoid gap with the end of the shipping tab The gap should be the same width as the tab If it is not loosen the mounting screws adjust the gap by repositioning the shaker solenoid then retighten the screws 11 Return the filter back to the machine ...

Страница 83: ... the electrical wires to the shaker mechanism NOTE Even if the wires are connected in opposite order of their original positions the shaker will still function properly 13 Check the dust filter seals 14 Replace hopper cover and secure with latches ...

Страница 84: ... main brush in the lowered position Rotate the main brush end for end after every 50 hours of operation for maximum brush life and best sweeping performance Replace the main brush when the remaining bristles measure 25 mm 1 in in length TO REPLACE MAIN BRUSH FOR SAFETY Before Leaving Or Servicing Machine Stop On Level Surface Set Parking Brake 1 Stop the machine set the parking brake and turn the ...

Страница 85: ...loor next to the access door 6 Slide the main brush onto the drive plug Rotate the brush until it engages the drive plug and push it all the way onto the plug 7 Check that the recirculation skirt is tucked in behind the frame 8 Slide the main brush idler arm plug onto the main brush 9 Secure the idler arm on the bolts Hand tighten the mounting knobs 10 Close the main brush access door ...

Страница 86: ...k will remain on the floor 4 Raise the main brush 5 Drive the machine off the test area 6 Observe the width of the brush pattern The proper brush pattern width is 50 to 75 mm 2 to 3 in The brush taper is factory set and should not need adjustment unless parts of the brush system have been replaced If the main brush pattern is tapered more than 15 mm 0 5 in on one end than the other adjust the tape...

Страница 87: ...ACE MAIN BRUSH DRIVE BELT FOR SAFETY Before Leaving Or Servicing Machine Stop On Level Surface Set Parking Brake 1 Remove the four screws holding the right hand brush door to the machine frame Remove the right hand side brush door 2 Locate the main brush drive belt idler pulley between the small drive pulley and the larger brush pulley 3 Loosen the hex nut in the center of the idler pulley 4 Push ...

Страница 88: ...card the old drive belt 6 Position the new main brush drive belt onto the brush drive pulleys 7 Move the idler pulley forward in the slot until the belt is tight Tighten the hex nut to 18 24 Nm 15 20 ft lb 8 Reinstall the right hand side brush door 9 Operate the machine and check the main brush for proper operation ...

Страница 89: ...ine Stop On Level Surface Set Parking Brake 1 Open the left hand side brush door 2 Remove the main brush idler mount plate See TO REPLACE MAIN BRUSH instructions in this sections 3 Remove the idler arm from the brush lift plate 4 Remove the hex screw nut and washer holding the idler plug assembly to the brush lift plate ...

Страница 90: ...ex screws holding the bearing retainer to the idler plug Remove the retainer 7 Remove and discard the idler ball bearing from the idler plug 8 Position the new ball bearing into the idler plug 9 Reinstall the bearing retainer plate on the idler plug Reinstall the four screws and tighten to 8 10 Nm 6 7 ft lb ...

Страница 91: ...rew washer and nyloc nut Tighten to 37 48 Nm 26 34 ft lb 11 Reinstall the idler arm onto the brush lift plate 12 Reinstall the main brush idler mount plate See TO REPLACE MAIN BRUSH instructions in this sections 13 Close the left hand side brush door 14 Operate the machine and check the main brush for proper operation ...

Страница 92: ... the jack points Install jack stands under the machine frame 2 Open the left hand side brush door Remove the right hand brush door 3 Remove the main brush idler mount plate See TO REPLACE MAIN BRUSH instructions in this sections 4 Remove the main brush See TO REPLACE MAIN BRUSH instructions in this sections 5 Remove the main brush drive belt See TO REPLACE MAIN BRUSH DRIVE BELT instructions in thi...

Страница 93: ... A LEFT HAND THREAD NUT 7 Remove the main brush V belt pulley larger one from the main brush shaft Make sure to retain the washer from behind the pulley 8 Hold the main brush drive plug from turning Remove the large nut from the center of the drive plug NOTE THIS IS A LEFT HAND THREAD NUT 9 Remove the main brush idler plug assembly from the main brush shaft ...

Страница 94: ...rew driver or punch to remove the remaining outer bearing from the main brush housing Discard the bearing 14 Use an arbor press to remove the bearing from the main brush shaft Discard the bearing 15 Install one new bearing onto the main brush shaft 16 Install one new bearing into the outer side of the main brush bearing housing 17 Install the new bearing and main brush shaft assembly into the main...

Страница 95: ...ighten tight 19 Reinstall the washer and V belt pulley recess to inside onto the outside of the main brush shaft Reinstall the left hand nut Tighten to 52 67 Nm 39 51 ft lb 20 Reinstall the main brush drive belt See TO REPLACE MAIN BRUSH DRIVE BELT instructions in this section 21 Reinstall the main brush See TO REPLACE MAIN BRUSH instructions in this sections ...

Страница 96: ...2 6200G LP 330375 6 99 22 Reinstall the right hand brush door and close the left hand brush door 23 Remove the jack stands and lower the machine 24 Operate the machine and check the main brush for proper operation ...

Страница 97: ... the four screws holding the right hand brush door to the machine frame Remove the right hand side brush door 2 Locate the main brush drive belt idler pulley between the small drive pulley and the larger brush pulley 3 Loosen the hex nut in the center of the idler pulley 4 Push the idler pulley back in the slot 5 Remove the main brush drive belt from the two remaining pulleys ...

Страница 98: ...o the hex bolt Reinstall the hex nut Leave loose for now 8 Reinstall the V belt around the two drive pulleys and on top of the idler pulley 9 Pull down on the idler pulley until the belt is tight Tighten the pulley nut to 18 24 Nm 15 20 ft lb 10 Reinstall the right hand side brush door 11 Operate the machine and check the main brush for proper operation ...

Страница 99: ...ng belt and fan Keep away TO REPLACE MAIN BRUSH JACKSHAFT BELT FOR SAFETY Before Leaving Or Servicing Machine Stop On Level Surface Set Parking Brake 1 Open the seat support and engage the prop rod Disconnect the battery cables 2 Remove the main brush See TO REPLACE MAIN BRUSH instructions in this section 3 Locate the main brush jack shaft belt tension idler pulley mount plate beside the machine b...

Страница 100: ...ate 5 Push the idler pulley mount plate down to loosen the tension on the main brush center V belt 6 Remove the V belt from the engine sheave idler sheaves and main brush jack shaft sheave Remove the V belt from the machine 7 Install the new V belt onto the engine sheave idler sheaves and main brush shaft sheave ...

Страница 101: ...n idler pulley mount plate up until the new V belt is tight Tighten the two nuts to 18 24 Nm 15 20 ft lb 9 Reinstall the main brush 10 Disengage the seat rod and close the seat assembly 11 Operate the machine and check the main brush for proper operation ...

Страница 102: ...Leaving Or Servicing Machine Stop On Level Surface Set Parking Brake 1 Open the seat support and engage the prop rod Disconnect the battery cables 2 Remove the main brush See TO REPLACE MAIN BRUSH instructions in this section 3 Locate the main brush jack shaft belt on the engine mounted sheave plate ...

Страница 103: ...y plate 5 Pull the idler pulley mount plate down to loosen the tension on the main brush center V belt 6 Remove the V belt from the main brush jack shaft sheave 7 Locate the main brush jack shaft V belt sheave in the brush compartment area Loosen the two set screws Remove the sheave from the jack shaft Retain the square key ...

Страница 104: ...rews on the bearing lock collar 9 Remove the two hex screws and nuts holding the bearing flanges to the mount bracket 10 Remove the outer bearing flange from the mount bracket 11 Pull the inner bearing off the jack shaft Leave the inner bearing flange in place ...

Страница 105: ...l the hardware Leave loose for now 14 Push the bearing in until it is seated against the inner flange Tighten the hardware to 18 24 Nm 15 20 ft lb Hand tighten the two bearing collar set screws tight 15 Reinstall the sheave onto the end of the jack shaft Make sure the square key is in place on the jack shaft Position the sheave so the face is flush with the end of the shaft Hand tighten the two sh...

Страница 106: ... 99 16 Position the V belt over the jack shaft sheave 17 Pull up on the idler arm to tighten the V belt Tighten the two hex screws 18 Reinstall the main brush 19 Start the machine and operate the main brush Check for proper operation ...

Страница 107: ...Leaving Or Servicing Machine Stop On Level Surface Set Parking Brake 1 Open the seat support and engage the prop rod Disconnect the battery cables 2 Remove the main brush See TO REPLACE MAIN BRUSH instructions in this section 3 Locate the main brush jack shaft belt on the engine mounted sheave plate ...

Страница 108: ...o the main engine pulley plate 5 Pull the idler pulley mount plate down to loosen the tension on the main brush center V belt 6 Remove the V belt from the main brush jack shaft sheave 7 Remove the four screws holding the right hand brush door to the machine frame Remove the right hand side brush door ...

Страница 109: ...ng the vacuum fan housing to the machine frame 10 Push the vacuum fan assembly forward in the slots to loosen the vacuum fan V belt 11 Remove the vacuum fan V belt from the two groove jack shaft sheave 12 Locate the main brush drive belt idler pulley between the jack shaft drive pulley and the larger brush pulley 13 Loosen the hex nut in the center of the idler pulley 14 Push the idler pulley back...

Страница 110: ...ull the sheave off the shaft Retain the shaft key 16 Loosen the two set screws on each of the jack shaft bearing locking collars 17 loosen the hardware holding each of the two jack shaft bearing flanges to the mount brackets 18 Push the jack shaft in toward the center of the machine Push the shaft in far enough so it clears the outer bearing ...

Страница 111: ...r bearing flange in place 21 Position the new outer bearing and the outer bearing flange onto the mount plate Reinstall the two nuts Leave hardware loose for now 22 Push the jack shaft through the new bearing until the end is showing out the right hand side of the brush wrap 23 Go under the machine in the brush wrap area Tighten the hardware holding the two jack shaft bearing flanges to the mount ...

Страница 112: ...inside face of the inner jack shaft sheave and the bearing flange mount bracket is about 1 5 inch 25 Hand tighten the two set screws on each jack shaft bearing tight 26 Position the V belt over the jack shaft sheave 27 Pull up on the idler arm to tighten the V belt Tighten the two hex screws ...

Страница 113: ...e sheave small sheave to the inside onto the outer end of the jack shaft Hand tighten the two set screws tight 30 Position the main brush drive belt onto the jack shaft and brush drive pulleys 31 Move the idler pulley forward in the slot until the belt is tight Tighten the hex nut to 18 24 Nm 15 20 ft lb 32 Install the vacuum fan V belt over the jack shaft sheave ...

Страница 114: ...t tension is when the belt deflects 8 38 mm 0 33 in from a force of 42 kg 90 to 95 lb at belt midpoint Tighten the screws hand tight 34 Tighten the five mounts screws hand tight 35 Reinstall the right hand machine cover 36 Reinstall the right hand side brush door 37 Operate the machine and check the main brush for proper operation ...

Страница 115: ...t Move the pulley mount bracket up or down to achieve the proper side brush pattern Retighten the hex screw The side brush should be replaced when it no longer sweeps effectively for your application A guideline length is when the remaining bristles measure 50 mm 2 in in length You may need to replace the side brush sooner if you are sweeping light litter or use a brush with shorter bristles if yo...

Страница 116: ...sh retaining pin through the side brush hub and shaft 6 Secure the pin by clipping the pin keeper over the end of the pin 7 Adjust the side brush pattern by loosening the hex screw located above the side brush cable pulley in the front of the operators compartment Move the pulley mount bracket up or down to achieve the proper side brush pattern Retighten the hex screw ...

Страница 117: ...ter every 200 hours of operation Replace the brush guard after it begins to show serious wear SIDE BRUSH PIVOT The side brush pivot should be checked for excessive movement after every 200 hours of operation Torque the front and rear compression springs to reduce excessive movement ...

Страница 118: ...andle 2 Go under the front of the machine near the side brush Locate the side brush lift cable clevis under the brush pivot hex nut Remove the nut only Pull the side brush lift cable off the hex screw 3 Go to the operators compartment Remove the two cable pulleys sleeves and cable clips from the side brush lift cable Note the orientation of the cable clips for proper re assembly ...

Страница 119: ...proper re assembly 5 Go up under the instrument panel and remove the hex screw and nut holding the end of the side brush lift cable to the lift handle Remove the side brush lift cable from the machine 6 Route the new side brush lift cable in the machine 7 Reinstall the three cable pulleys sleeves and cable clips Make sure the cable clips are in the correct orientation Tighten the hardware to 18 24...

Страница 120: ...ect the new side brush lift cable to the side brush pivot screw Hand tighten the hex nut Cable should pivot on the hardware 9 Connect the side brush lift cable to the lift handle 10 Raise the side brush Check the new cable for smooth operation ...

Страница 121: ... 0 09 in The recirculation skirt requires no adjustment Check the skirts for wear or damage and adjustment daily Note The recirculation skirt must be folded in between the brush and the machine frame before the brush door is mounted on for the machine to work properly SIDE SKIRTS The side skirts are located on both sides of the main brush compartment The skirts should clear the floor up to 5 mm ...

Страница 122: ...ot contact the floor Check the skirt for wear or damage after every 100 hours of operation HOPPER SEAL The hopper seal is located along the back of the main brush The lower lip of the hopper rests on this seal when the hopper is setting in proper sweeping position Check the seal for wear or damage after every 100 hours of operation FRONT SKIRT The front skirt is located along the front of the main...

Страница 123: ...ccess filter The vacuum fan is powered by the engine and driven with a V belt VACUUM FAN BELT Check the vacuum fan belt tension and wear after every 200 hours of operation The correct tension is when the belt deflects 8 38 mm 0 41 in from a force of 42 kg 88 to 93 lb at belt midpoint WARNING Moving belt and fan Keep away ...

Страница 124: ... fan drive belt remove the right hand side panel Start by lifting up on the panel pop the brush lift slot over the black knob then move the panel backward and off the machine 2 Remove the right hand side brush door 3 Loosen the five hex screws holding the vacuum fan housing to the machine frame 4 Push the vacuum fan assembly forward in the slots to loosen the vacuum fan V belt ...

Страница 125: ...cuum fan V belt from the jack shaft and impeller pulleys Remove the old V belt from the machine 7 Install the new vacuum fan V belt over both pulleys 8 Pull the vacuum fan assembly toward the back of the machine to tighten the V belt Tighten the five mounts screws hand tight 9 Reinstall the V belt cover Tighten the two screws hand tight ...

Страница 126: ...SWEEPING 3 52 6200G LP 330375 6 99 10 Reinstall the right hand machine cover 11 Reinstall the right hand brush door 12 Operate the machine Check the vacuum fan for proper operation ...

Страница 127: ...ck knob then move the panel backward and off the machine 2 Loosen the four hex screws holding the vacuum fan housing to the machine frame 3 Pull the vacuum fan assembly toward the back of the machine to tighten the V belt The correct tension is when the belt deflects 8 38 mm 0 41 in from a force of 42 kg 88 to 93 lb at belt midpoint 4 Tighten the four vacuum housing mount screws hand tight 5 Reins...

Страница 128: ...remove the right hand side panel Start by lifting up on the panel pop the brush lift slot over the black knob then move the panel backward and off the machine 3 Loosen the five hex screws holding the vacuum fan housing to the machine frame 4 Push the vacuum fan assembly forward in the slots to loosen the vacuum fan V belt 5 Remove the two hex screws holding the cover over the V belt pulley Remove ...

Страница 129: ...assembly to the machine Remove the assembly from the machine Make sure to retain the two steel sleeves from the bottom two hex screws 10 Place the assembly on a work bench with the vacuum fan inlet plate facing up 11 Remove the five hex screws and nuts holding the vacuum fan inlet plate to the bearing housing plate Remove the inlet plate from the housing Make sure to retain the five steel sleeves ...

Страница 130: ... the nyloc nut onto the fan shaft Tighten to 11 14 Nm 7 10 ft lb 15 Reinstall the vacuum fan inlet plate onto the bearing housing plate Reinstall the five steel sleeves hex screws and nuts Center the hole in the plate over the impeller fins Tighten the hardware to 18 24 Nm 15 20 ft lb 16 Position the vacuum fan assembly onto the right side off the machine Reinstall the five hex screws and nuts Mak...

Страница 131: ...ly toward the back of the machine to tighten the V belt The correct tension is when the belt deflects 8 38 mm 0 41 in from a force of 42 kg 88 to 93 lb at belt midpoint 19 Tighten the five mounts screws hand tight 20 Reinstall the V belt cover Tighten the two screws hand tight 21 Connect the wires to the Thermo Sentry ...

Страница 132: ...nnect the wires leading to the vacuum fan shut off solenoid 23 Reinstall the right hand machine cover 24 Start the machine raise the hopper disengage the prop arm Lower the hopper 25 Operate the machine Check the vacuum fan for proper operation ...

Страница 133: ...UUM FAN IMPELLER instructions to remove the vacuum fan assembly from the machine and and the impeller from the housing Once the vacuum fan impeller has been removed go to step 2 2 Loosen the two set screws holding the V belt pulley to the fan shaft Remove the pulley 3 Remove the four hex screws holding the vacuum fan bearing assembly to the bearing plate Remove the bearing assembly ...

Страница 134: ...he wide flange NOTE Make sure the bearings are pressed down tight The fan will be noisy if there is any play in the bearings The retaining rings must be tight to the housing 6 Reinstall the bearing housing onto the bearing housing plate The long end of the shaft is on the side with the sound foam Reinstall the four hex screws and washers Tighten to 8 10 Nm 6 8 ft lb 7 Reinstall the V belt pulley o...

Страница 135: ... Reinstall the vacuum fan impeller onto the fan shaft Make sure to reinstall the square key on the fan shaft 9 See TO REPLACE VACUUM FAN IMPELLER instructions to install the vacuum fan impeller and the vacuum fan assembly into the machine ...

Страница 136: ...ushes Main and side brushes not adjusted properly Adjust main and side brushes Debris caught in main brush drive mechanism Remove debris from drive mechanism Main brush drive failure Contact Tennant service personnel Side brush drive failure Contact Tennant service personnel Hopper full Empty hopper Hopper lip skirts worn or damaged Replace lip skirts Wrong sweeping brush Contact Tennant represent...

Страница 137: ...RBURETOR FUEL SHUT OFF SOLENOID 4 20 TO REPLACE DUMP DOOR ACTUATOR 4 21 THERMO SENTRY 4 24 TO REPLACE THERMO SENTRY 4 25 TO REPLACE VACUUM FAN SHUT OFF SOLENOID 4 27 TO REPLACE ENGINE STARTER 4 30 TO REPLACE MACHINE ALTERNATOR 4 32 ELECTRICAL SCHEMATIC GAS 4 37 ELECTRICAL SCHEMATIC LPG 4 38 WIRE HARNESS GROUP 4 39 TROUBLESHOOTING 4 43 GAS ENGINE START AND IGNITION 4 44 LOW OIL SHUTDOWN 4 47 FILTER...

Страница 138: ...ELECTRICAL 4 2 6200G LP 330375 6 99 ...

Страница 139: ...ELECTRICAL 4 3 6200G LP 330375 6 99 INTRODUCTION The model 6200G LP electrical system consists of the battery instrument panel side brush motor switches relays and circuit breakers ...

Страница 140: ...ays and switches BATTERY The battery is located under the operator s seat and can be accessed by lifting the seat up After the first 50 hours of operation and every 200 hours after that clean and tighten the battery connections Check the electrolyte level every 200 hours of operation Only add distilled water FOR SAFETY When Servicing Machine Avoid Contact With Battery Acid ...

Страница 141: ...ore Leaving Or Servicing Machine Stop On Level Surface Set Parking Brake turn off machine and remove key 1 Open the seat support and engage the prop rod 2 Locate the battery at the center of the machine in front of the hydraulic tank 3 Remove the battery negative cable ...

Страница 142: ... the black clamp to the negative post 5 Start the charger Check the voltage meter on the charger for proper charge voltage 6 Remove the charger after the voltage meter reads a full charge 7 Reinstall the negative battery cable and start the machine Check the battery for proper operation 8 Disengage the prop rod and lower the seat support ...

Страница 143: ...ng Machine Stop On Level Surface Set Parking Brake turn off machine and remove key 1 Open the seat support and engage the prop rod 2 Locate the battery at the center of the machine in front of the hydraulic tank 3 Remove the battery negative cable and positive cable from the battery terminals ...

Страница 144: ... bracket to the seat support Lift the battery out of the machine 5 Install the new battery in the machine in the same orientation as the old one 6 Reconnect the battery cables to the battery red cable to positive post black cable to negative post 7 Reinstall the battery hold down bracket ...

Страница 145: ...TRICAL 4 9 6200G LP 330375 6 99 8 Disengage the prop rod and lower the seat support 9 Check the new battery for proper operation If battery needs charging see TO CHARGE BATTERY instructions in this section ...

Страница 146: ...tains the switches gauges and instruments needed to run the machine functions TO ACCESS CIRCUIT BREAKER OR INSTRUMENT PANEL FOR SAFETY Before Leaving Or Servicing Machine Stop On Level Surface Set Parking Brake 1 Open the seat support and engage the prop rod 2 Disconnect the machine battery cables ...

Страница 147: ...4 Remove the two hex screws holding the circuit breaker panel to the front shroud 5 Pivot the circuit breaker panel back away from the front shroud 6 With the circuit breaker panel pivoted down electrical components on the circuit breaker panel and the main instrument panel can be accessed ...

Страница 148: ...nt panel back up to the front shroud Reinstall the hardware and hand tighten tight 8 Open the seat support and engage the prop rod 9 Reconnect the battery 10 Disengage the prop rod and lower the seat support 11 Start the machine and check for proper operation ...

Страница 149: ...the overload that caused the circuit breaker to trip is still there the circuit breaker will continue to stop current flow until the problem is corrected Circuit breakers 1 through 9 are located above the foot pedals in the circuit breaker panel The chart lists the circuit breakers and the electrical components they protect Circuit Breaker Rating Circuit Protected CB 1 15 A Main Power CB 2 15 A Ho...

Страница 150: ...vel Surface Set Parking Brake 1 Pull the instrument panel back away from the front shroud for better access to the circuit breakers See TO ACCESS CIRCUIT BREAKER OR INSTRUMENT PANEL instructions 2 Locate the circuit breaker that needs to be changed 3 Mark and disconnect the wires leading to the back of the circuit breaker ...

Страница 151: ...eaker out of the hole Discard the circuit breaker 7 Position the new circuit breaker into the mount hole NOTE The mount hole has a D shape to match the shape of the circuit breaker 8 Install the black threaded bushing onto the new circuit breaker 9 Install the rubber boot onto the out side of the new circuit breaker 10 Reconnect the electrical wires to the new circuit breaker See schematic in the ...

Страница 152: ...1 Pivot the instrument panel back onto the front shroud Reinstall the hardware and hand tighten tight See TO ACCESS CIRCUIT BREAKER OR INSTRUMENT PANEL instructions 12 Start the machine and check the new circuit breaker for proper operation ...

Страница 153: ...is a one time protection devices designed to stop the flow of current in the event of a circuit overload Never substitute higher value fuses than specified The fuse is located behind the circuit breaker panel Fuse Rating Circuit Protected FU 1 80 A Main ...

Страница 154: ... Set Parking Brake 1 Pull the instrument panel back away from the front shroud for better access to the 80 amp See TO ACCESS CIRCUIT BREAKER OR INSTRUMENT PANEL instructions 2 Locate the 80 amp fuse above the propel controller on the back of the pivot panel 3 Loosen the two hex screws holding the fuse to the insulator stand offs ...

Страница 155: ... screw Remove and discard the fuse 5 Install the new fuse under the two hex screws Hand tighten the hex screws tight 6 Pivot the instrument panel back onto the front shroud Reinstall the hardware and hand tighten tight See TO ACCESS CIRCUIT BREAKER OR INSTRUMENT PANEL instructions 7 Start the machine and check the new 80 amp fuse for proper operation ...

Страница 156: ...RICAL CONTROL MODULE The engine electrical control module controls the carburetor fuel shut off solenoid CARBURETOR FUEL SHUT OFF SOLENOID The carburetor fuel shut off solenoid positively shuts the fuel off at the carburetor when the key is turned off ...

Страница 157: ...e Stop On Level Surface Set Parking Brake 1 Place a wood block under the hopper dump door Turn on the key and open the door until the two cables one each side of the hopper go slack 2 Un latch and remove the hopper filter cover 3 Locate the dump door actuator on the left side of the hopper panel filter and shaker ...

Страница 158: ...he main harness 5 Remove the hair pin and clevis pin from each end of the actuator Remove the actuator from the machine 6 Install the new dump door actuator into the machine in the same orientation as the old one 7 Reinstall the hair pin and clevis pin into each end of the new actuator ...

Страница 159: ...door actuator to the main electrical harness 9 Reinstall the hopper cover and latch it down 10 Turn on the key and close the dump door Remove the wood block from under the dump door 11 Operate the machine and check the new dump door actuator for proper operation ...

Страница 160: ...ntry is an electrical device used to detect excess heat or fire in the hopper filter area If fire is detected in the hopper filter area the Thermo Sentry sends a signal to the shut off solenoid The solenoid in turn closes the shut off valve plate in the vacuum tube ...

Страница 161: ...R SAFETY Before Leaving Or Servicing Machine Stop On Level Surface Set Parking Brake 1 Un latch and remove the hopper filter cover 2 Locate the Thermo Sentry at the back side of the 90 degree section of the vacuum tube 3 Remove the wires leading to the Thermo Sentry ...

Страница 162: ...s holding the Thermo Sentry to the vacuum tube 5 Install the new Thermo Sentry onto the vacuum tube Reinstall the hardware and hand tighten Make sure the gasket is installed under the Thermo Sentry 6 Reconnect the wires to the Thermo Sentry 7 Reinstall the hopper cover ...

Страница 163: ... FOR SAFETY Before Leaving Or Servicing Machine Stop On Level Surface Set Parking Brake 1 Un latch and remove the hopper filter cover 2 Locate the shut off solenoid at the front side of the 90 degree section of the vacuum tube 3 Remove the wires leading to the shut off solenoid ...

Страница 164: ... lever 5 Loosen the large nut holding the shut off solenoid to the mount bracket 6 Remove the clevis pin holding the solenoid plunger to the shut off lever Remove the solenoid from the machine 7 Install the new vacuum fan shut off solenoid onto the mount bracket Hand tighten the jam nut ...

Страница 165: ...75 6 99 8 Reinstall the clevis pin into the end of the solenoid plunger and shut off lever arm 9 Reconnect the tension spring to the shut off lever arm 10 Reconnect the main harness to the new solenoid 11 Reinstall the hopper cover ...

Страница 166: ...achine Stop On Level Surface Set Parking Brake Turn Off Machine And Remove Key 1 Tilt the seat assembly forward and engage the prop rod Disconnect the battery cables from the battery 2 Locate the starter at the back of the engine under the muffler 3 Disconnect the electrical wires leading to the starter ...

Страница 167: ...e machine 5 Position the new starter back in the flywheel housing Re use the two hex nuts and tighten to 18 24 Nm 15 20 ft lb 6 Reconnect the electrical wires to the starter See schematic in this section 7 Reconnect the battery cables to the battery 8 Disengage the seat prop rod and pivot the seat assembly down 9 Check the new starter for proper operation ...

Страница 168: ... Before Leaving Or Servicing Machine Stop On Level Surface Set Parking Brake Turn Off Machine And Remove Key 1 Tilt the seat assembly forward and engage the prop rod 2 Disconnect the battery cables from the battery 3 Locate the machine alternator on the right side of the engine ...

Страница 169: ...oner in place Move the tensioner forward and remove the V belt from the alternator sheave 6 Remove the upper hex screw and nut holding the alternator to the engine plate Retain the steel sleeve 7 Remove the lower hex screw and nut holding the alternator to the engine plate Retain the steel sleeve Remove the existing alternator from the engine compartment ...

Страница 170: ... hex screws steel sleeves and nuts Tighten to 18 24 Nm 15 20 ft lb 10 Reconnect the wires to the back of the new alternator See the schematic in this section 11 Reinstall the V belt around the alternator sheave and idler sheave Pull the idler mount bracket until the V belt is tight Tighten the hardware to 18 24 Nm 15 20 ft lb ...

Страница 171: ...ELECTRICAL 4 35 6200G LP 330375 6 99 12 Reconnect the battery cables 13 Close the seat support 14 Operate the machine Check the new alternator for proper operation ...

Страница 172: ...ELECTRICAL 4 36 6200G LP 330375 6 99 ...

Страница 173: ...ELECTRICAL 4 37 6200G LP 330375 6 99 Fig 1 Electrical Schematic Gas 352982 ...

Страница 174: ...ELECTRICAL 4 38 6200G LP 330375 6 99 Fig 2 Electrical Schematic LPG 352983 ...

Страница 175: ...ELECTRICAL 4 39 6200G LP 330375 6 99 Fig 3 Wire Harnesses Group ...

Страница 176: ...ELECTRICAL 4 40 6200G LP 330375 6 99 Fig 3 Wire Harnesses Group 3 3 ...

Страница 177: ...ELECTRICAL 4 41 6200G LP 330375 6 99 Fig 3 Wire Harnesses Group ...

Страница 178: ...ELECTRICAL 4 42 6200G LP 330375 6 99 ...

Страница 179: ...00G LP 330375 6 99 TROUBLESHOOTING The troubleshooting charts that follow are organized so they lead you through the circuits They include flow charts and instructions for you as to where to insert your test instruments ...

Страница 180: ...of the start circuit is to energize the M1 coil to close the power contacts of the M1 main contactor Without M1 energized only the horn optional lighting and accessory vacuum unit will operate 2 Spark Ignition circuit fig 2 The ignition coil and spark plug are the only two electrical components used to provide ignition spark to the engine For the engine to run the key switch must be in the start o...

Страница 181: ...ELECTRICAL 4 45 6200G LP 330375 6 99 S Fig 1 ...

Страница 182: ...ELECTRICAL 4 46 6200G LP 330375 6 99 S Fig 2 ...

Страница 183: ... a low oil shutdown Ignition coil Oil level sensor Low oil LED 1 Low oil shutdown circuit fig 3 When the low oil level sensor detects a low level of oil it shuts down the engine by grounding out the black wire to the ignition coil and turns on the red low oil LED when the crankshaft rotates ...

Страница 184: ...ELECTRICAL 4 48 6200G LP 330375 6 99 S Fig 3 ...

Страница 185: ... Hopper air solenoid D2 Suppression diode 1 Filter shaker control circuit fig 4 36 volt current flows from CB 2 through the momentary switch contacts of the filter shaker vac fan switch to the pulse circuit of the filter shaker pulse driver and then returns to 36 volts at the battery 2 Filter shaker power circuit fig 5 36 volt current flows from CB 2 to the filter shaker solenoid The pulse circuit...

Страница 186: ...ELECTRICAL 4 50 6200G LP 330375 6 99 S Fig 4 ...

Страница 187: ...ELECTRICAL 4 51 6200G LP 330375 6 99 S Fig 5 ...

Страница 188: ...ntrol circuit and de energizes the M5 relay fig 6 Selecting the closed momentary position on the hopper lift switch will energize the M6 retract relay provided that the internal retract limit switch is closed within the hopper door linear actuator When the actuator reaches the full retracted position the retract limit switch inside the actuator opens the control circuit and de energizes the M6 rel...

Страница 189: ...ELECTRICAL 4 53 6200G LP 330375 6 99 S Fig 6 ...

Страница 190: ...ELECTRICAL 4 54 6200G LP 330375 6 99 S Fig 7 ...

Страница 191: ...ELECTRICAL 4 55 6200G LP 330375 6 99 S Fig 8 ...

Страница 192: ...ELECTRICAL 4 56 6200G LP 330375 6 99 S Fig 9 ...

Страница 193: ...ition coil Spark plug Oil level sensor 1 Start circuit fig 1 The function of the start circuit is to engage the start solenoid close its contacts activate the throttle solenoid and energize the starter motor to rotate the engine crankshaft 2 Spark Ignition circuit fig 2 For the engine to run the key switch must be in the start or run position If the key switch is in the off position the ignition c...

Страница 194: ...ELECTRICAL 4 58 6200G LP 330375 6 99 S Fig 1 ...

Страница 195: ...ELECTRICAL 4 59 6200G LP 330375 6 99 s Fig 2 ...

Страница 196: ...cal components needed for a low oil shutdown Ignition coil Oil level sensor Low oil LED 1 Low oil shutdown circuit fig 3 When the low oil level sensor detects a low oil level it shuts down the engine and turns on the red low oil LED as the crankshaft comes to a stop ...

Страница 197: ...ELECTRICAL 4 61 6200G LP 330375 6 99 S Fig 3 ...

Страница 198: ...ression diode 1 Filter shaker control circuit fig 4 36 volt current flows from CB 2 through the momentary switch contacts of the filter shaker vac fan switch to the enable input terminal 3 of the filter shaker pulse driver and then completes the circuit out terminal 2 to the negative battery line 36 volts 2 Filter shaker power circuit fig 5 36 volt supply current flows from CB 2 to the filter shak...

Страница 199: ...ELECTRICAL 4 63 6200G LP 330375 6 99 S Fig 4 ...

Страница 200: ...ELECTRICAL 4 64 6200G LP 330375 6 99 S Fig 5 ...

Страница 201: ...control circuit and de energizes the M5 relay fig 6 Selecting the closed momentary position on the hopper lift switch will energize the M6 retract relay provided that the internal retract limit switch is closed inside the hopper door linear actuator When the actuator reaches the full retracted position the retract limit switch inside the actuator opens the control circuit and de energizes the M6 r...

Страница 202: ...ELECTRICAL 4 66 6200G LP 330375 6 99 S Fig 6 ...

Страница 203: ...ELECTRICAL 4 67 6200G LP 330375 6 99 S Fig 7 ...

Страница 204: ...ELECTRICAL 4 68 6200G LP 330375 6 99 S Fig 8 ...

Страница 205: ...ELECTRICAL 4 69 6200G LP 330375 6 99 S Fig 9 ...

Страница 206: ...ELECTRICAL 4 70 6200G LP 330375 6 99 ...

Страница 207: ... DRIVE MOTOR 5 15 TO REPLACE DRIVE MOTOR 5 15 DIRECTIONAL CONTROL VALVE 5 19 TO REPLACE DIRECTIONAL CONTROL VALVE 5 19 ELECTRO HYDRAULIC FLUID RESERVOIR 5 23 TO REPLACE ELECTRO HYDRAULIC LIFT UNIT 5 24 TO REPLACE HOPPER LIFT CYLINDER 5 27 HYDRAULIC SCHEMATIC PROPEL 5 30 HYDRAULIC SCHEMATIC HOPPER LIFT 5 31 HYDRAULIC HOSE DIAGRAM PROPEL 5 32 HYDRAULIC HOSE DIAGRAM HOPPER LIFT 5 33 TROUBLESHOOTING 5...

Страница 208: ...HYDRAULICS 5 2 6200G LP 330375 6 99 ...

Страница 209: ...CS 5 3 6200G LP 330375 6 99 INTRODUCTION The hydraulic system on the model 6200G LP consists of the hydraulic pump directional control valve electro hydraulic pump reservoir hopper lift cylinder and drive motor ...

Страница 210: ...c fluid in the reservoir Cold fluid level is mid point of add and full lines Lubricate the filler cap gasket with a film of hydraulic fluid before putting the cap back on the reservoir ATTENTION Do not overfill the hydraulic fluid reservoir or operate the machine with a low level of hydraulic fluid in the reservoir Damage to the machine hydraulic system may result Drain and refill the hydraulic fl...

Страница 211: ...re of hydraulic components ATTENTION Hydraulic components depend on system hydraulic fluid for internal lubrication Malfunctions accelerated wear and damage will result if dirt or other contaminants enter the hydraulic system HYDRAULIC HOSES Check the hydraulic hoses every 200 hours of operation for wear or damage Fluid escaping at high pressure from a very small hole can be almost invisible and c...

Страница 212: ...om contaminates The filter should be changed every 800 hours TO REPLACE HYDRAULIC FLUID FILTER FOR SAFETY Before Leaving Or Servicing Machine Stop On Level Surface Set Parking Brake turn off machine and remove key 1 Open the seat support and engage the prop rod 2 Locate the hydraulic fluid filter in front of the hydraulic tank 3 Place a small drip pan or rag under the filter ...

Страница 213: ...5 Place a small amount of hydraulic oil on the rubber O ring on the new filter 6 Screw the new filter onto the filter head Tighten until snug then 1 4 turn 7 Remove the drain pan or rag 8 Disengage the prop rod and close the seat support 9 Start the machine and check the new hydraulic fluid filter for any leaks ...

Страница 214: ...FETY Before Leaving Or Servicing Machine Stop On Level Surface Set Parking Brake Turn Off Machine And Remove Key 1 Tilt the seat assembly forward and engage the prop rod Disconnect the battery cables from the battery 2 Mark disconnect and plug the two hoses leading to the hydraulic pump NOTE Observe hydraulic cleanliness requirements when opening hydraulic lines ...

Страница 215: ...ump sheave 4 Remove the bolts and hydraulic pump from the machine 5 Loosen the two set screws holding the V belt sheave to the pump shaft Remove the sheave from the old hydraulic pump Make sure to retain the square key 6 Install the V belt sheave onto the shaft of the new hydraulic pump in the same orientation that it was removed Leave the set screws loose for now ...

Страница 216: ...e Reinstall the hardware Leave loose for now 9 Position the V belt onto the pump sheave 10 Pull the hydraulic pump back to tension the V belt Tighten the pump mounting hardware 11 Use a straight edge to align the hydraulic pump sheave with the sheave on the engine Tighten the two set screws 12 Reconnect the hydraulic hoses to the pump See schematic in this section NOTE Observe hydraulic cleanlines...

Страница 217: ...HYDRAULICS 5 11 6200G LP 330375 6 99 13 Reconnect the battery cables 14 Start the machine and check the new pump for proper operation and for leaks 15 Disengage the prop rod and lower the seat support ...

Страница 218: ...emove Key 1 Tilt the seat assembly forward and engage the prop rod Disconnect the battery cables from the battery 2 Locate the main brush jackshaft belt tension idler pulley mount plate beside the machine battery 3 Loosen the nuts holding the idler mount plate to the main engine pulley plate 4 Push the idler pulley mount plate down to loosen the tension on the jack shaft V belt ...

Страница 219: ...e pump to loosen the V belt Remove the V belt from the pump sheave and engine sheave Remove the V belt from the machine 7 Install the new hydraulic pump V belt onto the engine sheave and hydraulic pump sheave Pull the pump up until the new V belt is tight Tighten the two nuts to 18 24 Nm 15 20 ft lb 8 Install the existing main brush jackshaft V belt onto the engine sheave ...

Страница 220: ...idler pulley mount plate up until the V belt is tight Tighten the two nuts to 18 24 Nm 15 20 ft lb 10 Reconnect the battery cables 11 Start the machine and check the pump for proper operation and for leaks 12 Disengage the prop rod and lower the seat support ...

Страница 221: ...R FOR SAFETY Before Leaving Or Servicing Machine Stop On Level Surface Set Parking Brake Turn Off Machine And Remove Key 1 Tilt the seat assembly forward and engage the prop rod Disconnect the battery cables from the battery 2 Raise the front of the machine and install jackstands under the machine frame 3 Mark disconnect and plug the three hoses leading to the drive motor NOTE Observe hydraulic cl...

Страница 222: ...hub off the main drive assembly 6 Go to the drive hub side of the drive assembly 7 Remove the cotter pin and castle nut holding the drive hub to the motor shaft Use a puller to remove the drive hub from the motor 8 Remove the hardware holding the old drive motor to the mount plate Remove the drive motor from the mount plate Note the orientation of the motor to the mount plate ...

Страница 223: ...hydraulic lines 10 Position the new motor and fittings onto the existing motor mount plate Note the orientation of the motor to the mount plate Install the two screws and nuts Tighten to 37 48 Nm 26 34 ft lb 11 Position the key and hub onto the output shaft of the new motor 12 Position the new motor drive hub and mount plate onto the drive assembly Reinstall the 4 hex screws and washers Tighten to...

Страница 224: ...matic in this section NOTE Observe hydraulic cleanliness requirements when reconnecting hydraulic lines 14 Reconnect the battery cables 15 Disengage the prop rod and lower the seat support 16 Remove the jack stands and lower the machine to the floor Operate the machine and check for proper operation ...

Страница 225: ...t of the machine TO REPLACE DIRECTIONAL CONTROL VALVE FOR SAFETY Before Leaving Or Servicing Machine Stop On Level Surface Set Parking Brake Turn Off Machine And Remove Key 1 Tilt the seat assembly forward and engage the prop rod Disconnect the battery cables from the battery 2 Raise the front of the machine and install jackstands under the machine frame 3 Go under the machine in the front right c...

Страница 226: ...e directional pedal down at the control valve linkage 6 Remove the two screws holding the control valve and mount plate assembly to the bottom of the machine frame Remove the assembly from the machine 7 Remove the cotter pin and clevis pin holding the pivot linkage to the spool on top of the control valve 8 Remove the two screws and nuts holding the control valve to the mount plate Remove the valv...

Страница 227: ...t lb NOTE Position hex nuts on the valve side 11 Align the mount hole in the pivot linkage with the hole in the top of the valve plunger Reinstall the cotter and clevis pin 12 Position the new valve and mount plate assembly into the machine with the pivot linkage facing the front of the machine Reinstall the mounting hardware and tighten to 11 14 Nm 7 10 ft lb 13 Reconnect the hydraulic hoses to t...

Страница 228: ...ce between the center line of the two ball joints should be 7 3 8 in See TO ADJUST DIRECTIONAL PEDAL LINKAGE instructions in the CHASSIS section 15 Remove the jackstands and lower the machine 16 Reconnect the battery cables 17 Disengage the prop rod and lower the seat support 18 Start the machine and check the new directional control valve for proper operation 7 3 8 inch ...

Страница 229: ...eration Make sure the hopper support bar is in place before checking hydraulic fluid level The side of the reservoir is marked with FULL and ADD levels to indicate the level of hydraulic fluid in the reservoir ATTENTION Do not overfill the hydraulic fluid reservoir or operate the machine with a low level of hydraulic fluid in the reservoir Damage to the machine hydraulic system may result Drain an...

Страница 230: ...et Parking Brake Turn Off Machine And Remove Key 1 Un latch and remove the hopper filter cover 2 Locate the hopper lift electro hydraulic unit at the rear left side of the machine 3 Mark disconnect and plug the two hoses leading to the hopper lift electro hydraulic unit NOTE Observe hydraulic cleanliness requirements when opening hydraulic lines ...

Страница 231: ... the lift arm panel Remove the unit from the machine Make sure to retain the two spacers 6 Remove the two hydraulic fittings from the existing electro hydraulic unit Install the two fittings into the new unit 7 Install the new electro hydraulic unit onto the lift arm panel Reinstall the two hex screws and spacers spacers between unit and panel Tighten to 18 24 Nm 15 20 ft lb ...

Страница 232: ...hydraulic unit 9 Connect the plug from the main electrical harness into the connector from the new unit 10 Check the hydraulic fluid reservoir tank 11 Reinstall the hopper cover and engage both latches 12 Operate the machine Check the new hopper lift electro hydraulic unit for proper operation ...

Страница 233: ... Level Surface Set Parking Brake Turn Off Machine And Remove Key 1 Un latch and remove the hopper filter cover 2 Locate the hopper lift cylinder at the rear center of the machine 3 Mark disconnect and plug the two hoses leading to the lift cylinder NOTE Observe hydraulic cleanliness requirements when opening hydraulic lines ...

Страница 234: ...wer cotter pin and clevis pin from the hopper lift cylinder Remove the lift cylinder from the machine 6 Remove the hydraulic fittings from the existing lift cylinder and install in the new cylinder in the same orientation 7 Install the new lift cylinder into the machine Reinstall the upper and lower clevis pins and cotter pins ...

Страница 235: ...200G LP 330375 6 99 8 Reconnect the two hydraulic hoses to the new hopper lift cylinder 9 Reinstall the hopper cover and engage both latches 10 Operate the machine Check the new hopper lift cylinder for proper operation ...

Страница 236: ...HYDRAULICS 5 30 6200G LP 330375 6 99 HYDRAULIC SCHEMATIC PROPEL ...

Страница 237: ...HYDRAULICS 5 31 6200G LP 330375 6 99 HYDRAULIC SCHEMATIC HOPPER LIFT ...

Страница 238: ...HYDRAULICS 5 32 6200G LP 330375 6 99 OUT IN B A B A HYDRAULIC HOSE DIAGRAM PROPEL ...

Страница 239: ...HYDRAULICS 5 33 6200G LP 330375 6 99 HYDRAULIC HOSE DIAGRAM HOPPER LIFT ...

Страница 240: ...HYDRAULICS 5 34 6200G LP 330375 6 99 TROUBLESHOOTING The troubleshooting chart that follows is organized to lead you through the hydraulic circuits ...

Страница 241: ...LUMBING OK No Yes RELIEF PRESSURE OK No REPAIR REPLACE POWER UNIT CHECK RESERVOIR FLUID LEVEL CIRCUIT FLOW OK No Yes CHECK ELECTRICAL SYSTEM ELECTRICAL POWER OK No Yes Yes REPAIR REPLACE ELECTRIC MOTOR POWER UNIT ELECTRIC MOTOR OK No REPAIR REPLACE LIFT CYLINDER LIFT CYLINDER FLOW OK Yes No ...

Страница 242: ...REPLACE PROPEL MOTOR MOTOR INLET FLOW OK Yes REPAIR REPLACE PLUMBING PLUMBING OK No No Yes RELIEF PRESSURE OK No REPAIR REPLACE RELIEF VALVE OR CONTROL VALVE REPAIR REPLACE PROPEL PUMP PUMP FLOW OK No Yes VALVE SPOOL SHIFTING OK No REPAIR REPLACE CONTROL LINKAGE OR VALVE Yes ...

Страница 243: ......

Страница 244: ......

Страница 245: ......

Страница 246: ......

Страница 247: ......

Страница 248: ......

Страница 249: ......

Страница 250: ......

Страница 251: ......

Страница 252: ......

Страница 253: ......

Страница 254: ......

Страница 255: ......

Страница 256: ......

Страница 257: ......

Страница 258: ......

Страница 259: ......

Страница 260: ......

Страница 261: ......

Страница 262: ......

Страница 263: ......

Страница 264: ......

Страница 265: ......

Страница 266: ......

Страница 267: ......

Страница 268: ......

Страница 269: ......

Страница 270: ......

Страница 271: ......

Страница 272: ......

Страница 273: ... GASOLINE 6 6 FUEL FILTER 6 6 TO CLEAN FUEL TANK SEDIMENT BOWL 6 7 GAS CARBURETOR 6 7 FUEL SYSTEM LPG 6 8 LP LOCK OFF FILTER 6 8 LP VAPORIZER REGULATOR 6 8 LP CARBURETOR 6 8 ENGINE CHOKE KNOB 6 9 LP FUEL TANK 6 9 TO CHANGE LPG FUEL TANK 6 9 IGNITION SYSTEM 6 11 SPARK PLUG 6 11 TO REPLACE SPARK PLUG 6 11 TO REMOVE ENGINE 6 13 TO INSTALL ENGINE 6 17 ROBIN ENGINE SERVICE MANUAL 6 21 ...

Страница 274: ...ENGINE GAS LP 6 2 6200G LP 330375 6 99 ...

Страница 275: ...75 6 99 INTRODUCTION This section includes repair information on the engine and related systems such as fuel electrical and drive belts Also engine removal and installation This section includes information on the gas and LP engines ...

Страница 276: ...engine is 1 2 liters 0 32 U S gallon Use an automobile grade SAE 20 30 or 10W 30 COOLING SYSTEM The engine on the model 6200G LP uses a forced air cooling system Every 100 to 200 hours the blower housing on the engine should be removed so the area between the cooling fins can be clean of any dirt or debris GOVERNOR The governor on the model 6200G LP is an internal mechanical style using a centrifu...

Страница 277: ...ng air flow To clean the filter element remove it from the filter housing Carefully clean the end cap and the interior of the housing with a damp cloth Clean the housing sealing surfaces Using an air hose direct clean dry air maximum 205 kPa 30 psi up and down the pleats on the inside of the element Do not rap tap or pound dust out of the element FOR SAFETY When Servicing Machine Wear Eye And Ear ...

Страница 278: ...a gravity feed type There is no fuel pump on this engine The fuel tank holds 7 0 liters 1 95 gallons FUEL FILTER The engine on the model 6200G LP does not have an in line fuel filter This engine is equipped with a sediment bolt at the fuel tank shut off valve Clean the sediment bowl every 100 to 200 hours ...

Страница 279: ... the sediment bowl from the bottom of the fuel tank shut off valve 5 Clean any dirt or residue out of the sediment bowl 6 Reinstall the sediment bowl on the fuel tank shut off valve Tighten firmly but do not over tighten 7 Turn the fuel tank shut off valve to the open position 8 Start the engine and check the sediment valve for any leaks GAS CARBURETOR The gas carburetor is a horizontal draft floa...

Страница 280: ...mpurities from the LP gas and stopping the flow of LP gas when the engine is not running LP VAPORIZER REGULATOR The LP regulator is mounted on the back of the engine The inlet port on the regulator is connected to the outlet port of the lock off filter The outlet port on the regulator is connected by hose to the LP carburetor The LP regulator senses engine vacuum and controls the amount of LP fuel...

Страница 281: ...oke knob out Off Push the choke knob in LP FUEL TANK The standard LP tank is a 20lb Vapor withdrawal type TO CHANGE LPG FUEL TANK FOR SAFETY Before Leaving Or Servicing Machine Stop On Level Surface Set parking brake 1 Close the valve on the LP tank 2 Run the engine until all of the LP gas has been used up in the fuel lines 3 Disconnect the coupler at the tank outlet ...

Страница 282: ...ank strap Remove the LP tank from the machine 6 Install a full LP tank with the connection on the liquid withdrawal valve 7 Position the tank strap over the tank and snap the lock clamp 8 Re connect the LP coupler on the tank valve Turn on the valve 9 Start the engine and check the coupler for leaks ...

Страница 283: ... spark plug gap is 70mm 024 in TO REPLACE SPARK PLUG FOR SAFETY Before Leaving Or Servicing Machine Stop On Level Surface Set parking brake 1 Pivot the seat support open and engage the prop rod 2 Remove the spark plug wire from the spark plug 3 Use a spark plug wrench to loosen and remove the plug 4 Clean any dirt from the area around the spark plug opening ...

Страница 284: ...6 99 5 Install the new spark plug Tighten firmly 6 Reconnect the spark plug wire 7 Disengage the prop rod and close the seat support 8 Clean or replace the spark plug every 200 hours GAS Replace with NGK B 4ES LPG Replace with NGK B 6VX ...

Страница 285: ...0375 6 99 TO REMOVE ENGINE FOR SAFETY Before Leaving Or Servicing Machine Stop On Level Surface Set parking brake 1 Pivot the seat support open and engage the prop rod 2 LP MACHINE Remove the LP tank 3 Disconnect the battery cables ...

Страница 286: ...6 99 4 Remove the left hand side panel 5 Remove the air duct baffle assembly from the left side of the engine 6 Remove the left hand side brace from the machine 7 LP MACHINE Disconnect the LP fuel line and vacuum line at the engine carb ...

Страница 287: ...hoke cable at the carburetor 9 Shut the fuel valve off at the gas tank 10 Disconnect the fuel line at the carb 11 Mark disconnect and plug the two hoses leading to the hydraulic pump NOTE Observe hydraulic cleanliness requirements when opening hydraulic lines ...

Страница 288: ...on the engine and idler sheave 13 Disconnect the exhaust pipe from the muffler at the engine 14 Disconnect the alternator wires two low oil pressure switch wires solenoid wires ground cable and a positive battery cable from the back of the engine 15 Remove the four engine mount bolts 16 The engine can now be removed from the machine ...

Страница 289: ... machine frame 3 Install the four engine mount bolts The longer bolt goes into the right rear mount hole Make sure the ground cable and ground wires are positioned under the left rear mounting bolt Tighten to 37 48 Nm 26 34 ft lb 4 Reconnect the alternator wires low oil pressure switch wires solenoid wire and the positive battery cable on the back of the engine See schematic in the ELECTRICAL sect...

Страница 290: ...e to the carb 7 Reconnect the choke cable at the carburetor 8 Reconnect the fuel line at the carb and open the valve at the gas tank 9 Reconnect the two hoses to the hydraulic pump See schematic in the HYDRAULIC section NOTE Observe hydraulic cleanliness requirements when opening hydraulic lines ...

Страница 291: ...onto the sheave on the engine and the two idler sheaves Pull the idler tight and tighten the hardware 11 Reinstall the air duct baffle assembly onto the left side of the engine 12 Reinstall the left hand side brace onto the machine panels 13 Reinstall the left hand side panel ...

Страница 292: ...needed fill the engine with oil The capacity of this engine is 1 2 liters 0 32 U S gallon Use an automobile grade SAE 20 30 or 10W 30 16 Disengage the prop rod and close the seat support 17 LP MACHINE Install the LP tank Reconnect the LP hose to the tank Open the valve 18 Start the engine and check for proper operation ...

Страница 293: ......

Страница 294: ......

Страница 295: ......

Страница 296: ......

Страница 297: ......

Страница 298: ......

Страница 299: ......

Страница 300: ......

Страница 301: ......

Страница 302: ......

Страница 303: ......

Страница 304: ......

Страница 305: ......

Страница 306: ......

Страница 307: ......

Страница 308: ......

Страница 309: ......

Страница 310: ......

Страница 311: ......

Страница 312: ......

Страница 313: ......

Страница 314: ......

Страница 315: ......

Страница 316: ......

Страница 317: ......

Страница 318: ......

Страница 319: ......

Страница 320: ......

Страница 321: ......

Страница 322: ......

Страница 323: ......

Страница 324: ......

Страница 325: ......

Страница 326: ......

Страница 327: ......

Страница 328: ......

Страница 329: ......

Страница 330: ......

Страница 331: ......

Страница 332: ......

Страница 333: ......

Страница 334: ......

Страница 335: ......

Страница 336: ......

Страница 337: ......

Страница 338: ......

Страница 339: ......

Страница 340: ......

Страница 341: ......

Страница 342: ......

Страница 343: ......

Страница 344: ......

Страница 345: ......

Страница 346: ......

Страница 347: ......

Страница 348: ......

Страница 349: ......

Страница 350: ......

Страница 351: ......

Страница 352: ......

Страница 353: ......

Страница 354: ......

Страница 355: ......

Страница 356: ......

Страница 357: ......

Страница 358: ......

Страница 359: ......

Страница 360: ......

Страница 361: ......

Страница 362: ......

Страница 363: ......

Страница 364: ......

Страница 365: ......

Страница 366: ......

Страница 367: ...ave regarding our machine manuals If you find an error or have a suggestion please complete this postage paid form and mail it to us Thank you for helping us make zero defects a way of life at Tennant Manual No Rev No Publish Date Page Machine Report Error Suggestion Name Date Customer Number Company Address City State Zip Code ...

Страница 368: ...GE NECESSARY IF MAILED IN THE UNITED SATES BUSINESS REPLY MAIL FIRST CLASS MAIL PERMIT NO 94 MINNEAPOLIS MN POSTAGE WILL BE PAID BY ADDRESSEE Technical Publications 15 701 North Lilac Drive P O Box 1452 Minneapolis MN 55440 9947 TENNANT COMPANY ...

Страница 369: ...ave regarding our machine manuals If you find an error or have a suggestion please complete this postage paid form and mail it to us Thank you for helping us make zero defects a way of life at Tennant Manual No Rev No Publish Date Page Machine Report Error Suggestion Name Date Customer Number Company Address City State Zip Code ...

Страница 370: ...GE NECESSARY IF MAILED IN THE UNITED SATES BUSINESS REPLY MAIL FIRST CLASS MAIL PERMIT NO 94 MINNEAPOLIS MN POSTAGE WILL BE PAID BY ADDRESSEE Technical Publications 15 701 North Lilac Drive P O Box 1452 Minneapolis MN 55440 9947 TENNANT COMPANY ...

Отзывы: