background image

Digital Multimeter

Page <10>

20/09/10  V1.1

http://www.farnell.com
http://www.newark.com
http://www.cpc.co.uk

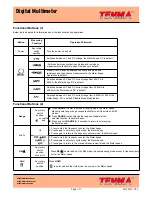
Measurement Ranges (2)

••

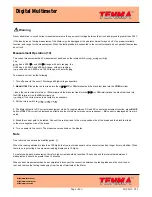
In the autorange mode, the Meter selects the best range for input signals. This allows you to switch test points without 
having to reset the range.

••

In the manual range mode, you may select the range. This allows you to override autorange and lock the Meter in a specific 
range.

The Meter defaults to the autorange mode in measurement functions that have more than one range. When the Meter is in the
autorange mode, 

AUTO 

is displayed.

To enter and exit the manual range mode:

1. Press 

RANGE.

The Meter enters the manual range mode and 

AUTO 

turns off. Each presses of 

RANGE

increments the range. When the highest

range is reached, The Meter wraps to the lowest range.

2. To exit the manual range mode, press and hold 

RANGE

for two seconds. The Meter returns to the autorange mode and 

AUTO 

is

displayed.

Note

••

If you manually change the measurement range after entering the REL or Hold recording modes, the Meter exits these 
modes.

••

Under frequency/duty cycle and capacitance measurement, only autorange mode is available.

Measurement Operation (1)

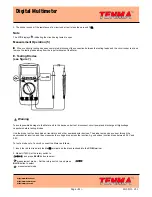
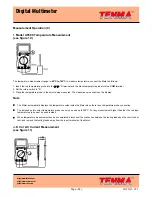
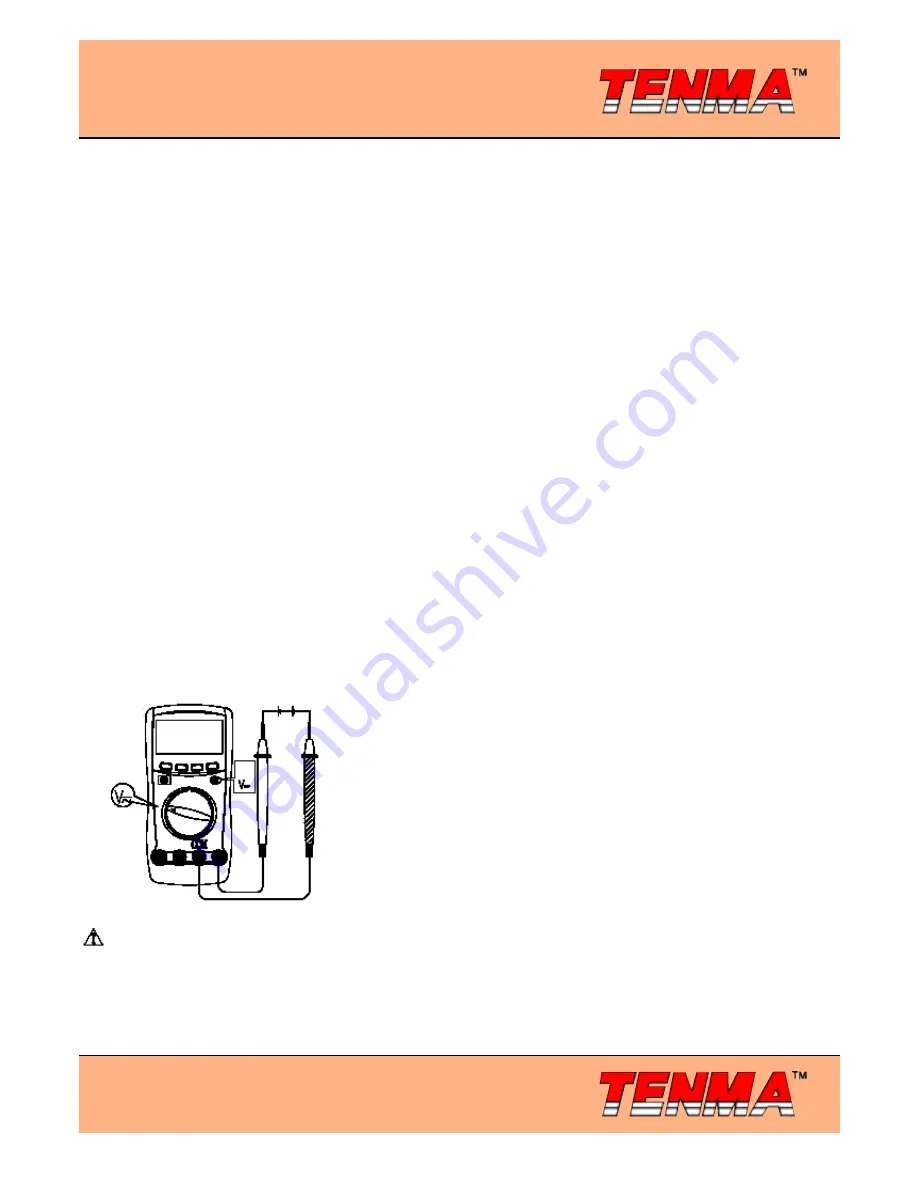
A.DC Voltage Measurement

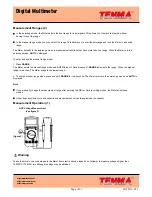
(see figure 3)

Warning

To avoid harms to you or damages to the Meter from electric shock, please do not attempt to measure voltages higher than
1000VDC / 750VAC rms although readings may be obtained.

(figure 3)

Содержание UT60C

Страница 1: ...2 D Testing for Continuity 13 E Testing Diodes 14 F Capacitance Measurement 15 G Frequency Measurement 16 H Measuring Duty Cycle 17 I Temperature Measurement Model UT60C 18 J DC or AC Current Measurement 18 Operation of Hold Mode 20 The Use of Relative Value Mode 20 The POWER Button 21 The BLUE Button 21 Turning on the Display Backlight 21 Sleep Mode Model UT60C 21 General Specifications 21 Accura...

Страница 2: ... recording and monitoring and capture of transient dynamic data displaying change of waveform during the measurement providing data and evidence to engineering technicians for scientific research This is also a highly applied digital multimeter of good performance with full overload protection and backlight function also has true rms reading for AC voltage and AC current measurements Except where ...

Страница 3: ...e case Do not use the Meter if it is damaged or the case or part of the case is removed Look for cracks or missing plastic Pay attention to the insulation around the connectors Inspect the test leads for damaged insulation or exposed metal Check the test leads for continuity Replace damaged test leads with identical model number or electrical specifications before using the Meter Do not apply more...

Страница 4: ...d any accident Soft cloth and mild detergent should be used to clean the surface of the Meter when servicing No abrasive and solvent should be used to prevent the surface of the Meter from corrosion damage and accident The Meter is suitable for indoor use Under the environment with high 4kV electrostatic discharge the Meter may not be operated as normal condition The user may require resetting the...

Страница 5: ...nal Input for voltage frequency duty cycle resistance diode continuity and capacitance measurements 5 COM Input Terminal Return terminal for all measurements 6 µAmA Input Terminal Input for 0 1 µA to 400 0mA current measurements Model UT60C µAmA C Input Terminal Input for 0 1 µA to 400 0mA current measurements and temperature testing 7 10A Input Terminal Input for 0 01A to 10 00A current measureme...

Страница 6: ...000V or AC voltage measurement range from 4 000V to 750 0V Continuity test Diode test Resistance measurement range from 400 0Ω to 40 00MΩ Capacity test range from 40 00nF to 100 0µF Model UT60C Temperature in Celsius from 40 C to 1000 C Hz Frequency measurement range from 10 00Hz to 10 00MHz AC or DC current measurement range from 400 0µA to 4000µA AC or DC current measurement range from 40 00mA t...

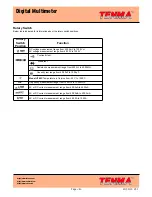
Страница 7: ...C is default Disable Sleep Mode feature Functional Buttons 2 Range Any rotary switch position exceptHz and Press RANGE to enter the manual ranging mode the Meter beeps Manually selecting a range causes the Meter to exit the Hold and REL modes Press RANGE to step through the ranges available for the selected function the Meter beeps Press and hold RANGE for 2 seconds to return to autoranging the Me...

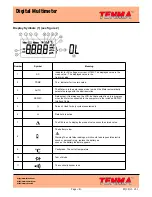
Страница 8: ...ects the range with the best resolution 4 RS232C Data output It is always on the LCD but data output is only in progress when the Meter is connected to the computer via the included RS232C Interface Cable 5 Percent Used for duty cycle measurements 6 H Data hold is active 7 The REL is on to display the present value minus the stored value 8 The battery is low Warning To avoid false readings which c...

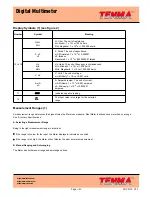
Страница 9: ...0 3 or 0 001 volts A mA µA A Amperes amps The unit of current mA Milliamp 1 x 10 3or 0 001 amperes µA Microamp 1x 10 6 or 0 000001 amperes 17 Indicates negative reading 18 The input value is too large for the selected range Display Symbols 1 see figure 2 Measurement Ranges 1 A measurement range determines the highest value the Meter can measure Most Meter functions have more than one range See Acc...

Страница 10: ...mode 1 Press RANGE The Meter enters the manual range mode and AUTO turns off Each presses of RANGE increments the range When the highest range is reached The Meter wraps to the lowest range 2 To exit the manual range mode press and hold RANGE for two seconds The Meter returns to the autorange mode and AUTO is displayed Note If you manually change the measurement range after entering the REL or Hol...

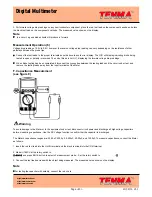
Страница 11: ... than or equal to 10kΩ the error is negligible 0 1 or less When DC voltage measurement has been completed disconnect the connection between the testing leads and the circuit under test and remove the testing leads away from the input terminals of the Meter Measurement Operation 2 B AC Voltage Measurement see figure 4 Warning To avoid harms to you or damages to the Meter from electric shock please ...

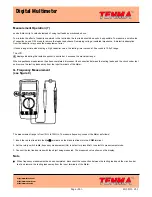
Страница 12: ...tabilize When there is no input voltage the maximum reading displayed is 10 digits Measurement Operation 3 C Measuring Resistance see figure 5 Warning To avoid damages to the Meter or to the devices under test disconnect circuit power and discharge all the high voltage capacitors before measuring resistance The resistance ranges are 400 0Ω Ω 4 000kΩ Ω 40 00kΩ Ω 400 0kΩ Ω 4 000MΩ Ω and 40 00MΩ Ω To...

Страница 13: ...ke several seconds to obtain a stable reading The LCD displays indicating open circuit for the tested resistor or the resistor value is higher than the maximum range of the Meter When resistance measurement has been completed disconnect the connection between the testing leads and the circuit under test and remove the testing leads away from the input terminals of the Meter D Testing for Continuit...

Страница 14: ...d possible damage to the Meter and to the device under test disconnect circuit power and discharge all highvoltage capacitors before testing diodes Use the diode test to check diodes transistors and other semiconductor devices The diode test sends a current through the semiconductor junction and then measures the voltage drop across the junction A good silicon junction drops between 0 5V and 0 8V ...

Страница 15: ... readings When diode testing has been completed disconnect the connection between the testing leads and the circuit under test and remove the testing leads away from the input terminals of the Meter F Capacitance Measurement see figure 8 Warning To avoid damage to the Meter or to the equipment under test disconnect circuit power and discharge all high voltage capacitors before measuring capacitanc...

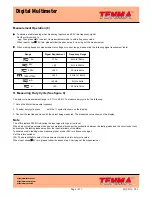
Страница 16: ...ed or it exceeds the maximum range When capacitance measurement has been completed disconnect the connection between the testing leads and the circuit under test and remove the testing leads away from the input terminals of the Meter G Frequency Measurement see figure 9 The measurement range is from 10Hz to 10MHz To measure frequency connect the Meter as follows 1 Insert the red test lead into the...

Страница 17: ... figure 9 The duty cycle measurement range is 0 1 to 99 9 To measure duty cycle do the following 1 Set up the Meter to measure frequency 2 To select duty cycle press until the symbol is shown on the display 3 Connect the test leads across with the object being measured The measured value shows on the display Note The LCD displays 000 0 indicating the input signal is high or low level When duty cyc...

Страница 18: ...3 Place the temperature probe to the object being measured The measured value shows on the display Note The Meter automatically displays the temperature value inside the Meter when there is no temperature probe connection The included point contact temperature probe can only be used up to 250 C For any measurement higher than that the rod type temperature probe must be used instead When temperatur...

Страница 19: ...o the µ µAµ µA or 10A terminal and the black test lead into theCOM terminal Use the10A terminal and range if the current value to be tested is an unknown 4 The Meter defaults to DC current measurement mode To toggle between DC and AC current measurement function press BLUE button UT60C AC current is displayed as effective value of sine wave mean value response AC current is displayed as true rms v...

Страница 20: ...measurement It subtracts a stored value from the present measurement value and displays the result For instance if the stored value is 20 0V and the present measurement value is 22 0V the reading would be 2 0V If a new measurement value is equal to the stored value then display 0 0V To enter or exit REL mode Use rotary switch to select the measurement function before selecting REL If measurement f...

Страница 21: ...otary switch or press any button for around 30 minutes To disable the Sleep Mode function press BLUE button while turning on the Meter General Specifications Maximum Voltage between any Terminals and Grounding 1000V Fused Protection for µ µAmA Input Terminal Glass fuse 0 5A 250V fast type Ø5 x 20mm Fused Protection for µ µAmA C Input Terminal Model UT60C Glass fuse 0 5A 250V fast type Ø5 x 20mm Fu...

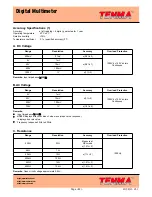
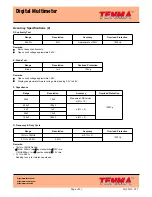
Страница 22: ...ntinuous 4V 1mV 0 8 1 40V 10mV 400V 100mV 1000V 1V 1 3 Remarks Input impedance 10MΩ Ω B AC Voltage Range Resolution Accuracy Overload Protection 4V 1mV 1 5 1000V dc 750V ac rms Continuous 40V 10mV 400V 100mV 750V 1V 1 2 5 Remarks Input impedance 10MΩ Ω UT60C displays effective value of sine wave mean value response displays true rms value Frequency response 40Hz to 400Hz C Resistance Range Resolut...

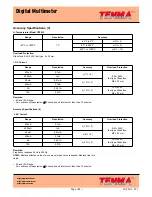
Страница 23: ... Diode 1mV 100Vp Remarks Open circuit voltage approximate 1 48V Displays approximate forward voltage drop reading 0 5V to 0 8V F Capacitance Range Resolution Accuracy Overload Protection 40nF 10pF Measure at REL mode 3 10 1000Vp 400nF 100pF 3 5 4nF 1nF 40nF 10nF 100nF 100nF 4 5 G Frequency Duty Cycle Range Resolution Accuracy Overload Protection 10Hz to 10MHz 0 1 3 1000Vp 0 1 to 99 9 0 01 Remarks ...

Страница 24: ... 3 400mA 0 1mA 4A 0 001A 1 5 5 10A 250V fast type Glass fuse Ø5 x 20 mm 10A 0 01A Remarks 4A and 10A Range For continuous measurement 10 seconds and interval not less than 15 minutes Accuracy Specifications 4 J AC Current Range Resolution Accuracy Overload Protection 400µA 0 1µA 1 5 5 0 5A 250V fast type Glass fuse Ø5 x 20 mm 4000µA 1µA 40mA 0 01mA 2 5 400mA 0 1mA 4A 0 001A 2 5 5 10A 250V fast typ...

Страница 25: ...when not using for a long time Take out the battery when it is using for a long time Do not use or store the Meter in a place of humidity high temperature explosive inflammable and strong magnetic field B Testing the Fuses Warning To avoid electrical shock or personal injury remove the test leads and any input signals before replacing the battery or fuse To prevent damage or injury install ONLY re...

Страница 26: ...sure the test leads are disconnected from the circuit being tested before opening the case bottom To replace the battery 1 Press the POWER to turn the Meter off and remove all connections from the terminals 2 Remove the screw from the battery compartment and separate the battery compartment from the case bottom 3 Remove the battery from the battery compartment 4 Replace the battery with a new 9V b...

Страница 27: ...uired Burning of a fuse always results from improper operation Disclaimer This data sheet and its contents the Information belong to the Premier Farnell Group the Group or are licensed to it No licence is granted for the use of it other than for information purposes in connection with the products to which it relates No licence of any intellectual property rights is granted The Information is subj...

Отзывы: