9
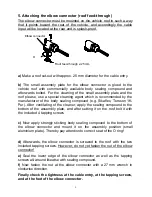
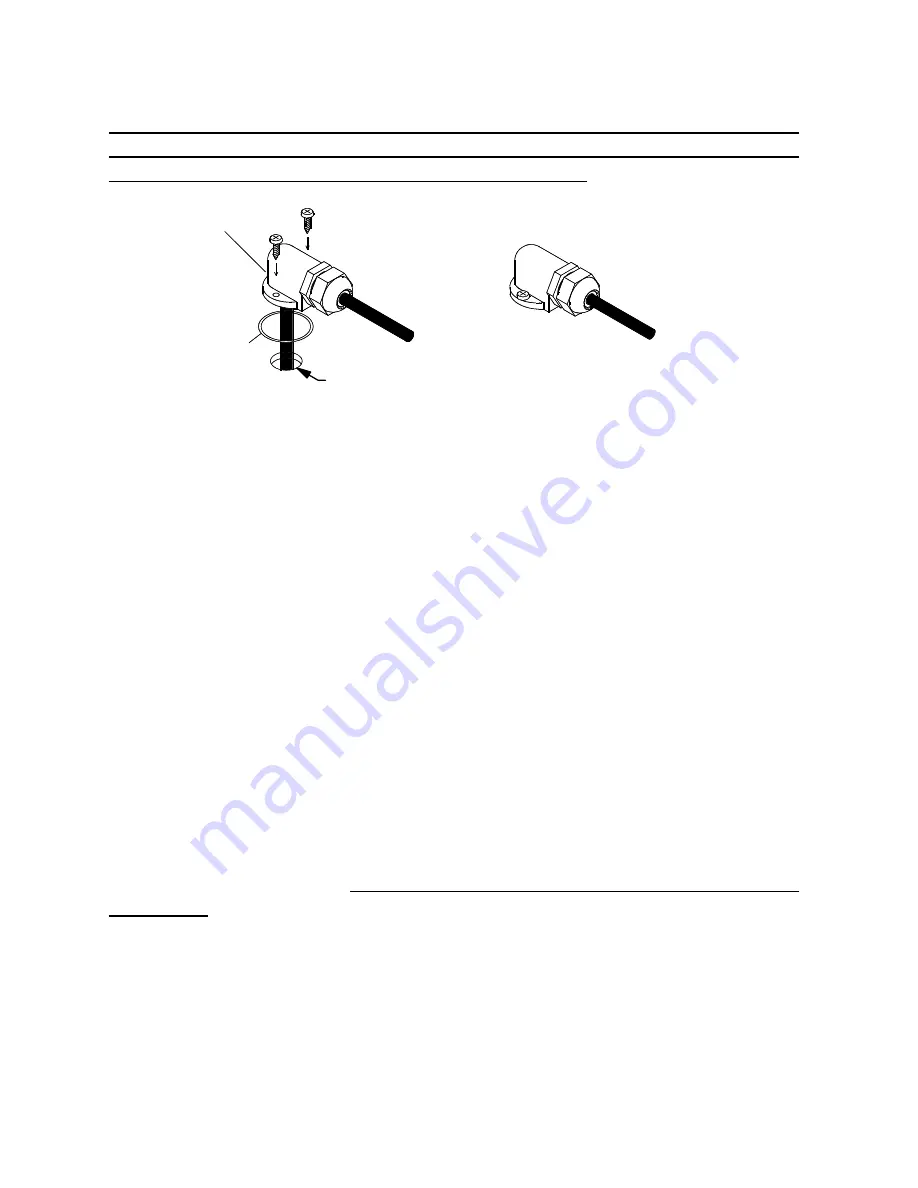
5. Attaching the elbow connector (roof feed-through)
The elbow connector must be mounted on the vehicle roof in such a way
that it points toward the rear of the vehicle, and accordingly the cable
input will be located at the rear and is splash-proof.
a)
Make a roof cut-out with approx. 25 mm diameter for the cable entry.
b)
The small assembly plate for the elbow connector is glued to the
vehicle roof with commercially available body sealing compound and
afterwards bolted. For the cleaning of the small assembly plate and the
roof please, use a special cleaning agent which is recommended by the
manufacturer of the body sealing compound (e.g. Sikaflex, Teroson 1K-
Pur). After ventilating of the cleaner, apply the sealing compound to the
bottom of the assembly plate, and after setting it on the roof bolt it with
the included 4 tapping screws
c)
Now apply strongly sticking body sealing compound to the bottom of
the elbow connector and mount it on the assembly position (small
aluminium plate). Thereby pay attention to correct seat of the O ring!
d)
Afterwards, the elbow connector is screwed to the roof with the two
included tapping screws. However, do not yet fasten the nut of the elbow
connector!
e)
Seal the lower edge of the elbow connector as well as the tapping
screws all-around likewise with sealing compound.
f)
Now fasten the nut at the elbow connector with a 27 mm wrench in
clockwise direction.
Finally check the tightness at the cable entry, at the tapping screws,
and at the foot of the elbow connector.
O
Elbow connector
Roof feed-through ø 25 mm


