background image

Telindus 1120 ADSL Router

Configuration

User’s Guide

23

Modify IP Route

If you want to change the parameters of a route, select the route number, and then click 

Modify

. This will open the 

Modify Route

 window. You can change the 

Destination IP 

Address

Subnet Mask

Interface, Gateway IP Address

, and the particular instances of the 

ATM PVC. 
When you are finished, click 

OK

. If you do not want to modify this route, click 

Cancel

 to 

close the Modify Route window. 

Remove IP Route

To delete a route, select the route number, and then click 

Remove

. Click 

Yes

 to remove 

the selected route or click 

No

 to keep it. 

Once you have finished setting these parameters, click 

Apply

 to review the parameters 

you have entered and then click 

Finish

 to send settings to the Telindus 1120 ADSL Router. 

Click 

Exit

 to return to the Telindus 9100 Maintenance Application.

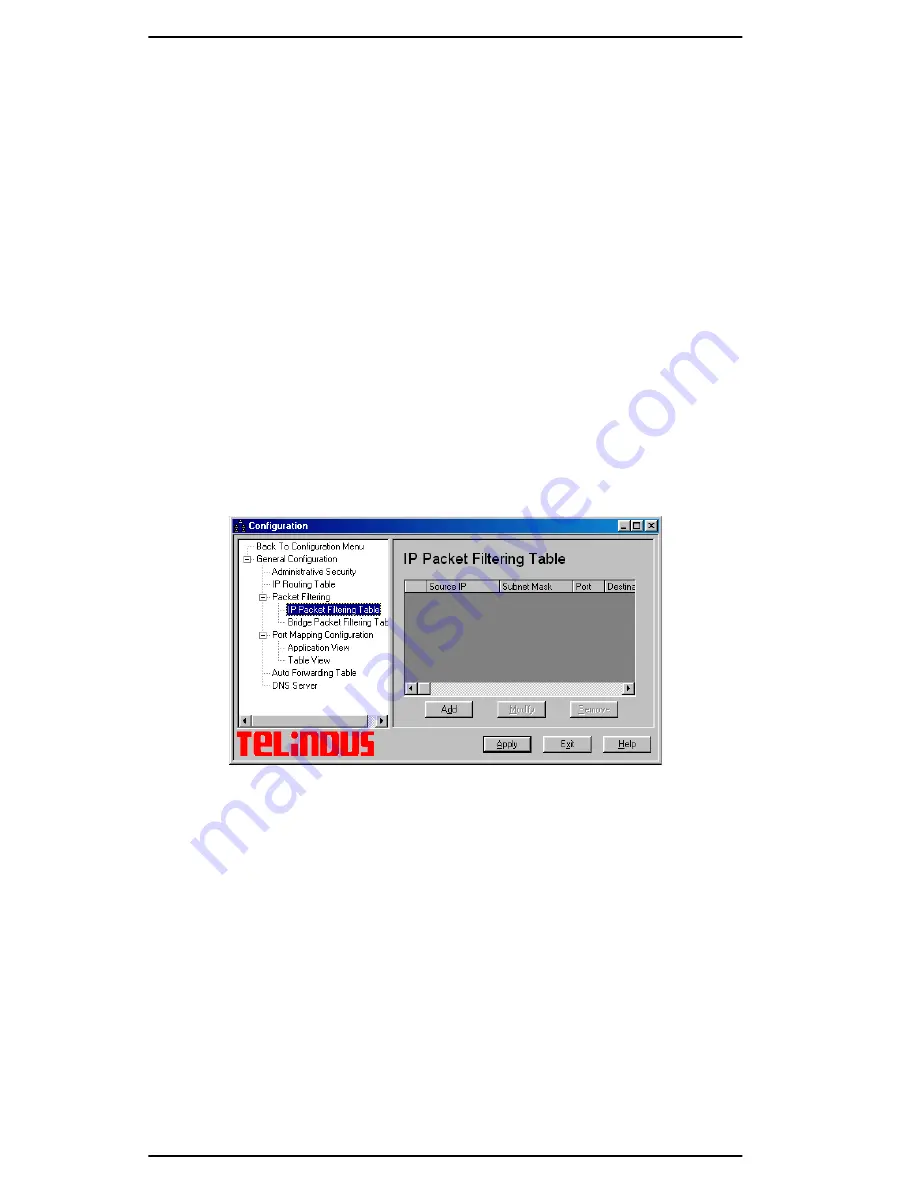
Packet Filtering - IP Packet Filtering Table

From Configuration, double-click on the General Configuration icon, and click on the 

IP 

Packet Filtering Table 

in the left panel. The IP packet filters allow you to monitor and 

selectively filter packets that enter or leave the Telindus 1120 ADSL Router. You can use 
filtering to protect your network from unauthorized access, and restrict certain traffic from 
leaving your LAN. 
The IP Packet Filtering Table allows for up to 32 sequential filters, and each filter can be 
set to examine source packets, destination packets, or both. From this panel, you can 

Add 

New IP Packet Filter

Modify IP Packet Filter

, or 

Remove IP Packet Filter

.

Figure 5.5 IP Packet Filtering Table

Содержание 1120

Страница 1: ...1120 ADSL Router USER S GUIDE Version 5 3 172162 USER S GUIDE Telindus Technical Publications Geldenaaksebaan 335 B 3001 Leuven Belgium Tel 32 16 382011 ...

Страница 2: ...technical inaccuracies or typographical errors for which Telindus never can or shall be held liable Changes are made periodically to the information herein these changes will be incorporated in new editions of this publication Telindus may make improvements and or changes in the product s described in this publication at any time without prior notice This equipment for safety and hygiene purposes ...

Страница 3: ...technical inaccuracies or typographical errors for which Telindus never can or shall be held liable Changes are made periodically to the information herein these changes will be incorporated in new editions of this publication Telindus may make improvements and or changes in the product s described in this publication at any time without prior notice This equipment for safety and hygiene purposes ...

Страница 4: ...999 5 EC Hiermit TELINDUS erklärt daß dieser Telindus 1120 ADSL Router ist in Fügsamkeit mit den wesentlichen Anforderungen und anderen relevanten Bereitstellungen von Direktive 1999 5 EC Mediante la presente TELINDUS declara que el Telindus 1120 ADSL Router cumple con los requisitos esenciales y las demás prescripciones relevantes de la Directiva 1999 5 CE A TELINDUS declara que o Telindus 1120 A...

Страница 5: ...60950 1992 A1 A2 A3 A4 A11 l EN55022 1998 Class B l EN55024 1998 This declaration is based on the conformity assessment procedure as described in annex II of the R TTE Council Directive 1999 5 EC The product may be connected to the following interface s l IEEE 802 3 Ethernet 10Base T This product is conforming to the following Technical Standards l G 992 1 G DMT l G 992 2 G Lite l T1 413 Issue 2 T...

Страница 6: ...ebt met de Telindus 1120 ADSL Router contacteer uw verdeler voor advies Déclaration Le Telindus 1120 ADSL Router peut être employé à condition qu il soit installé entretenu et utilisé dans la fonction pour laquelle il a été conçu en suivant les règles de pratique professionnelles les standards d installation d application et les instructions du fabricant voyez aussi la déclaration CE de Conformité...

Страница 7: ...nte consultar declaração de Conformidade da UE Declaração de Utilização O Telindus 1120 ADSL Router permite dados transferem por cabos de par trançados normais de acordo com ITU T G 992 1 G 992 2 ANSI T1 413 Issue 2 Interfaces O Telindus 1120 ADSL Router poderá ter os seguintes interfaces IEEE 802 3 Ethernet 10Base T Problemas Em caso de dúvida ou se forem detectados problemas com o Telindus 1120 ...

Страница 8: ...P in Windows 95 98 12 3 3 Installing TCP IP in Windows 95 98 12 3 4 Configuring TCP IP in Windows 95 98 12 3 5 Detecting TCP IP in Windows 2000 13 3 6 Installing TCP IP in Windows 2000 13 3 7 Configuring TCP IP in Windows 2000 13 3 8 Detecting TCP IP in Windows NT 4 0 14 3 9 Installing TCP IP in Windows NT 4 0 14 3 10 Configuring TCP IP in Windows NT 4 0 14 4 Telindus 9100 Maintenance Application ...

Страница 9: ... Status Table 43 6 5 IP Routing Table 44 6 6 DHCP Table 44 7 Tools Feature 47 7 1 Upgrade Firmware 47 7 2 Reset Router 48 8 Troubleshooting 49 8 1 Cannot Detect the Router 49 8 2 Router and PC are Not in the Same Subnet 50 8 3 Cannot Upgrade the Firmware 50 Appendix A About Configuration Parameters 51 Appendix B Ethernet Cable Pinout 55 ...

Страница 10: ...lter 25 Figure 5 9Port Mapping by Application 26 Figure 5 10Port Mapping Table 27 Figure 5 11Add New Port Mapping Item 27 Figure 5 12Auto Forwarding Table 29 Figure 5 13Add New Auto Forwarding Item 29 Figure 5 14DNS Server 30 Figure 5 15LAN Configuration 31 Figure 5 16DHCP 32 Figure 5 17Protocol Configuration for LAN Interface 33 Figure 5 18DSL Configuration 34 Figure 5 19ATM PVC Properties 35 Fig...

Страница 11: ...ering Table Similar to the IP Packet Filtering Firewall Telindus 1120 ADSL Router now has a new feature the bridge packet filtering table When the Telindus 1120 ADSL Router is set in bridge mode you can use this filtering table to monitor and restrict traffic through the unit Telindus 1120 ADSL Router can be set to use up to 32 sequential criteria filters by which to check each packet as it enters...

Страница 12: ...AutoForwarding ensures that traffic routed through Network Address Translation NAT will retain the correct destination port information This is crucial for applications running on a private LAN that need to send data to a specific port to properly establish and maintain a session 1 2 New Features in Version 5 3 New Encryption Types Telindus 1120 ADSL Router version 5 3 supports new encryption type...

Страница 13: ...ital modem account the Network Address Translation NAT option should be selected during configuration of your Telindus 1120 ADSL Router If you ordered a Multiple User account from your ISP they will assign a specific IP Address for your router and a range of IP Addresses for your network You will need this information when you configure the Telindus 1120 ADSL Router In this case the NAT options sh...

Страница 14: ...e PWR Power A green LED is ON when power is supplied to the Telindus 1120 ADSL Router DIAG Diagnostic The yellow DIAG LED is an indicator that shows the Telindus 1120 ADSL Router has been successfully booted up and the software is functional When Telindus 1120 ADSL Router is powered on the DIAG LED flashes while the router is booting up After 10 to 15 seconds the DIAG LED stops flashing and remain...

Страница 15: ...e closest electricity power off switch Refrain from touching any active wires or terminals Remove jewelry before working on equipment connected to electricity Keep cables away from walkways Dispose of this product in accordance with national laws and regulations Product Handling Keep ventilation slots clear Operate in a clean and dust free location Cables must be attached to the correct interfaces...

Страница 16: ...your Ethernet network Option 1 Attach the included Ethernet cable to the Ethernet port on a PC Figure 2 3 Connecting to a Ethernet Port on a PC Option 2 Attach the included Ethernet cable to the uplink port on a hub Figure 2 4 Connecting to the Uplink Port on a Network Hub Option 3 If the uplink port is unavailable then you can use a crossover Ethernet cable not included and attach it to the non u...

Страница 17: ...x B Ethernet Cable Pinout for further information about the differ ences between a straight through cable and a crossover cable 2 5 Connect to the ADSL Interface Step 1 Plug the RJ 11 connector end of the ADSL phone cable included in the DSL port of the router The ADSL phone cable is provided RJ 11 to RJ 45 Step 2 Connect the RJ 45 connector end of the ADSL phone cable to the ADSL outlet on the wa...

Страница 18: ...r in the Power interface of the Telindus 1120 ADSL Router Step 2 Connect one end of the power cord to the power adapter and connect the other end of the power cord to the power outlet on the wall Step 3 To activate the Telindus 1120 ADSL Router turn the ON OFF switch to ON Figure 2 7 Connecting to a Power Supply ...

Страница 19: ...he PCs before you install the router Note To ensure that your Telindus 1120 ADSL Router will assign an IP address to your PCs if you set them to get IP addresses automatically we have already configured your Telindus 1120 ADSL Router prior to shipping The Telindus 1120 ADSL Router is configured with the default IP address of 192 168 1 1 and subnet mask of 255 255 255 0 The Telindus 1120 ADSL Route...

Страница 20: ... IP in Windows 95 98 Step 1 From the Configuration tab select TCP IP for Ethernet adapters listed under Network Components and then click Properties Step 2 Select the IP Address tab You now have the option of using either dynamic or static IP addressing To enable dynamic IP addressing Step 1 Click Obtain an IP Address automatically Step 2 OPTIONAL Click the DNS Configuration tab and select Disable...

Страница 21: ...3 Choose the Internet Protocol TCP IP icon from the Network Protocol list box then click OK Step 4 Check to see if Internet Protocol TCP IP is listed under Network Components A If you do not see TCP IP listed under Network Components you have not installed TCP IP Repeat steps 1 4 B If you see TCP IP listed under Network Components you already have TCP IP on your Windows 2000 Proceed to Configuring...

Страница 22: ...u have not installed TCP IP Repeat steps 1 3 B If you see TCP IP listed under Network Protocols then you have successfully installed TCP IP Proceed to configuration directions for Windows NT 4 0 in Section 3 7 3 10 Configuring TCP IP in Windows NT 4 0 Step 1 From the Protocols tab select TCP IP for Ethernet adapters listed under Network Protocol and then click Properties Step 2 Select the IP Addre...

Страница 23: ...d look in your CD ROM drive Step 5 Select the TELINDUS folder and then the Telindus 9100 Maintenance Application folder Step 6 Select the setup exe file and click the Open button Step 7 Click the OK button 4 2 Launching the Telindus 9100 Maintenance Application When you launch the Telindus 9100 Maintenance Application you will be presented with a sequence of panels that help you decide which route...

Страница 24: ...f the router is not in the same subnet as the managing PC a Subnet window appears and allows you to choose three selections You can Change the router s IP address and keep the other configuration Reset the router to Manufacture mode and delete the configuration or Change your computer s TCP IP settings After you have made your choice click Next to proceed Figure 4 2 Subnet Window If the Telindus 9...

Страница 25: ...inter changes into a hand Once you select a feature click on the feature button Figure 4 3 Telindus 9100 Maintenance Application Table 4 1 Keyboard Keys to Activate Telindus Features The Telindus 9100 Maintenance Application gives you access to the following features Configuration a step by step guide to configuring all parameters of your router General LAN DSL Configuration and Configuration File...

Страница 26: ...al Configuration window Click on the item that you wish to configure and then set the parameters General Configuration Administrative Security Sets your router s name and enables password protection optional IP Routing Table Directs the Telindus 1120 ADSL Router to which path or route to forward data packets Packet Filtering Monitors and selectively filters packets that enter or leave the Telindus...

Страница 27: ...e UBR and Constant Bit Rate CBR From this panel you can specify the Peak Cell Rate PCR in kbps and you can set the Operations and Maintenance OAM F5 timer period If the period is set to zero the OAM F5 loopback cell will not be sent If the period is non zero the loopback cell is sent according to the specified period to the remote peer ATM PVC Protocol Configuration Allows you to choose the encaps...

Страница 28: ...outer If you are concerned with administration security you should select Password Protected This optional feature limits Telindus Telindus 9100 Maintenance Application access to users with the correct password To select this feature check Password Protected and then click Change Password When you type your password and confirmation in the edit boxes they will appear as asterisk Figure 5 2 Adminis...

Страница 29: ...oute window Figure 5 4 Add New Route Enter the following information Destination IP Address The IP address of where data packets are to be sent Subnet Mask The subnet of the Destination IP Address Gateway IP Address The IP address of the gateway on the LAN where data packets are to be sent The Gateway IP Address can only be set if the route uses the LAN interface otherwise it is grayed out Interfa...

Страница 30: ...arameters you have entered and then click Finish to send settings to the Telindus 1120 ADSL Router Click Exit to return to the Telindus 9100 Maintenance Application Packet Filtering IP Packet Filtering Table From Configuration double click on the General Configuration icon and click on the IP Packet Filtering Table in the left panel The IP packet filters allow you to monitor and selectively filter...

Страница 31: ...rue or whether they do not match false For either true false condition the packets can be set to Pass Automatically pass through the router Restrict Pass only if there is an available connection Discard Packet is blocked and discarded Pass to next filter Packet goes to the next filter in sequence When you are finished click OK If you do not want to create an IP packet filter click Cancel to close ...

Страница 32: ... Packet Filter Figure 5 7 Bridge Packet Filter Add New Bridge Packet Filter To add a new Bridge Packet Filter click the Add button This will open the Add New Bridge Packet Filter window Figure 5 8 Add New Bridge Packet Filter Enter the Bridge packet filter parameters according to the following criteria MAC Identifies each device on the network and the Internet The characteristics of each packet th...

Страница 33: ... an IP Master LAN Incoming data packets being sent to a specific IP port can be routed to the application or service using Port Mapping Configuration Figure 5 9 Port Mapping by Application To port map an application or service simply select it from the Application list and while holding down the left mouse button drag and drop it into the Port Mapping List Then you will need to specify the interna...

Страница 34: ... port mapping item click the New button This will open the Add New Port Mapping Item window Figure 5 11 Add New Port Mapping Item Enter the following information Protocol A set of rules governing the information flow within a communications infrastructure Currently the Telindus 1120 ADSL Router supports TCP and UDP External IP Address The destination IP address for incoming data packets Usually th...

Страница 35: ...s selected then any port can be accessed More than one service can run on a single network device or different services can run on different network devices but the same service with same port number cannot be run on more than one network device When you are finished click OK If you do not want to create a new port mapping item click Cancel to close the Add New Port Mapping window Modify Port Mapp...

Страница 36: ...ding Item Add New Auto Forwarding Item To add a new auto forwarding item click the Add button This will open the Add New Auto Forwarding Item window Figure 5 13 Add New Auto Forwarding Item Enter the following information From Low Some applications that require Auto Forwarding need to utilize a range of port numbers From Low is the lowest port number in the range of port numbers to be used Refer t...

Страница 37: ...Click Yes to remove the selected item or click No to keep it Once you have finished setting the Auto Forwarding parameters click Apply to review the parameters you have entered and then click Finish to send settings to the Telindus 1120 ADSL Router Click Exit to return to the Telindus 9100 Maintenance Application DNS Server From Configuration double click on the General Configuration icon Use the ...

Страница 38: ...ou would like the router to be able to access you may provide its IP Address and Subnet Mask under Secondary IP Address Single IP Address Account A single IP address account allows users on your entire local area network to share the one IP address Selecting Use Default IP Address and Subnet Mask enables your router to automatically assign itself a default Private IP Address of 192 168 1 1 with a ...

Страница 39: ...ork However if you select Enable DHCP On you have the option of enabling DHCP on either the Primary of Secondary IP Address You can also configure the following DHCP parameters DHCP Lease Time The amount of time that a network device can have lease a Private IP Address before the router makes the address available for re assignment The DHCP Lease Time range is Max 999 days 23 hours 59 minutes Min ...

Страница 40: ...is a method that routers use to communicate network status and determine optimal routes After enabling RIP you can select to use Version 1 or Version 1 2 In addition you can set the RIP Update to Receive Only or Send Receive In addition selecting the IGMP checkbox allows your PC to send content to multiple other PCs IGMP is used by IP hosts to report their IP Multicast group memberships to any imm...

Страница 41: ...re 5 18 DSL Configuration You have the option to use ANSI T1 413 G Lite G DMT or Multi Mode as your DSL line mode To find out which DSL line mode suits your unit please consult your ISP or telephone company When you are done click Apply to go to the next window Note The DSL line mode refers to the entire Telindus 1120 ADSL Router unit and not each individual ATM PVC profile Once you have made your...

Страница 42: ...eters you have entered and then click Finish to send settings to the Telindus 1120 ADSL Router Click Exit to return to the Telindus 9100 Maintenance Application ATM Service Type Click on ATM Service Type in the left panel Figure 5 20 ATM Service Type This panel allows you to select the ATM Service Type for the ATM interface Presently Unspecified Bit Rate UBR and Constant Bit Rate CBR are available...

Страница 43: ...ress or you can select the Specified NAT Pool IP Addresses and enter the requested values Also you MUST select the PPP Configuration feature from the list located in the left panel and enter the User Name and Password Option 2 If you select SNAP IP as your encapsulation type then you can check the Enable Network Address Translation NAT checkbox if you have a single user account for the NAT Propert...

Страница 44: ...Addresses Selecting this option allows you to enter a range of specified NAT IP addresses and subnet mask Once you have finished setting these parameters click Apply to review the parameters you have entered and then click Finish to send settings to the Telindus 1120 ADSL Router Click Exit to return to the Telindus 9100 Maintenance Application ATM PVC IP Properties Click on IP Properties in the le...

Страница 45: ...nnections the IPCP protocol uses the LAN IP addresses instead of the WAN IP addresses Once you have finished setting these parameters click Apply to review the parameters you have entered and then click Finish to send settings to the Telindus 1120 ADSL Router Click Exit to return to the Telindus 9100 Maintenance Application ATM PVC PPP Configuration Click on ATM PVC Properties to open the menu the...

Страница 46: ...TM PVC Properties to open the menu then click on RIP Configuration Figure 5 25 RIP Configuration In the RIP Configuration panel you can select the Enable RIP on ATM PVC checkbox to use the Routing Information Protocol RIP on ATM PVC Selecting Enable RIP on ATM PVC will turn RIP on RIP is a method that routers use to communicate network status and determine optimal routes After enabling RIP you can...

Страница 47: ...hard drive The default path is c Program Files Telindus 1120 ADSL Router and the default file name is My Configuration cfg Step 4 Click Save Once you have a saved Configuration Profile you can load it at any time Just click Load Configuration Profile and click the Load Configuration button Select the appropriate drive directory and file folder to locate the configuration profile file Choose the co...

Страница 48: ...nel The Main Status panel is the default panel when Status feature is opened If the Main Status panel has been expanded to show the Status tabs then clicking on the Hide Details button can open the Main Status panel Depending on where your Telindus 1120 ADSL Router is located you may have difficulty viewing the front window LEDs The Main Status panel provides a real time display of the front windo...

Страница 49: ... 3 5 floppy disk To close the Event Log click the Close button To exit Status and return to the Telindus 9100 Maintenance Application click the Close button 6 2 LED Panel From the Telindus 9100 Maintenance Application click on the Status icon click on the Show Details button and then select the LED Panel tab Depending on where your router is located you may have difficulty viewing the front window...

Страница 50: ... to the Telindus 9100 Maintenance Application click the Close button 6 4 DSL Status Table From the Telindus 9100 Maintenance Application click on the Status icon click on the Show Details button and then select the DSL Status Table tab The DSL Status Table tab displays all the user defined ATM interfaces and protocol configuration For each ATM interface listed the DSL Status Table will show the AT...

Страница 51: ...ange To update and display the changes in the IP Routing Table tab Click the Refresh IP Routing Table button To return to the Main Status panel click the Hide Details button To exit Status and return to the Telindus 9100 Maintenance Application click the Close button 6 6 DHCP Table From the Telindus 9100 Maintenance Application click on the Status icon click on the Show Details button and then sel...

Страница 52: ...ork the list of DHCP assignments can change To update and display the changes in the DHCP Table tab Click the Refresh DHCP Table button To return to the Main Status panel click the Hide Details button To exit Status and return to the Telindus 9100 Maintenance Application click the Close button ...

Страница 53: ...er using the Upgrade Firmware feature You can obtain upgrade firmware files from TELINDUS s web site You can save the binary firmware file either on a floppy diskette or your hard drive Once you have downloaded the firmware please following the instructions below Step 1 From the Upgrade Firmware panel select the appropriate drive directory and file folder to locate the firmware file Step 2 Choose ...

Страница 54: ...acture Mode checkbox if you want to remove all your custom settings while resetting your router Otherwise if you do not select the checkbox the router will simply reboot Figure 7 2 Reset Router If you have deleted your custom configuration you will need to re configure your router after it reboots Remember internetworking connectivity is not possible with an unconfigured router To reconfigure your...

Страница 55: ...our PC is configured as Obtain an IP Address Automatically in TCP IP Properties in Windows 95 98 or Windows NT 4 0 and the Telindus 1120 ADSL Router DHCP is disabled Then your PC cannot obtain an IP from the router and you cannot detect the Telindus 1120 ADSL Router You must configure the PC to Static IP first If your ISP has given you IP Addresses for your LAN for a Multiple User LAN Access accou...

Страница 56: ...dresses to your PC and router refer to Assigning IP Addresses for Static IP Only section in Appendix A 8 3 Cannot Upgrade the Firmware 1 You may have inadvertently tried to download the wrong file to your router Telindus 1120 ADSL Router can only use upgrades created by TELINDUS NV The upgrades are available by downloading the file from TELINDUS s web site The correct file format is bin Serial num...

Страница 57: ... DSL device Figure A 1 LAN and DSL side of the Telindus 1120 ADSL Router Some of the IP addresses that you see in the Advanced configuration are associated with the LAN interface others are associated with the DSL interface and the NAT IP address can be associated with either interface For instance all of the IP addresses located within the Connection Profiles are part of the DSL interface and the...

Страница 58: ...ss outside the private network the Private IP Addresses must pass their data back and forth with an associated Public IP address The Public IP address is then used to access the Internet or remote server NAT IP Address Network Address Translation NAT IP Address is a Public IP Address It can be a single fixed Public IP address or an dynamically assigned Public IP address NAT is used to translate Pr...

Страница 59: ...d can be re used by other connections Bridge Packet Filtering Establishing Bridge packet filters allows you to monitor and selectively filter packets that enter or leave the Telindus 1120 ADSL Router You can use filtering to protect your network from unauthorized access and restrict certain web traffic from leaving your LAN This is done by examining each packet that enters the Telindus 1120 ADSL R...

Страница 60: ...ou are given the IP Address range from 192 168 1 0 to 192 168 1 7 with a subnet of 255 255 255 248 then the following typically would apply 192 168 1 0 is the network address 192 168 1 7 is the broadcast address 192 168 1 1 is your router s IP Address 192 168 1 2 to 192 168 1 6 are assigned to LAN PCs ...

Страница 61: ...Telindus 1120 ADSL Router Appendix B Ethernet Cable Pinout User s Guide 55 Appendix B Ethernet Cable Pinout ...

Отзывы: